
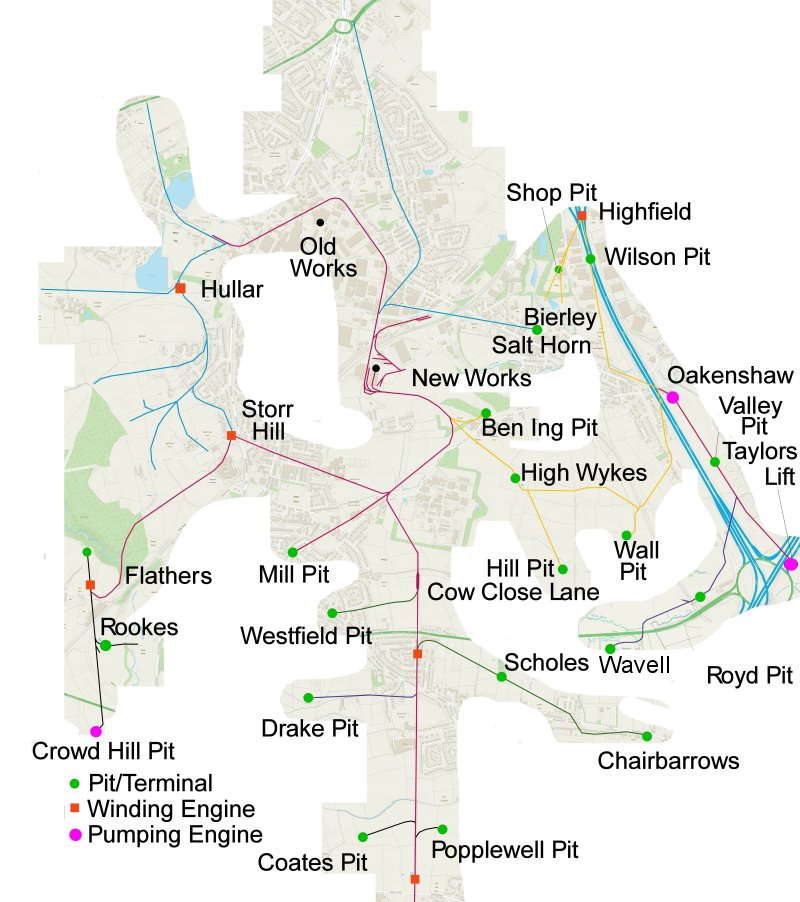
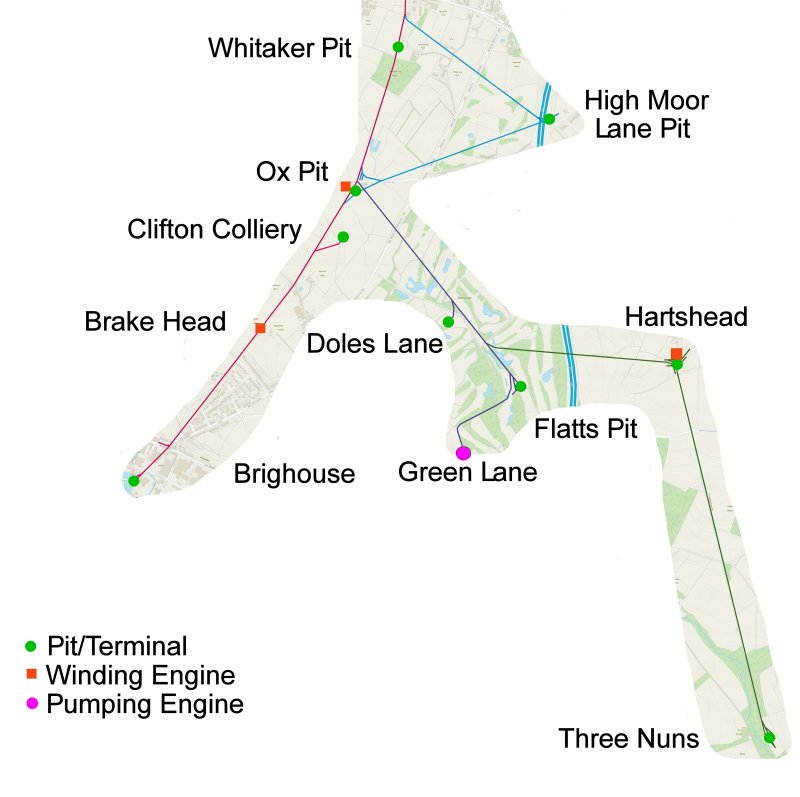
The Low Moor and Clifton Colliery Tramways system map
Low Moor Tramway: Clifton Low Moor Tramway: History Low Moor Tramway: Route Low Moor Tramway: Track & Inclines
This mapping is copyright of the Ordnance Survery and is reproduced here as per the licence terms displayed here
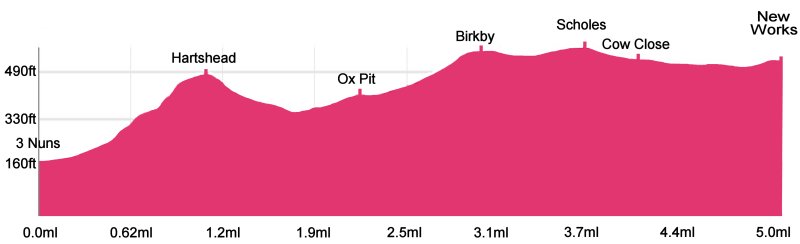
The final 'main lime' ran from Three Nuns to the New Works at Low Moor. The longest and steepest incline was the one from Three Nuns to Hartshead, which started at an altitude 174 feet and rises to Hartshead at an altitude of 480 feet. The actual summit is at Scholes, with an altitude at 574 feet. Scholes dropped rafts of corves down to the sidings at Cow Close (529 feet). Locomotives then worked the corves forward to the New and Old Works.
The Low Moor constructed tracks were laid out from the start for rope working. It is unclear how the Clifton Colliery Tramway was worked between Brake Head and Ox Pit, as the stationary engine was placed at the top of the incline from Brighouse. The section from there to Ox Pit was virtually level, placed on top of its dry-stone wall. Clearly rope working on this section would be an issue as there is no practical way of returning the rope to the winding engine. Horse working is the most likely option. Ordnance Survey mapping does not show an engine at Ox Pit, although the square reservoir that provides the water supply does feature. There are fleeting references to an engine at Ox Pit, although it does not appear on any lists in the published references. However it is marked on a Low Moor Company map c. 1880. The need for an engine is clear from the above diagram, where rafts of corves faced an uphill run from Flatts Pit Junction to Ox Pit.
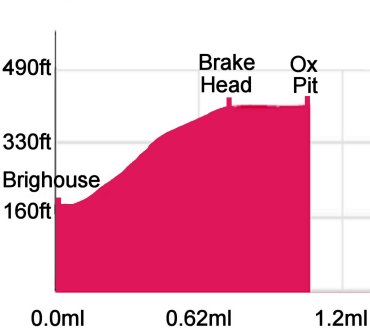
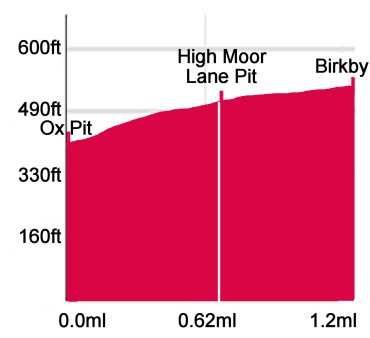
In the first series of developments, a branch was laid from Ox Pit to High Moor Lane Pit, with the connection at Ox Pit Junction facing Brighouse, and this was probably on the Clifton 3' gauge using its smaller corves. As the gradient profile below shows, this would have required an engine to be installed at High Moor Lane Pit. However, after the connection with the Low Moor system was established, a new branch was cut from the Pit to the mainline, only now favouring Low Moor, and worked from Birkby Lane. This would have allowed the engine at High Moor to be recovered and/or redeployed, along with the track materials on the Ox Pit to High Moor Lane branch.
However, this change does highlight a potential shortcoming of a rope worked system, in that traffic can only be worked from Ox Pit or from High Moor Lane, but not both at the same time, whereas with a locomotive-worked system, traffic could be moving on both southward arms simultaneously.
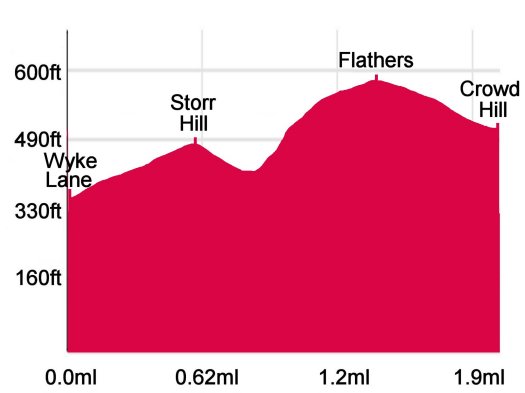
The profile of the Wyke Lane to Crowd Hill branch via Flathers and Storr Hill shows that the Flathers engine drawing the traffic from Storr Hill had both the longest and steepest incline of this section.
Low Moor Tramway: Clifton Low Moor Tramway: History Low Moor Tramway: Route Low Moor Tramway: Track & Inclines

Copyright J K Wallace, t/a 'Hall Royd Junction' 2013-2023 email: Hall Royd Junction
7 Portobello Close, Chesham, Bucks. HP5 2PL, UK
tel: +44 (0)7513 412880