
Plinthing a Pannier
What do you give a 90-year old fir his birthday that already has everything he needs? Or more correctly, a 90-year old whose Father and Uncle worked for the Great Western Railway, and who vividly - and with great fondness - remembers the Pannier tanks that serviced the collieries of Lye in the West Midlands chuffing past the end of his garden?
A couple of weeks ago my wife had a BFOTO ( a blinding flash of the obvious). Was there a model of a Pannier we could we give him? A quick search found THREE Samhongsa Brass GWR 57XX Pannier tanks on eBay: two unpainted @ £234 each and a painted one for £334. Secretly one of the unpainted ones was my choice. I showed my wife an unpainted brass Black 5 that I have, but she thought her father would prefer something 'finished'.
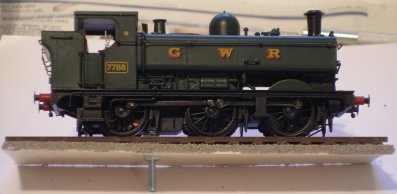
So a Bachmann it was. I found a 'Mint in Box' offering (a coupling and vac pipe missing - but I was thinking of fitting screw couplings anyway).
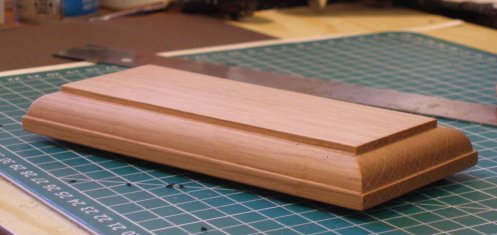
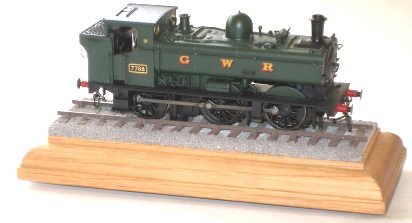
Then the question was how to display it. I thought a piece of nicely ballasted track mounted on an oak plinth, with the Pannier bolted to it would do the job.
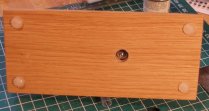
The Solid Oak Shop came up trumps with a bespoke plinth which they ran off within a couple of days. This also has four rubber 'feet' so hopefully it wont slide around.
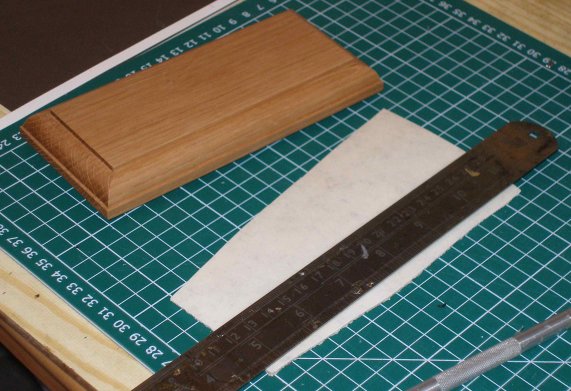
Some years ago we had a cushioned vinyl floor laid in the kitchen. This unfortunately wasn't suitable as a kitchen floor, but when we lifted it, I squirreled much of it away in the loft, as it makes excellent underlay.
This was cut to the same size as the top of the oak plinth, and then a chamfer was cut down each of the longer sides to represent the ballast shoulders.
This was slightly more difficult than anticipated as the scalpel blade couldn't be drawn along the edge, so I lined up the square of vinyl against the edge of the work bench, and then with the steel rule placed on top where the ballast shoulder ended, I then cut along the vinyl from below bench level.
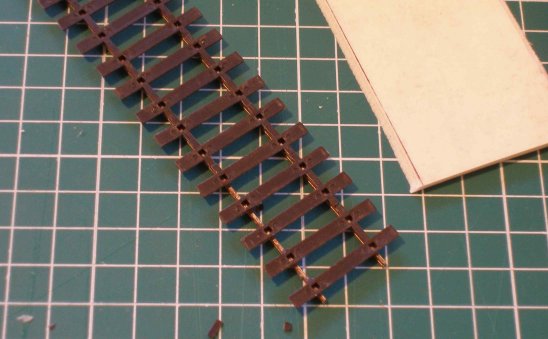
This then led to the matter of the track. I had some steel C&L. This is nice looking track and steel does look the part, having a, err, steely appearance. However I had problems with it rusting, and decided that I would revert to nickel silver for future layout building. But for a showcase model steel sounded like an authentic material.
At this point I made up my first panel, and ballasted it. It was obvious that the plastic webs joining the sleepers were visible and that wouldn't do at all.
So I repeated all the above steps, only this time cut the webs out. I then sprayed the track panel. First with car grey primer and then with Phoenix Precision P991 Track Dirt using one of their spray cans. The primer dries within minutes but I left it for 24-hours before applying the track colour, and this was again left 24-hours.
The vinyl trackbase was coated with neat wood working glue, the painted track section was centred on it, and then Woodland Scenic fine ballast poured over it, and left for 24-hours. The sleepers were double checked for spacing before final laying.
The Bachmann Panier is easy to dismantle. There is a screw behind the buffer beam front and back, and then two screws holding the keeper plate in place. The two keeper plate screws are smaller than the screws securing the body. I decided that one of the keeper plate screws could be replaced with a bolt, which would then pass through the track base and be secured from beneath the plinth.
The keeper plate screw hole was gently increased, and then the webbing on the underside removed to allow the bolt head to fit without distorting the keeper plate.
It was now possible to re-assemble the Pannier using the remaining three original Bachmann screws. However just before putting it all back together I fitted the Jackson screw couplings. I broke off the original Bachmann hooks and then gently opened the slot with a scalpel before easing in the Jackson hook. These were bent through 90 degrees and then inserted around the body screw socket before being cut short to allow the keeper plate to fit back in place.
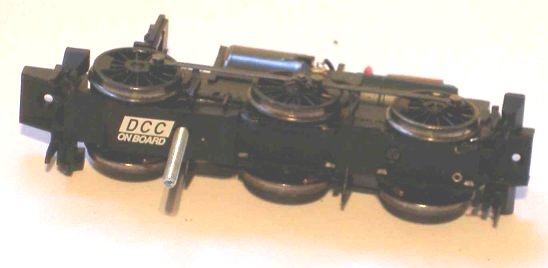
Observant readers might have noticed the 'DCC on board' branding on the keeper plate. I removed the chip and inserted a standard blanking plate. I have found the Bachmann chips disappointing when fitted to their own steam locos, but when factory fitted seemed to work well. I think the flywheel fitted diesels are more tolerant as the flywheel helps iron out any irregularities in running. Anyway, I'm sure they'll be a diesel kicking around somewhere that will need chipping soon.
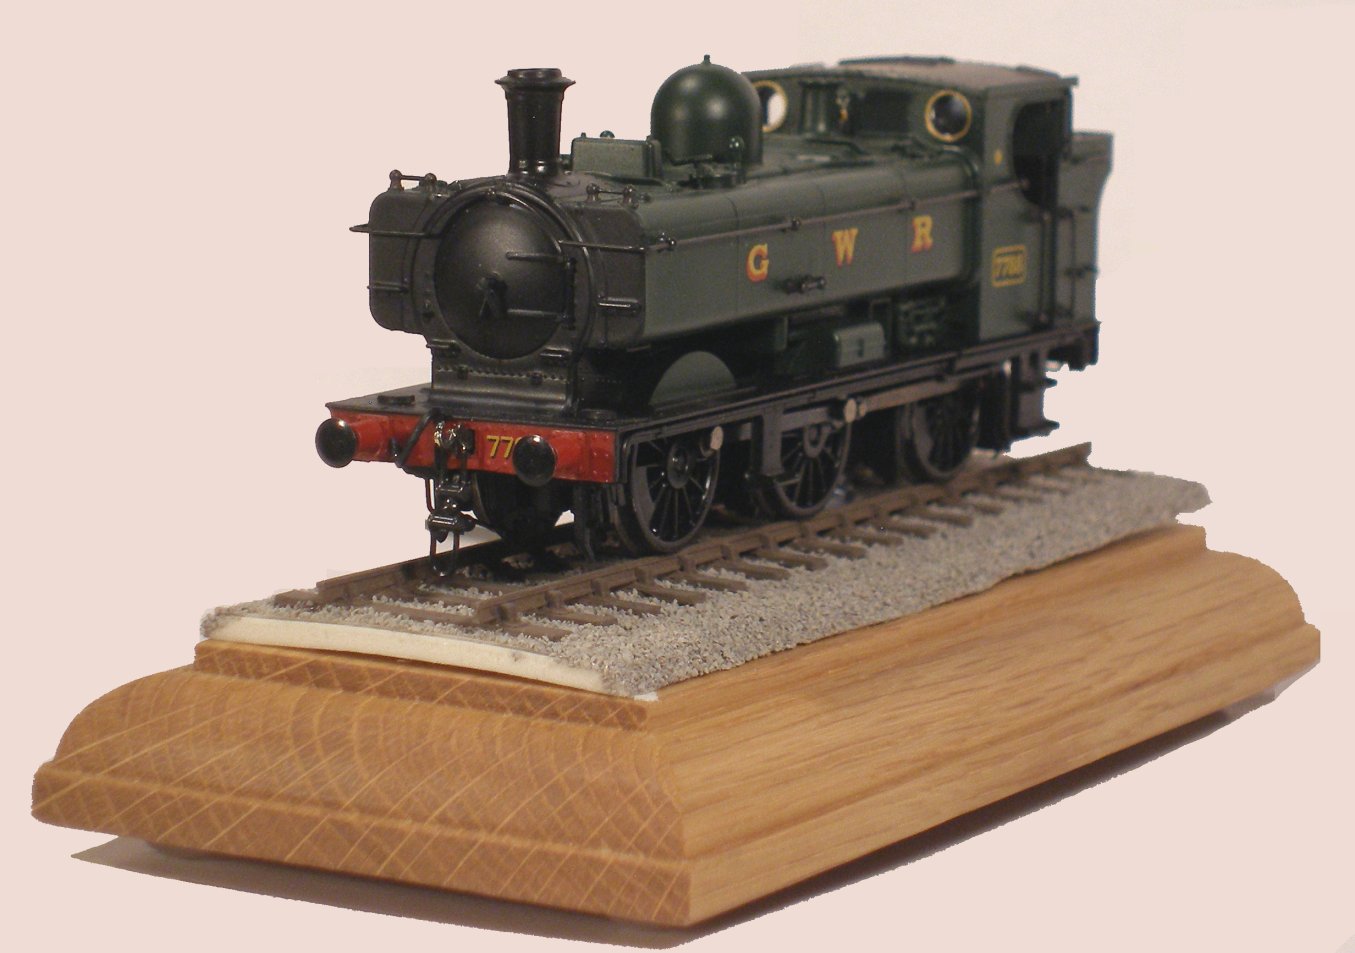
A casual examination of the photo above shows that some ballast has fallen off, and that the track panel is not completely level. So the next task is to glue the panel to the plinth and then leave it under a large brick for 24-hours...
Although Bachmann's livery application is beautifully rendered, it's almost impossible to replicate brass in the process. It really did need a set of brass cabside number plates, and I had a hunch that 247 Developments would be the place to go...and indeed Gary had a set of plates in the post by return for the very reasonable sum of £4.60. This almost brings us back-on-topic as 247 are based in Marsden, on the ex-L&NWR trans-Pennine route, and roughly 10 miles south of Hall Royd Junction!

Copyright J K Wallace, t/a 'Hall Royd Junction' 2013-2023 email: Hall Royd Junction
7 Portobello Close, Chesham, Bucks. HP5 2PL, UK
tel: +44 (0)7513 412880