
Track Ballasting: ballast brushed into place
Photo 1:
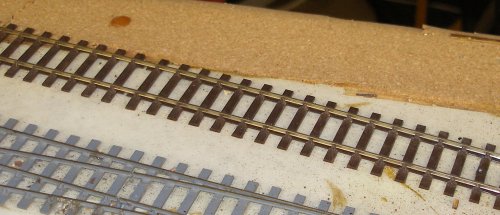
Photo 2:

Photo 3:
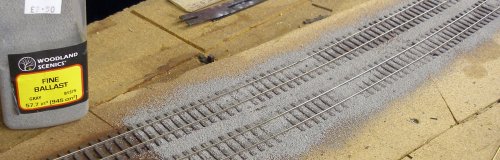
Photo 4:
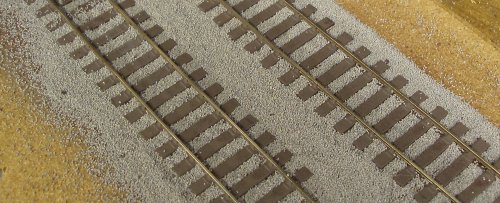
Photo 5:
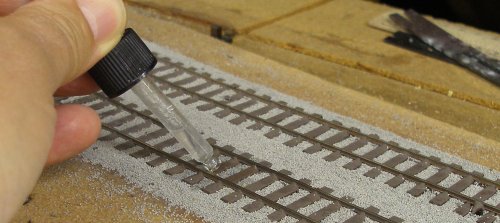
Photo 6:
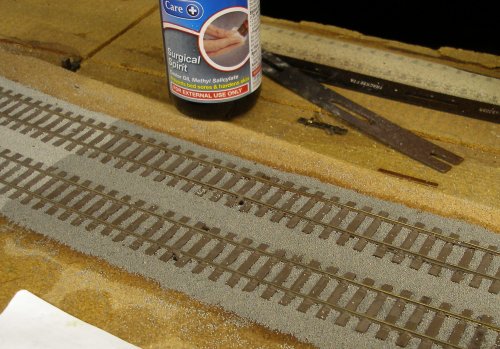
Photo 7:
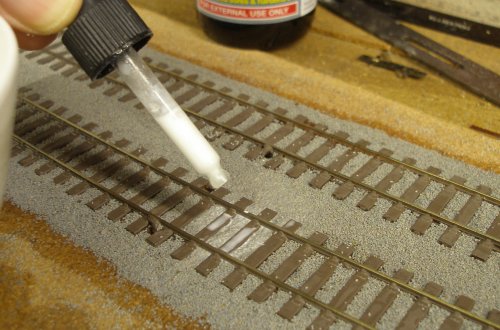
Photo 8:
The correct ballasting of track is an essential task on a model railway, but it is time consuming. Some modellers even opt out off the task, but done well, it can be the making of a layout.
There are two basic methods. One is to lay the track on a bed of PVA and sprinkle the ballast onto the wet glue. This requires accurate laying of the tack during the ballasting process, but is very quick and accurate.
The second method sees the track laid and tested before the ballast is placed around the track using a brush. It is then affixed with diluted PVA. This page deals with this method.
It is advisable to lay the track on a sub-base rather than directly onto the baseboard. This helps to muffle the unrealistic drumming effect trains create when running, particularly important if operating in the loft. I have used cork underlay of both depths, and also some surplus cushioned floor covering that was left over when the bathroom was done some years ago. Although not shown in the photos below, it can be cut with a chamfered edge to create the ballast shoulders that run parallel to the sleeper ends.
The track can be either be lightly pinned to the underlay or glued. A hole needs to be drilled in the sleepers to insert the pins. So now the track is laid and aligned...
First, pick the finest grade of ballast available. If ballasting in '00' gauge, use N scale ballast; if N, use fine sand.
Remember that real granite actually discolours when the glue is applied. I use Woodland Scenics Fine Grey Ballast, which looks the part but is made from an artificial material, and so is lighter than real stones. This means that it is easily dislodged when the glue is applied, even when washing-up liquid is added to break the surface tension.
The technique is to brush the ballast into place, and then moisten the area with surgical spirit. This penetrates the ballast without disturbing the stones, and allows the diluted PVA to then be applied.
Photo 1 shows the track laid onto the cork underlay. It can be glued (I use 'pink' solvent-based Bostick) or in this case lightly pinned (the pins will be removed when the glue has dried).
The sleepers are a black/dark brown plastic as supplied, and the sleepers and rails are painted with Humbrol 98 (Photo 2). Some modellers paint the rails and sleepers different colours to represent weathered sleepers and rusty rails. This is a personal judgement call and you should study a piece of real track to decide what the predominant colours are. The rail heads are wiped clean, and then left to dry.
The ballast is gentle shaken onto the track, and spread lightly, as the C&L sleeper base is quite thin, and is easy to overwhelm with ballast (Photo 3).
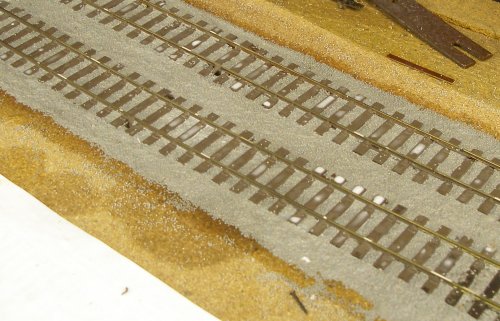
Now take a small paint brush and very gentle brush the ballast off the tops of the sleepers, taking care to keep the ballast off the rail sides, but covering the sleeper webs that connect the sleepers below the rail (Photo 4).
The surgical spirit is now gentle applied using a dropper (Photo 5). The spirit is applied to the top of the sleepers, so that it flows off the sleepers and into the ballast without disturbing it. Keep squeezing the pipette until it is fully discharged and all the surrounding ballast treated.
Photo 6 shows the entire area now moistened with surgical spirit.
For this demonstration, the PVA Wood Glue is poured into a bowl, and then water added to create a 30/70 mix, together with and a drop of washing-up liquid. If doing a lot of track over successive evenings, buy a plastic jar with a screw lid, and use that to do the mixing. This is a superior way of doing it as, as the ingredients can be shaken until fully mixed. Also, with the lid screwed on, it is easy to store between track laying sessions. I did read somewhere that the mix can be affected by low temperatures, so if track laying in the winter months in the loft, keep the 'mix' downstairs in the body of the house. However, do wipe the screw threads on the jar after use, as inevitably glue will find its way onto them, and eventually the lid will be well and truly glued to the jar!
The mix is then applied carefully using a dropper. Photo 8 shows the area after the glue has been applied, and is now left to dry. The white glue residue on the sleepers will dry clear. However, any touching up required will be minimal.
Finally, before running any trains, the surface of the rail should be cleaned to remove any residues. As glue is involved, I use a PECO track cleaner, and then a final wipe of surgical spirit using a lint-free cloth. Some people reckon that the track cleaner blocks scar the rail surface. I can't comment on this, except to note there are stubborn stains that need something more aggressive to remove; and PECO are a track manufacturer, and one has to assume that their track cleaning system is compatible. Failing that, the OO Gauge Association sells a nice cleaning block that is just as effective, but has a less gritty make-up.
22 September 2015

Copyright J K Wallace, t/a 'Hall Royd Junction' 2013-2023 email: Hall Royd Junction
7 Portobello Close, Chesham, Bucks. HP5 2PL, UK
tel: +44 (0)7513 412880