
Updating the split-frame Bachmann Jubilee
or how to fit a DCC decoder
Palitoy entered the market with its Mainline brand and introduced a new generation of better looking models. These also broke new ground by featuring a split frame, which incorporated an integral pancake motor. There were a number of issues of these models, and in particular the plastic axle centres had a nasty habit of expanding and splitting. The irony is that this was due to the inappropriate grease applied in the factory, and so the very first thing that should have been doing was opening up the chassis and removing the grease. The tooling eventually passed to Bachmann, who laudably attempted to address some of these issues, but retained the split chassis - and the wrong sort of grease.
The problem for many modellers is that these early models look the part, and it goes against the grain to through away a model because of some poor design issues. In summary these are:
1. the split frame design is a 'wire less' one, and wires are required to fit a DCC decoder
2. the plastic axles centres will either need repairing or replacing (and appropriate grease applied)
3. the plating on the axle bearings is likely to have worn through
Fitting a decoder to the earlier Bachmann split frame locos can appear daunting. However, with a bit of perseverance it is possible to do.
This particular method involves fully dismantling the chassis, as one of the steps involves cleaning out the factory-applied grease to extend the life of the plastic axle centres. However some modellers report that they have been able to remove the springs that connect the motor terminals to the chassis and attach new leads without having to fully open up the chassis.
It needs to be noted that the Bachmann Jubilee has gone through an evolutionary process. They can be defined as:
Mark 1: Mainline with integral pancake motor
Mark 2: Mainline with white pancake motor
Mark 3A: Bachmann with Buhler motor and plastic slide bars
Mark 3B: Bachmann with Buhler motor and metal slide bars
Mark 3C: Bachmann with Buhler motor, metal slide bars and bogie pick-ups
Mark 4: Bachmann with conventional chassis and DCC ready
This article deals with the Mark 3B. This conversion needs the creation of '+' and '-' chassis tags to terminate the red and black decoder wires on the chassis. In this conversion, the decoder is going to be plugged into a socket, and located in the tender.
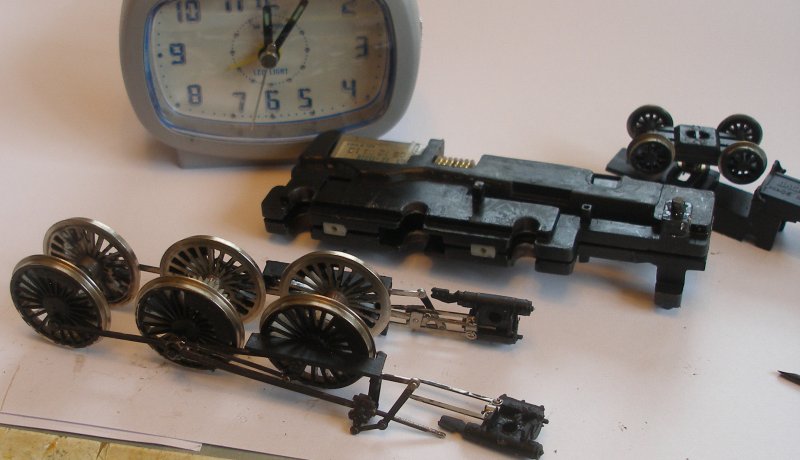
The following photos show the sequence of events.
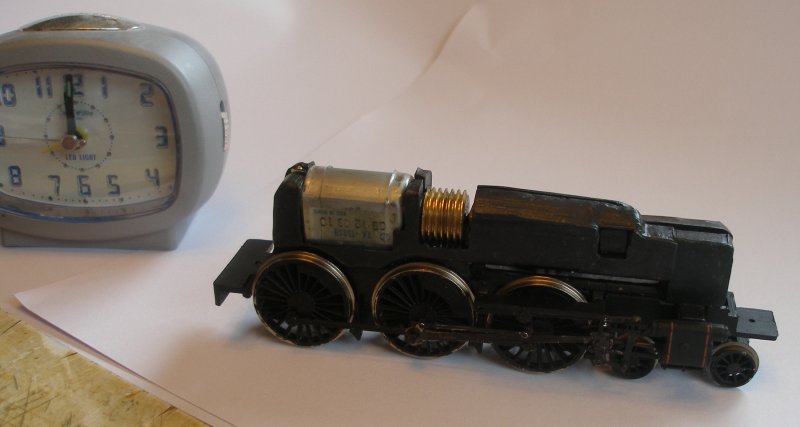
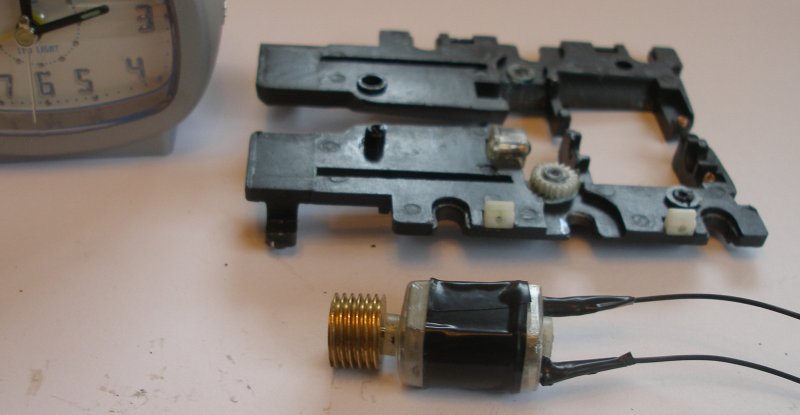
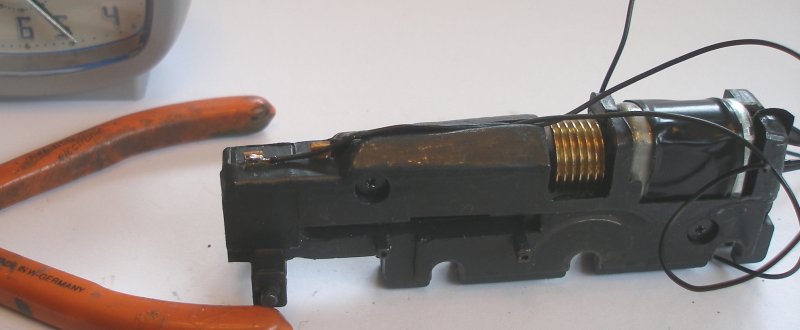
Here is the chassis before it is dismantled. There is no facility for a DCC chip in this design, as it was designed to be assembled without any wires. The motor is powered by two small brass springs that connect each motor terminal within the chassis.
Breaking down of the chassis starts with the removal of the keeper plate. There are two screws that have to be removed and put to one side.
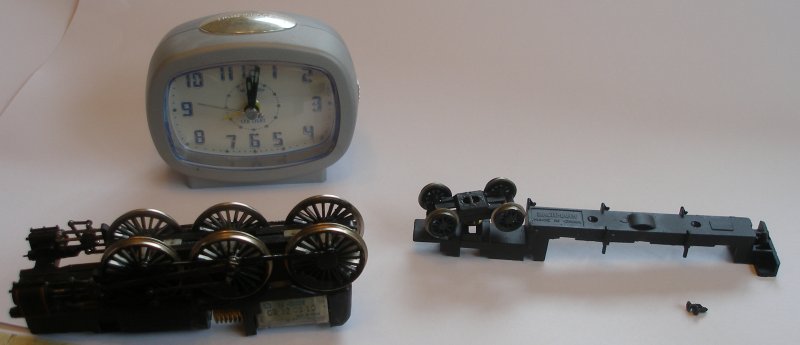
With the screws removed, the keeper plate and front bogie can be lifted out.
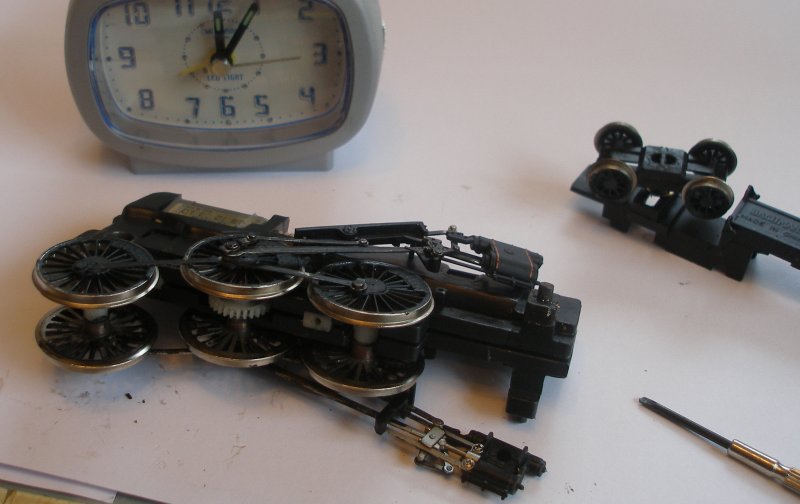
The valve gear and cylinders need to be removed along with the wheels. The motion bracket and cylinders plug into sockets on the chassis frame. On the Mark 3B (metal slide bars) these appear to be glued on, so some earnest - but gentle - leveraging is required with a screw driver. Because of the glue, one of the plugs on the motion bracket broke off. This is easily repairable and will be dealt with in the reassembly.
The wheels, motion and cylinders can now be put to one side.
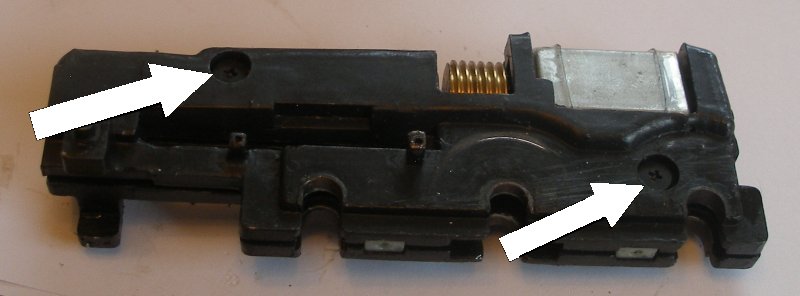
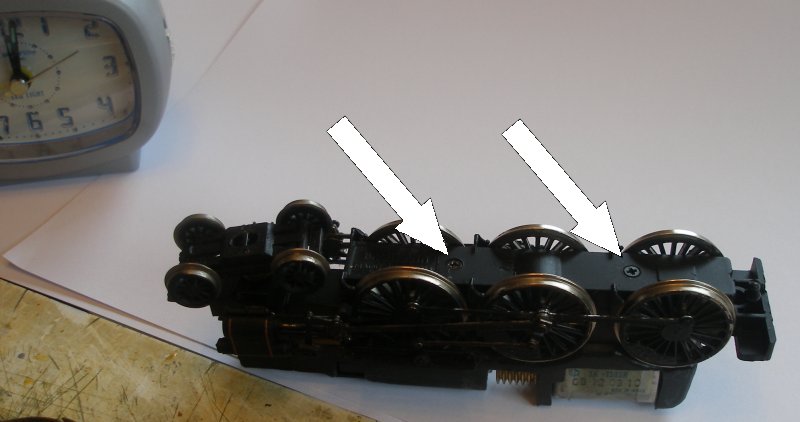
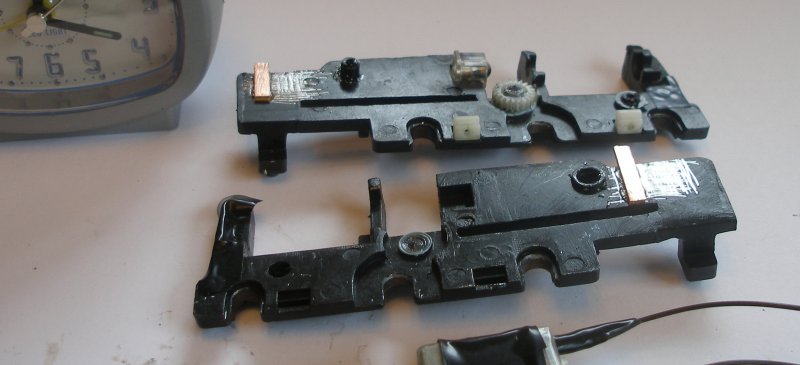
There are two screws on the left hand side (arrowed) which need to be undone and put to one side.
The 'top' frame is lifted off, and placed above the 'bottom' frame. This means that the spacer washers and spacers all stay in place! If not, do this operation on a tray so any parts that spring off are contained. In the first chassis I modified the gearing and axles were coated in grease that had been applied in the factory. This was all carefully removed with a cotton bud and Isopropyl alcohol. This costs £8.50 a bottle and can be bought from ironmongers.
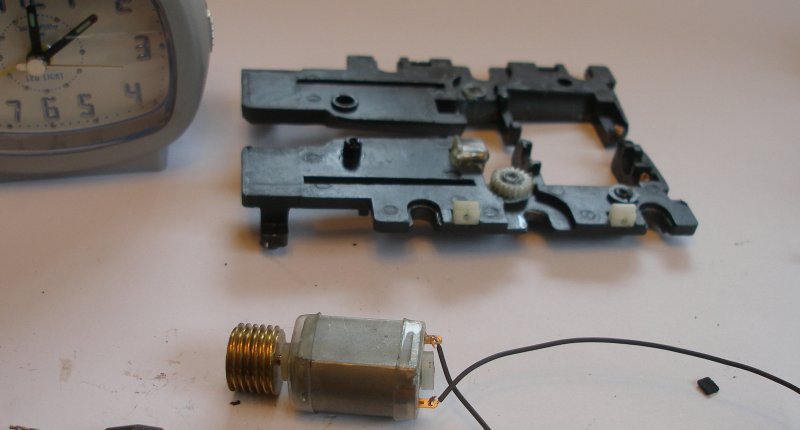
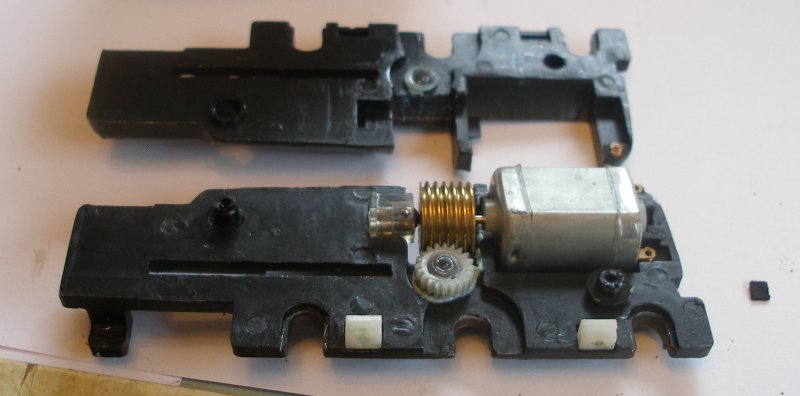
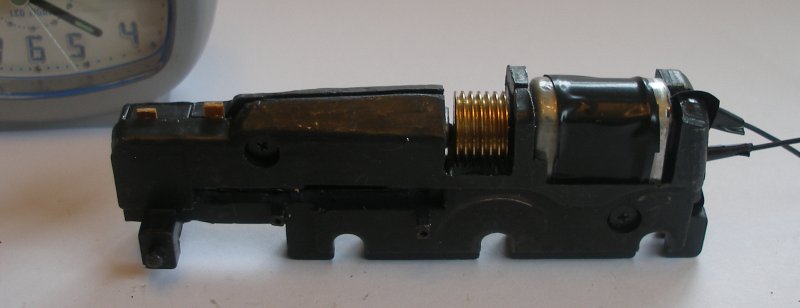
The motor is removed and two wires attached to the two terminals. Note the small felt pad to the right which I believe may have been an insulated spacer for the side of the motor. I didn't replace this, as the sides of the motor will be taped.

The wires are now soldered in place.
There are two small springs that connected with the motor terminals, and these should be removed. The soldered terminals are now covered in insulation tape or similar.

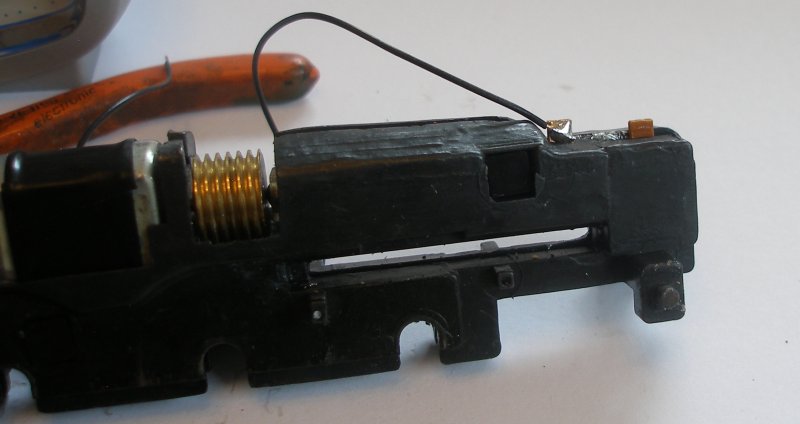
At the other end of the chassis, the insides of the two frame halves are scraped down to clean metal.
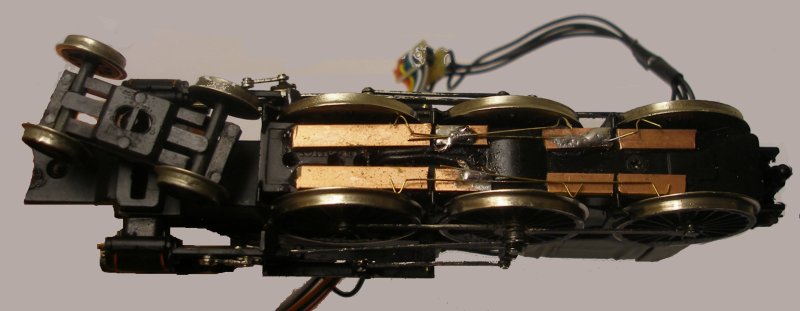
Two pieces of PCB are glued to the frames. The plain resin side is glued to the frame side, leaving the copper side facing outwards. Note how the strips are spaced to allow them to rest flat between the two frames and are placed so as not to overlap each other when the frames are re-assembled.
The frames are screwed back together, and now there are two tabs sticking out above the frames at the front of the chassis. This feature is NOT required on locos with bogie pick-ups, as there are a pair of brass tags on the outside of the frames to which the wires can be soldered to.
The first 'red' wire is now soldered to the first tab.
Now both wires are in place, and they are gentle pushed into the gap between the two frame halves, and then covered with tape.
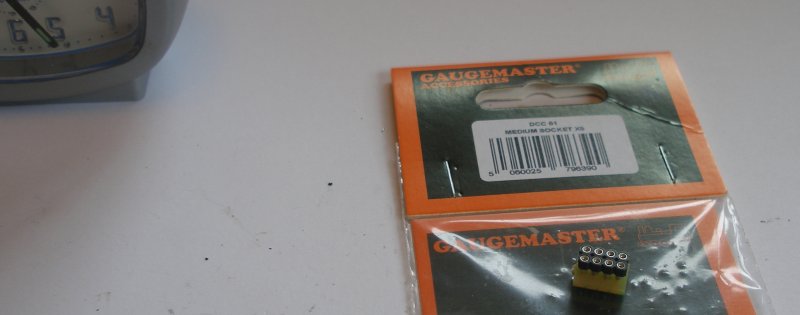
In my conversions I have decided not to hardwire chips into locos. This allows the decoders to be switched around or upgraded easily (or removed when selling!). I therefore install a Gaugemaster socket (DCC 61).
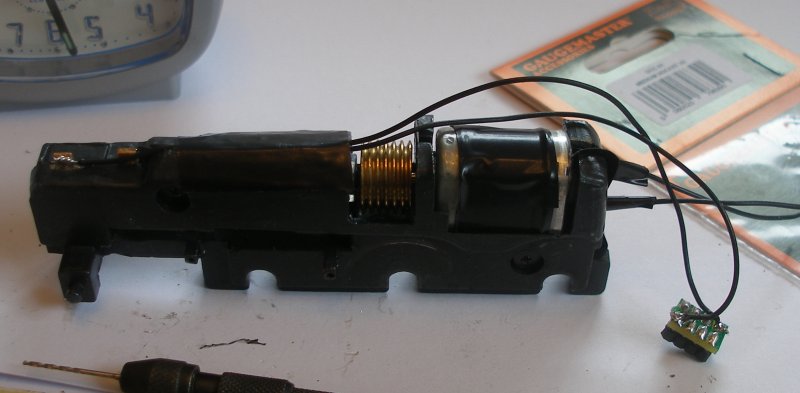
First the 'red' and 'black' wires are attached to the socket. Do make sure you get these the right way round!
The socket and wire will pass though a hole cut where the firebox door is, and then into the tender interior through a hole cut where the tender coal shovelling plate is. This is crude but simple and effective.
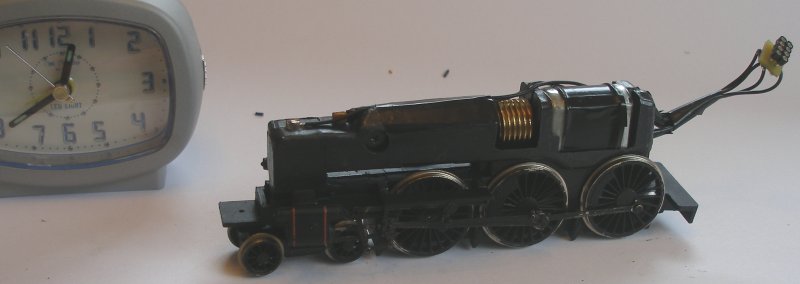
You might think, if you have noted the clock in the back ground, that the whole process has taken 40 minutes. Actually there was a little more work to do as the chassis halves hadn't mated properly, and the keeper plate consequently didn't fit. As this is the second one I had done within 24 hours, I know it is probably the motor that has not bedded into its recess properly due to the insulation tape that has been applied on the insides of the frame halves.
It took literally five minutes to remove the wheels again, split the chassis and remove the offending tape. It is worth noting at this stage that no attempt has been made to test the chassis during the reassembly process. I was lucky, as it worked first time with the DC blanking plate inserted, and then with the decoder fitted, ran first time on the layout.
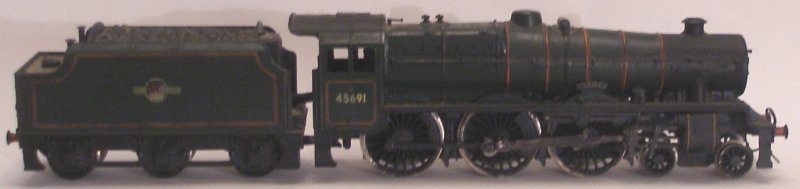
This is a Mainline 'Orion' body, and was acquired from a shop that used to be located in Friar's Square in Aylesbury. There was literally a wicker basket full of Jubillees and tenders being sold for £5 each! Note the DCC cabling passing between the loco and tender. This could be easily hidden by the addition of cab doors.
The first chassis I did worked perfectly on DC when re-assembled but not at all on DCC. There was no hum from the decoder or from the motor, and the motor appeared to be completely dead. The entire assembly was slowly dismantled until all that was left was a motor with a pair of wires connecting it to the socket and decoder. Then the motor powered-up and ran perfectly. It would seem that the insulating clear plastic around the Buhler motor wasn't the best of insulators, and the solution was to wrap the motor in tape. This cured the problem completely.
Bachmann and Mainline had significant problems finding a plastic that was tolerant to the oil-based grease applied in the factory. The Mark 3A chassis was coated with the stuff, and this was carefully cleaned off. Study of the various forums led to me trying Woodland Scenics HL657 White Grease 9.6g - Hob-E-Lube. This is described as a white grease with Teflon, non-staining, clean lubricant with the super-slippery properties of Teflon, is waterproof and protects against corrosion.
Should the axle centres have split, there are two possible options 1) repair or 2) replace. I initially went for repair on the earlier chassis, supergluing the split halves together, and then gluing them into the stub axles on the wheel halves. The loco with this repair ran but not particularly well, as there appeared to be pick-up issues (see below).
Fortunately replacement parts are available. There are two types of axles. Mainline used a round axle end that needs quartering, and modern replacements are available from Peter's Spares. The Bachmann version has square ends, and these are available from Shapeways. I have two Bachmann BR 4MTs, and have now found that although the two underframes were provided by Bachmann as replacements at the same time (both have the Buhler motor) one has round axles centres and one square centres. It is not possible to determine which type is fitted until the loco is dismantled.
Or you can lurk on eBay until a spare set come available! If you do this, remember that the Mainline and Bachmann wheels are not interchangeable, as Bachmann have the gear on the centre axle whilst Mainline had it on the rear axle. Having said that, I have not compared the two gears, and it might be possible to swap the axle centres around. Also note that there are modern sets of wheels and axles also being offered which are for a conventional chassis, and are not suitable for the split frame. These have a conventional metal axle.
Although not shown, one of the plastic motion bracket lugs broke when taking the bracket off. This also happened with the Mark 3A conversion undertaken the day before, and the solution is to drill a hole through the motion bracket and into the chassis locating socket to take a piece of Gibson 0.9mm straight wire, which is then superglued into the chassis socket.
Having completed two conversions on two consecutive days, there are now two notionally DCC-ready locomotives. But as mentioned above, the running of the first was good on the work bench with the crocodile clips attached, but erratic when placed on the track. Placing the second (and better running) chassis on the track again saw somewhat indifferent running - great in spurts..
A visit to the forums found this comment from Bignet on the newrailwaymodellers.co.uk forum: "...quite apart from the wheels going wobbly, the plating on the chassis and wheel halves wears through relatively quickly in use, and once that starts to go, pick up becomes very unreliable." This struck a chord, as these locos had been well used on the original DC set-up, and I had noticed that the axle bearing areas had looked rather flaky when the chassis halves were lying on the workbench, but had assumed this was their natural appearance.
A set of wiper pick-ups were then added to the keeper plate to see whether this would make a difference. Another 30 minutes saw the first chassis 'converted'.
Possibly not the neatest of jobs, but it has dealt with the pick-up problem! The pick-ups are formed from Gibson 0.45 mm straight wired soldered to PCB sleeper strip, which in turn are superglued to the keeper plate. Two wires that pass up between the two chassis halves and are soldered to the PCB tabs previously created.
In conclusion, I now have two locos that are DCC fitted, and do work. However, neither seems particularly powerful, with the motor unable to rotate the wheels if the loco is run up against the buffer stops.
For comparison purposes, I do have both a spare Hornby Rebuilt Patriot and Bachmann Patriot chassis. The relative smoothness and greater power of these two mechanisms to the older Bachmanns is striking. The expression 'runs like a bag of spanners' has been previously coined, but is a very apt description of the older split-frame mechanisms in action.
I remain undecided whether this was worth the effort, but in the event, I was able to acquire two current generation mechs on eBay in the 'spares of repairs' category for £20 each, and both have represented relatively little work to produce a vastly superior mechanisms. So in conclusion, if you have a split-frame mechanism which runs smoothly and powerfully then it may be worth the effort, with the caveat that the wheels may still prove to be the weak link.

Copyright J K Wallace, t/a 'Hall Royd Junction' 2013-2023 email: Hall Royd Junction
7 Portobello Close, Chesham, Bucks. HP5 2PL, UK
tel: +44 (0)7513 412880