
Building a diamond with a curved track to match PECO points
The PECO model railway track system uses its own unique geometry to ensure that various combinations of points, crossings and track will all fit together without the modeller having to tailor the various elements to fit.
This shows itself in pointwork, which has a continuous curve from the toe through the frog and so are defined by their radius as small, medium or large, whilst prototypical points tend to be described by their frog angle and length.
The system has proved itself since its introduction back in the 1960s, and most track layouts can be created. With one notable exception.
To create the classic double junction, the PECO system provides a choice of two diamond crossings - short or long - and these both feature straight track on both tracks. This works well where there is the room to accommodate the extra length required, but doesn't work well when the joining track has to be curved. Whilst it seems an obvious piece of track for PECO to produce, it would have to be produce in left or right handed versions right across all the various ranges of standard gauge systems (we can assume that most narrow gauge systems would not feature a double junction - OK, I know there are double track NG railways dotted around the world, but they are in the minority).
Hall Royd had originally been conceived as a dumb-bell, with trains leaving and returning to the storages sidings. Experience showed that this greatly limited operating potential, particularly when trying to recreate specific trains which only ran in one direction and would not have returned by the other set of tracks that the dumb-bell configuration required.
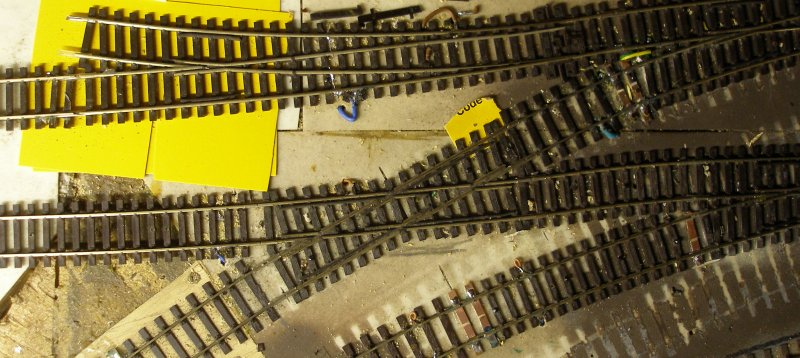
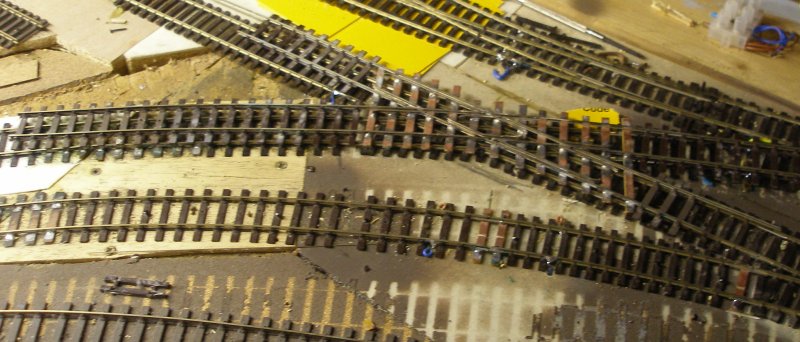
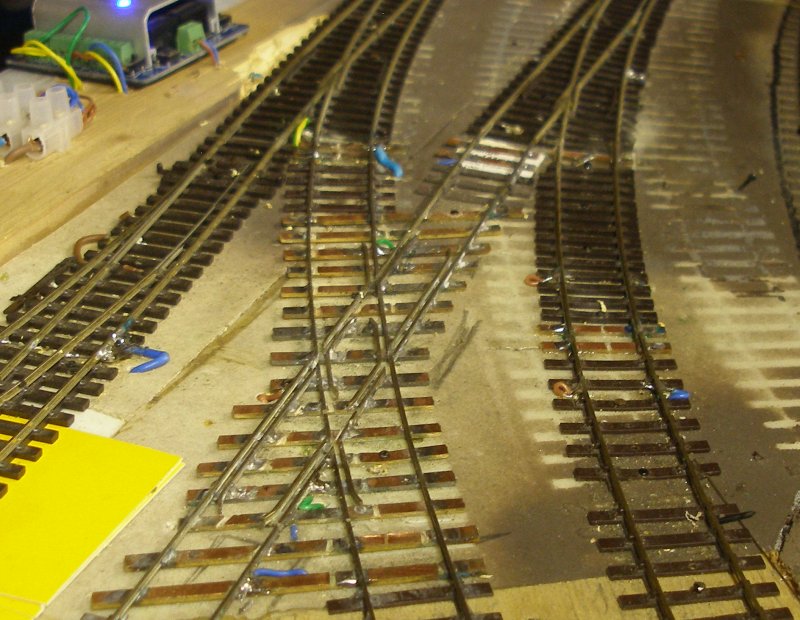
The first 'effort' was to lay in the junction using a PECO short diamond. This was awkward, as trains heading 'straight' across the diamond still faced a 'joggle' at one end, whilst trains on the curved track hit the 'straight' on the diamond without any form of transitioning before a short curved section brought them onto the point - to minimise this a curved point had been used, but it was still awkward. The photo below shows the first trial layout.
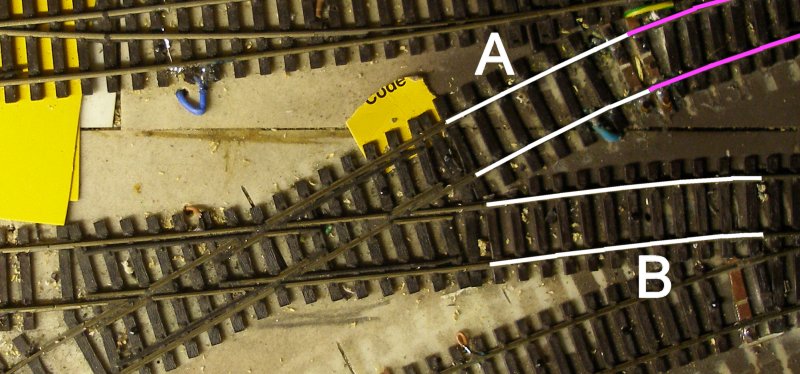
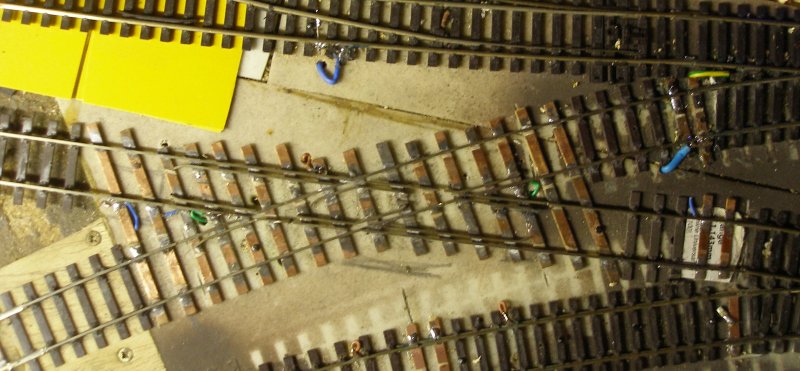
In the photo it looks as if trains running right to left have the more difficult crossing, whereas the route from bottom left to top right looks better aligned. Ironically, the opposite was true, and it was clear that a better solution was required. These issues are highlighted in the photograph below. Although track B looks the more awkward, trains pass over this surprisingly well - and without derailment. However it is the sharp change in curvature between the white rails marked A, and the rails of the adjacent curved point rails marked in pink which was creating issues for steam locos with rigid wheelbases (a Hornby old-style Fowler tank with fully flanged Romfords) or multiple-wheeled diesels such as Classes 40 and 45. These do pass over the junction without derailment but are very awkward in their movements.
As the new crossing was to feature a curved track, experience suggested that this was the track that had to be correctly aligned, and therefore should be the starting point for the 'build'.
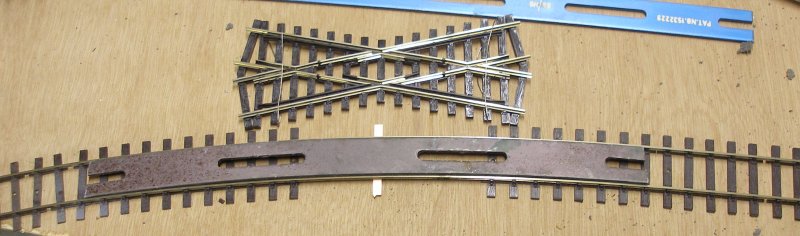
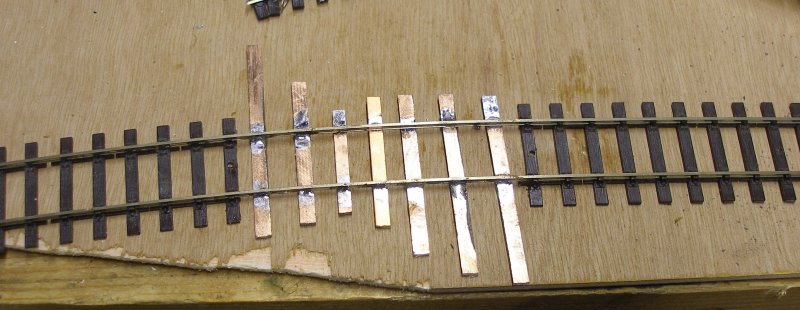
A piece of C&L track was used, with a section of the plastic sleeper web removed from the centre. It was then set to the 36" radius required using a Tracksetta, and then the first (short) sleeper soldered in place, as shown below.
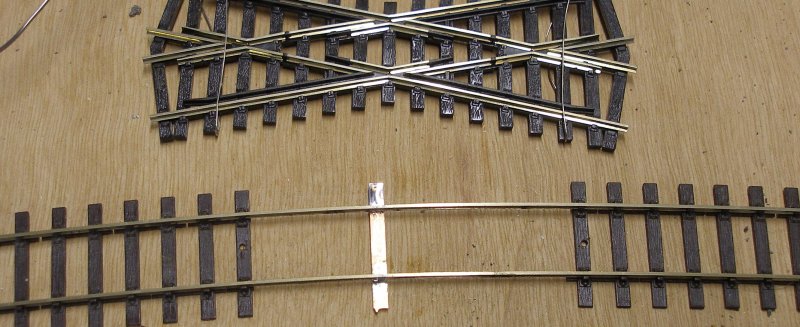
Now more sleepers are added. These need to be longer to accommodate the rails of the crossing.
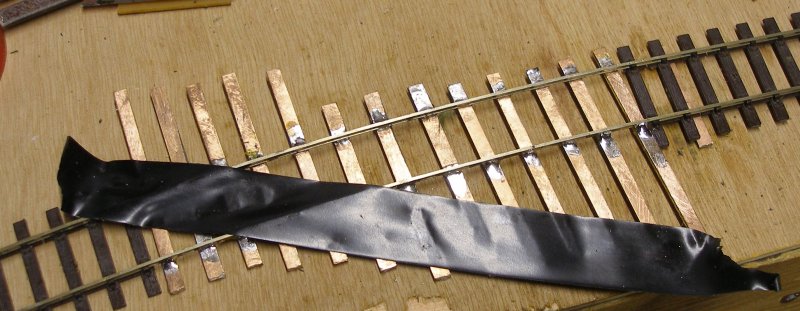
Now with the first track completed, the item was tried on the actual junction, and the alignment of the second track marked with insulation tape.
The straight track is now built-up around the curved track. The idea was to build-up a solid assembly and then cut through the rails with the Dremel to create the flangeways. The straight Tracksetta has now come into play to gauge the second rail.
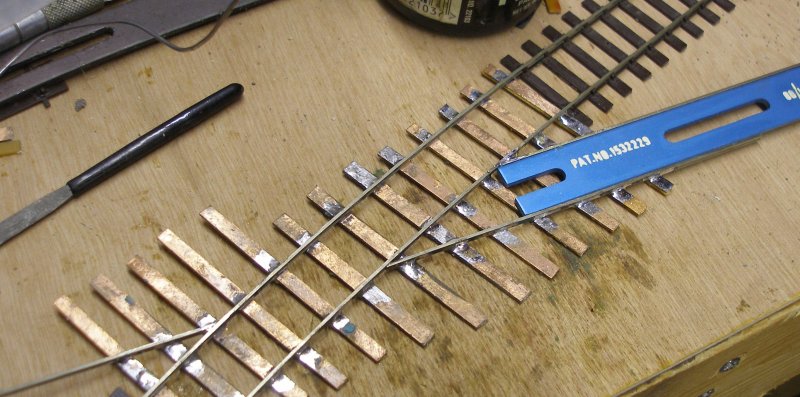
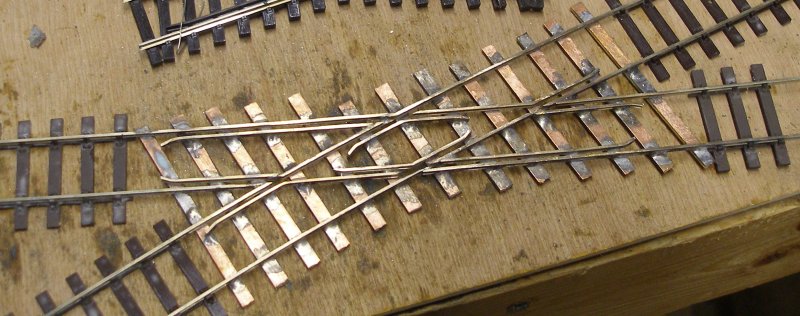
Now all the running rails are in place, and the various wing rails are being added. Note how the plastic sleeper web has been used to position the exit rails to keep everything aligned correctly and in gauge.
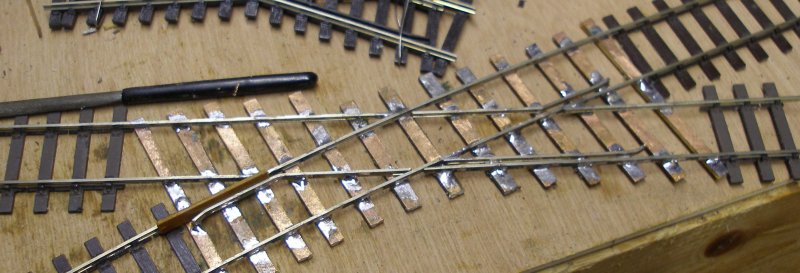
With all the check and wing rails in place,the Dremel was used to cut away the rail that bridged the flangeways. I used a thicker cutting disk so that only one cut was required to get the required width.
This whole process took about 75 minutes from start to finish. Finally, the completed unit was laid on top of the existing track to check the exit alignments.
The exit track top left needs to be realigned, but the transition will now be smooth and flowing.
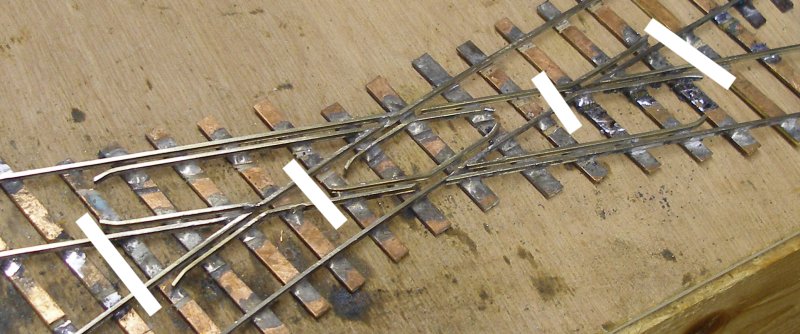
The next step is cut the rails to create the isolated frogs, and also to gap the paxolin sleepers so that there are no short cuts. This photo shows two extra sleepers have been added at either end so that when the rails are cut on the outer end of the frogs, the structure remains rigid. The gaps in sleepers have been cut alongside one the rails, so that there are no unsightly cuts mid-sleepers. As this will be a DCC installation, the two outer rails remain electrically continuous. This is exactly as PECO do it on their electrofrog version, so presume people with DC layouts know how to install them :-) Looking at the Hornby example, the junction of the outer rails is indeed plastic, so some form of polarity switching of these two rails may well be needed in some DC configurations. Although it was this sort of complexity in DC - often requiring rotary switches for junctions with live frogs - that decided me to go DCC! 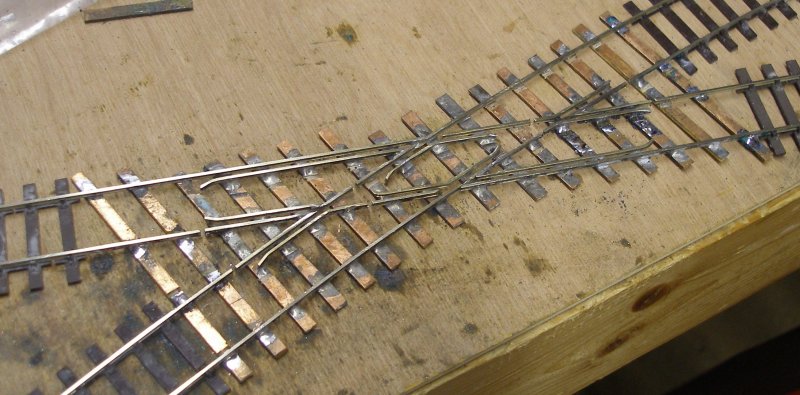
Finally, for clarity, the rails to be cut have been marked up.
With the unit tested both with actual rolling stock and with electricity applied to check for shorts, the next step will be installation.
20 October 2017
It took an hour to cut out the old track and lay the new, and wire it up. The transition where the straight route meets the point top right clearly needs some final tweeking - a job for tomorrow.
20 October 2017
With the slightly awkward lead into the straight leg, it is now difficult to remember that this was just a few days ago a problem piece of track. To all intents and purposes, it has 'disappeared'.
This is a prototypical configuration and I am very grateful to Darren Sneeze Hunt for permission to reproduce his photograph of 23 October here, which shows a diamond with both tracks on a curve.
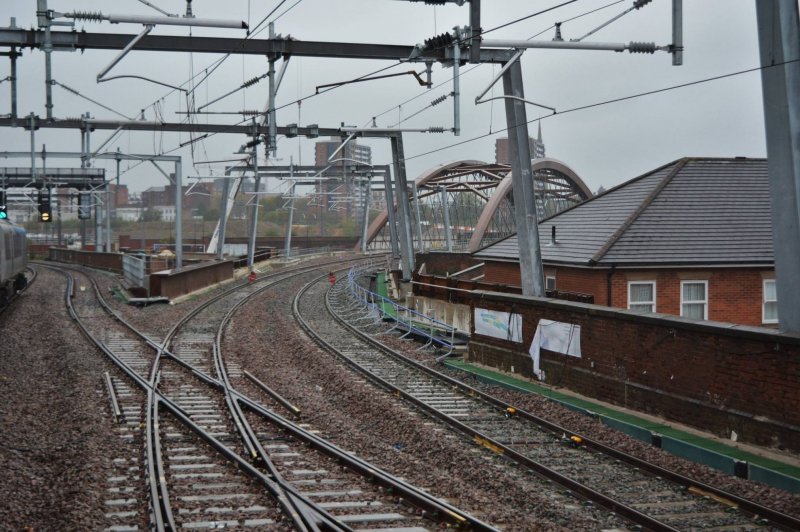
Copyright Darren Sneeze Hunt; all rights reserved

Copyright J K Wallace, t/a 'Hall Royd Junction' 2013-2023 email: Hall Royd Junction
7 Portobello Close, Chesham, Bucks. HP5 2PL, UK
tel: +44 (0)7513 412880