
A Trans-Pennine Class 124 DMU for the Calder Valley
The Class 124s never ran regularly on the Calder Valley, being associated with the L&NWR's Standedge Route via Huddersfield and Stalybridge.
However, things might have turned out differently. In the September 1964 issue of 'Modern Railways' on page 162, in an article headed 'Reorganising Manchester's Passenger Services', Peter Craighill noted: "Another important rerouting scheme concerns the Hull-Leeds-Manchester-Liverpool "Trans-Pennine" diesel service. It is proposed, also within the next 5 years, that these should take the Calder Valley lines between Leeds and Manchester instead of running via Huddersfield and Standedge Tunnel, which are also busy with freight. This would give several West Riding towns, such as Sowerby Bridge and Todmorden, and Rochdale in Lancashire the benefit of fast cross-country services which has seen good increases in traffic since special six-car multiple units replaced the irregular steam service in 1961. Bradford and Halifax are also likely to benefit."
(The other route 'busy with freight' at this time was Woodhead, and to allow for the opening of Fiddler's Ferry Power Station in 1969, the proposal was to make Woodhead entirely freight, so that it could handle the 4 million tons of coal required for the new power station, with the new Woodhead Tunnel being cited as a potential bottle neck if both passenger and freight had to compete for paths. The original plan had been to close the Hope Valley, but with Fiddler's Ferry, it was decided to divert the passenger service so freeing up capacity over Woodhead.)
Three points. One: it is my layout and I can run what I want :-)
Two: I always wanted one when Trix launched their original Ready-to-Run version but have always been put off by its sub-scale of 3.8mm to the foot and, at the time, the price.
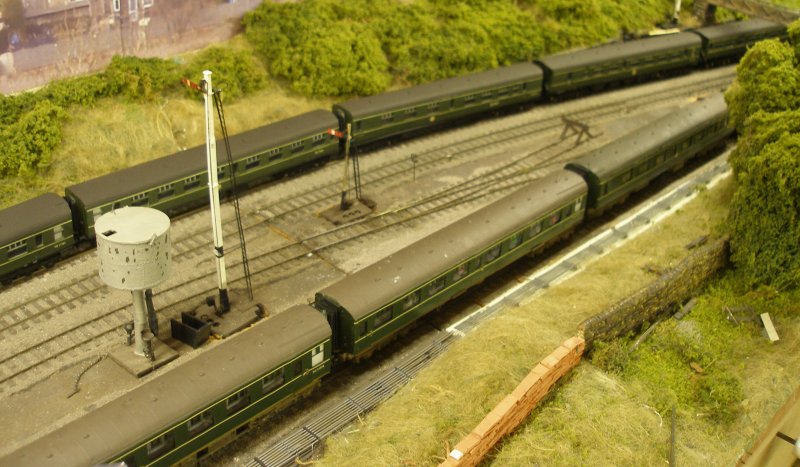
But Three, David Ball shot some his cine film at Todmorden in 1972 (which is on YouTube), and, as well as the Royal Train, their is a wonderful clip showing a 7-car Class 124 powering through Todmorden with a 2-car Class 111 Metro-Cammell unit swaying around at the rear.
Seven-car set? Remarkably, David's film doesn't only capture as Class 124 on the Calder Valley, the film clearly shows TWO buffet cars, coupled together, so it was either a beer special; extra accommodation was required; a repaired car being worked back to Liverpool after overhaul: who knows! There are photographs of 124s in the Calder Valley, usually as a result of a diversion. These tend to show green liveried units, and so far, all the photos (and David's film) show trains in the Up direction towards Manchester.
I have seen the wonderful Class 124 created of Mark 1 carriages as featured on the 'Hornsey East' layout based in East London. The problem here is that the Swindon-built Inter-City DMU units had windows that were slightly smaller than the Mk 1 type, so not only do the donor carriages need much cutting and shutting but the windows are also a major issue. My first thought was to try and get a MTK kit. I have read that these do make reasonable models but are heavy. This led to the thought that the Heljan Class 128 would be a brilliant prime mover, as my Clss 128 can haul 19 bogie vans with ease.
I did buy the January 2017 issue of the 'Railway Modeller'. My motivation was the wonderful article on the Carlisle 4mm model which featured signals built using the signal transfers available on this site :-). However there was also an article by Sean Hutchinson describing the construction of his Class 124. For anyone looking to build a Class 124, this article is highly recommended, and I will make reference to it in these notes.
And that is where I was when I discovered that Silver Fox now have a Class 124 kit.
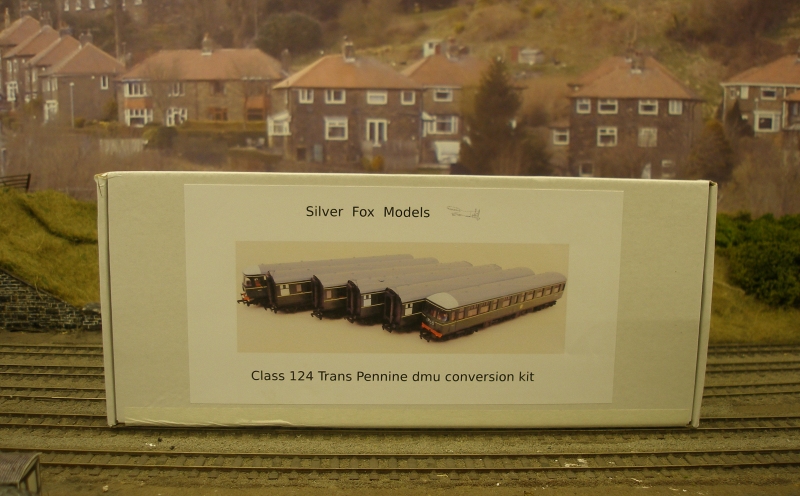
To make the kit, various bits and pieces have to be acquired. These were:
1 x Heljan Class 128 (cheapest of eBay £60, although one without a body was on for £48)
6 x Hornby Railroad Mk 1s (various, as per the instructions - £15 each although the price subsequently fell to £12)
10 x Hornby Class 110 type bogies (from the spares box and Peter's Spares: £4.45 each)
1 x etched grab and door handles.
It is worth noting that it would appear that Dapol did offer packs of Class 124 bogies, which, despite the model being 3.8,mm scale, the bogies had the correct wheelbase and springing arrangements (and I understand the width matches the modern Bachmanns so a real mix of two scales). But none where available. Silver Fox also suggest that the existing bogies can be modified to resemble a DMU bogie. There were problems with this (see later), and in the end I elected to modify the Hornby Class 110 type.
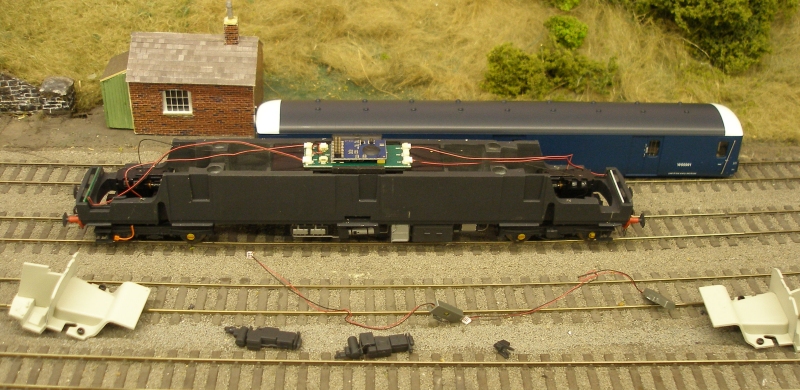
The first item to be converted was the Heljan Class 128. The body is secured by four screws from underneath, and then the cab lighting was removed. The illuminated headcode boxes are also redundant but have yet to be removed. It is possible to cut the sides of the chassis block down so that they are level with the bottom of the new windows, but for now this has been left. The plan is to motorise the buffet car, as it has relatively fewer windows compared to th other coaches, and is centered in the 6-car set, so allowing ease of running in both directions. The wonderful Heljan undergear will also have to be removed, as the buffet car was unpowered.
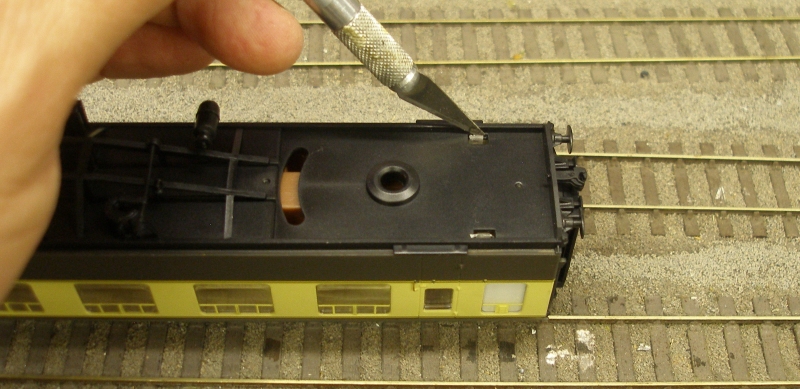
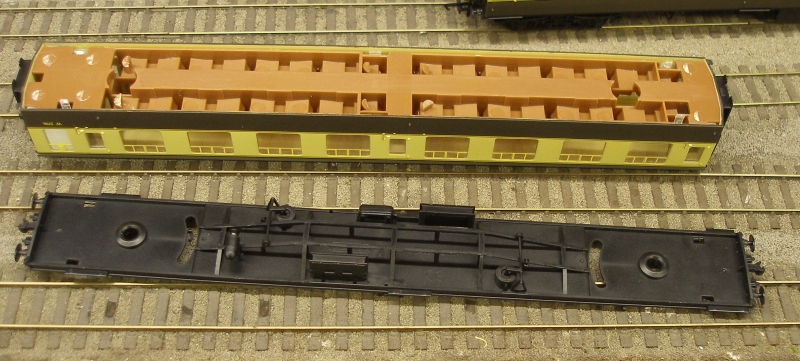
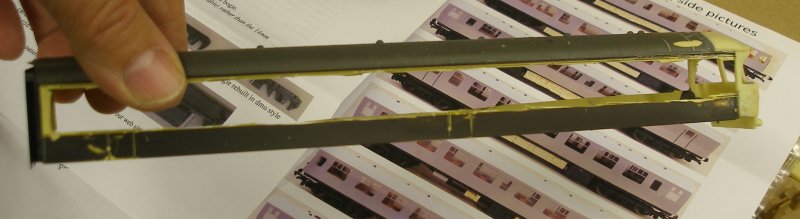
The donor body for the buffet car was next tackled, and had to be dismantled. The first step is to disengage the glazing strip through the slots in the chassis as shown.
Then the clip in the middle of the coach side is disengaged.
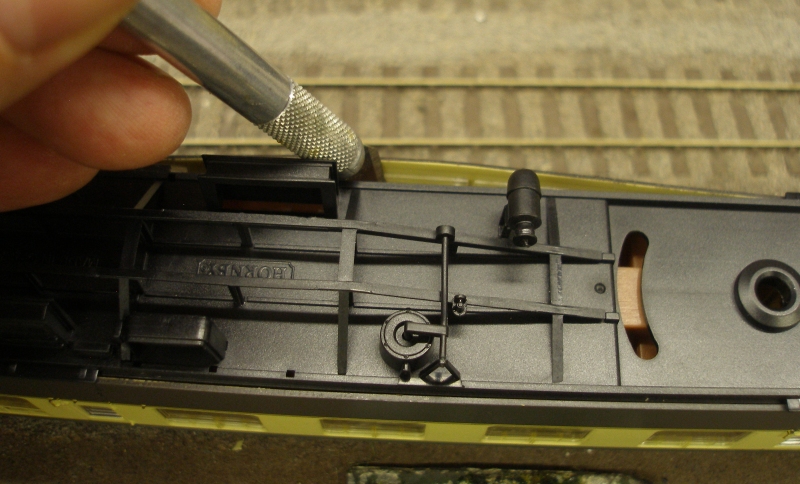
Finally each end of the chassis can be disengaged and lifted out. Sorry for the slightly blurred image here but it was tricky prizing out the chassis and holding the camera at the same time.

Here it is shown here in its component parts.
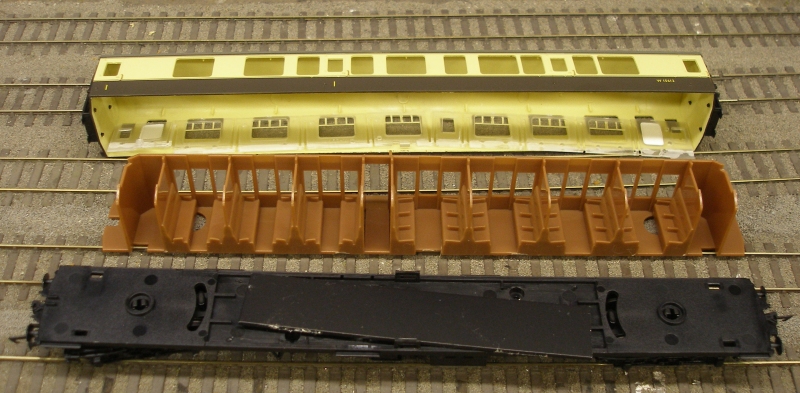
Next,the glazing has to be removed. This is held in place by a combination of a 'clip fit' and glue along the bottom. Just gentle insert the scalpel under the glazing and twist, and it should just pop out.
The body was trial fitted on the Heljan chassis and was a neat fit.

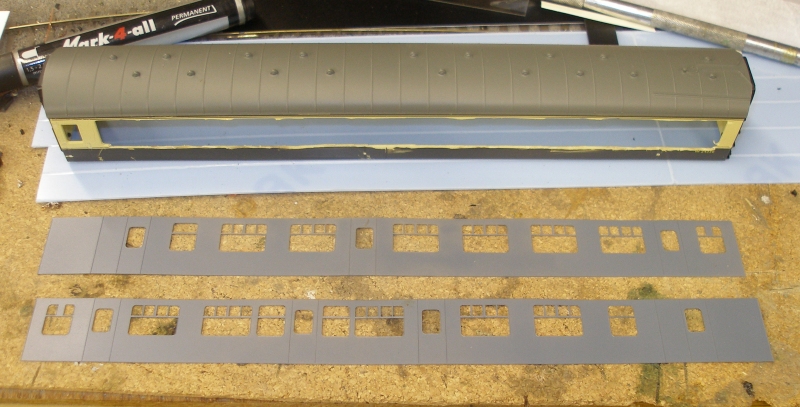
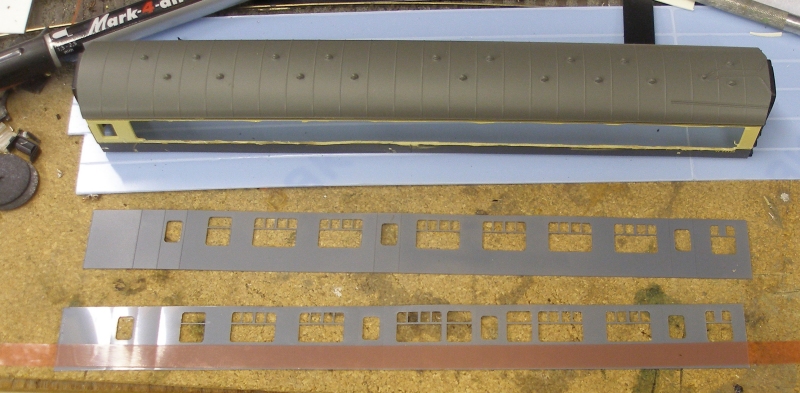
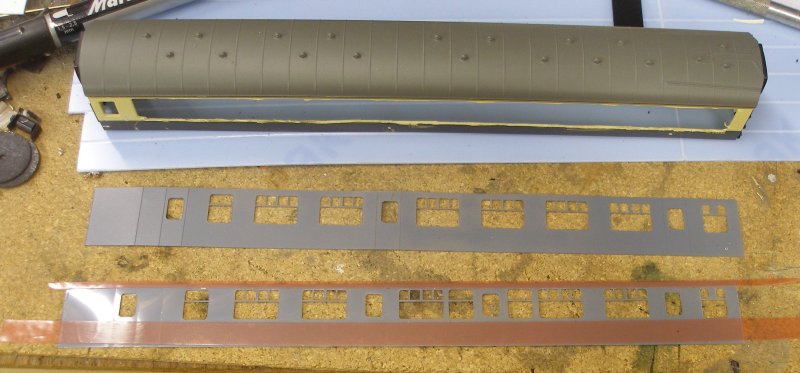
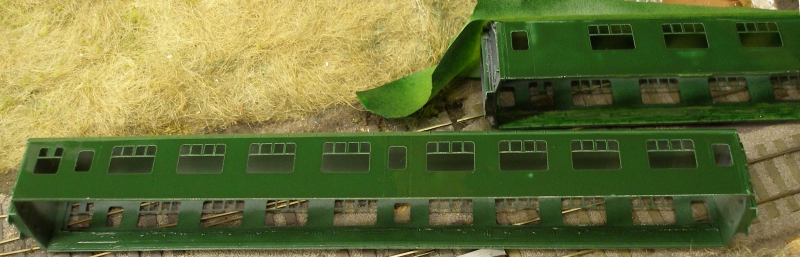
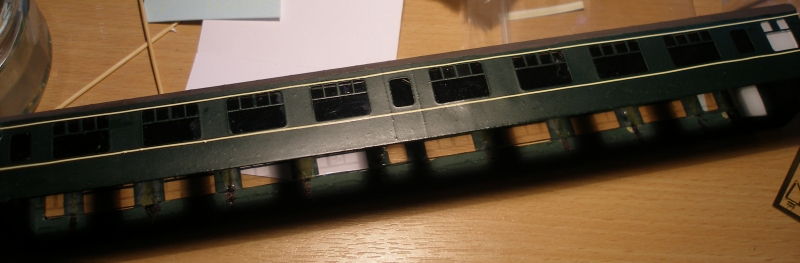
The first stage of the conversion requires the window area to be removed. Anyone who has used the old PC coach sides or fitted Comet etched brass sides will recognize the technique. Pillars have been left where there are no windows to provide extra strength.
Here the sides for the Motor Brake Second are being prepared, and have been laid out alongside the modified body.
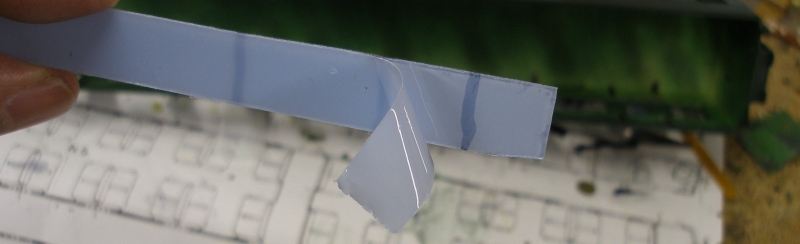
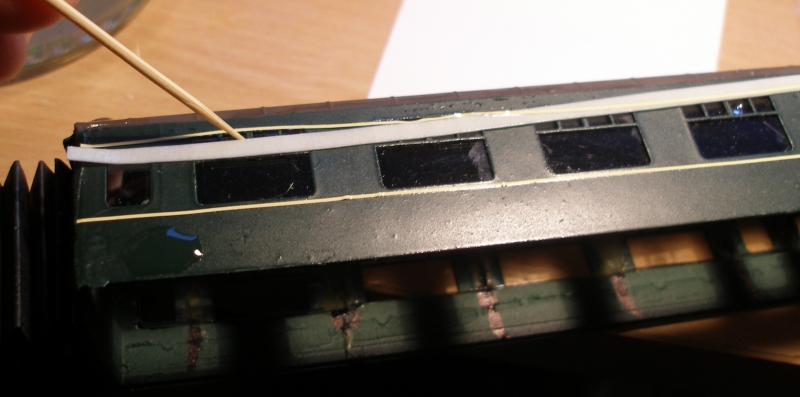
Silver Fox recommend double sided red tape, and two widths were obtained. Here the wider tape has been affixed to the lower body side. The tape was initially affixed to the cork work top, and then , keeping the tension on the tape with the other hand, laid across the body side and then pressed down. The Silver Fox sides are created from clear Acetate sheet, which is then sprayed with grey undercoat on the outer side. Consequently the side which is to be attached to the donor coach has a shiny finish.
Now the second, thinner red tape is attached to the upper body side.
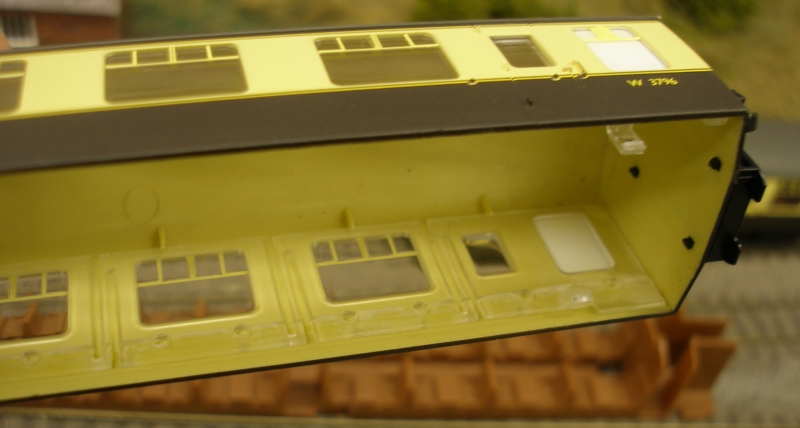
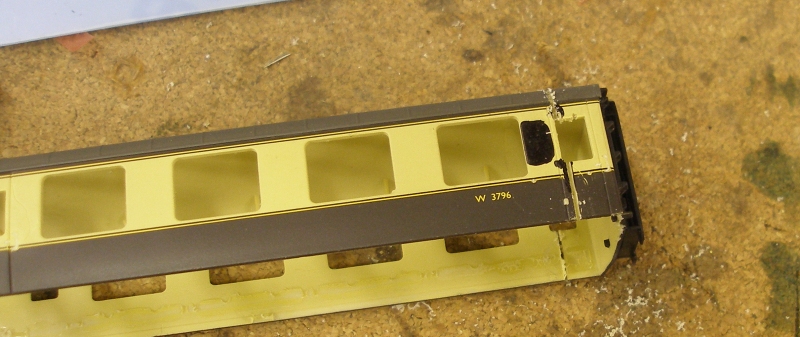
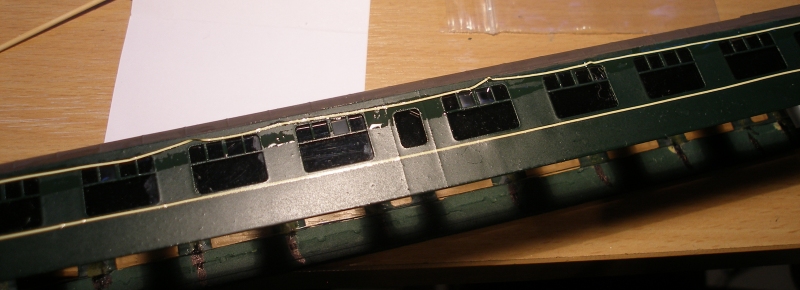
The red backing material was removed, and the side offered up to the donor vehicle. Note that there is a vertical strip of cream and brown is showing on the left-hand side. This is because the length of the Hornby Railroad coach is slightly longer than the Bachmann equivalent. John at Silver Fox provided some additional material to allow this gap to be filled. A final note on fitting the overlays@ do ensure that the donor side is perfectly flat. Remove all signs of door hinges and protrusions, particularly any rough edges where the sides have been cut. There is some flex in the overlays, and they can be carefully pealed back if need be.
Finally, for the other coaches the trussing and various cylinders and battery boxes need removing. Take care with the battery boxes as they will be reused. According to the Railcar Website, the bodies and underframes were integrated, and so no vehicle had any trussing. However the instructions suggest that the TSL DID have trussing, so until further information comes available I have left the trussing on that vehicle.
The trickiest part of the conversion at fitting the resin cabs. The vertical cut lines exactly with the window opening in the door. The window section to be cut out was marked but left in place until the cab was firmly attached.
Next the section of roof was removed.
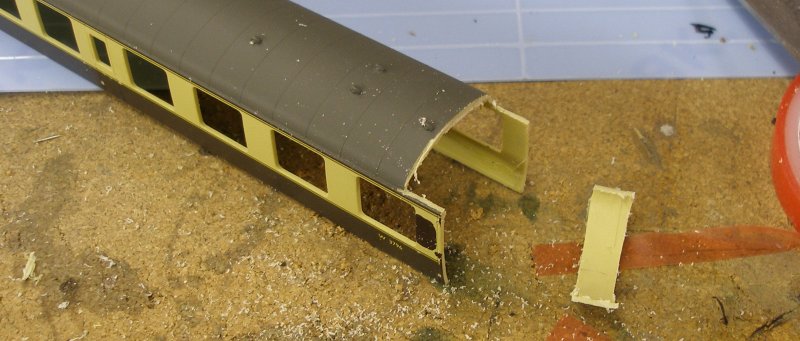
This all looks a little crude, but the instructions do stress the need to use filler and carefully sand to shape. A start has been made on removing the window strip. Note that standing behind the Driving Motor is one of the Brake vehicles now fitted with the underfloor detailing segment, representing an engine and cooler group.
The inside of the body shows the join. Superglue was used to join the resin cab and plastic bodyshell.
Finally, the rest of the window strip is removed.
The buffer beam on the casting is lacking detail (right) and the second one was modified with the cast buffer beam sawn off, and the original Hornby buffer beam used. The original one was then modified so both use the Hornby beam. Do take care to remove and keep the Hornby buck-eye coupling. Once the Jackson screw coupling is inserted into a slot cut into the buffer beam, the buckeye is re-attached but hanging down.This is such a characteristic aspect of the real thing that it needs to be modelled. I have never seen a photo of 2 6-car sets coupled together, and it is possible these were never actually used! However I have seen a photo of a disabled Motor Driver coupled on the back of set being returned to depot, although whether using the screw or the buckeye coupling is unknown. Also note on the right hand body the overlay is slightly proud of the cab side, and this is a weakness in the kit, as the door frame is very thin at this point, and it is all butt joints. Not ideal.
With the sides attached to the body shells, the instructions suggest that the joins should be sealed with diluted PVA glue. A drop of detergent was added to break any film that might form and stop the glue working its way into the joint.

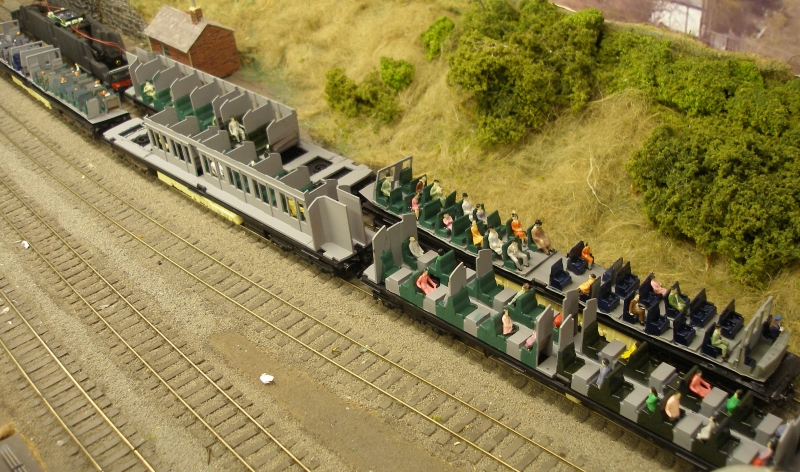
An excellent set of floor plans are provided, as new interiors are required for the Motor Driving coaches. These can be cut from the original open seating units, but I had a number of the old Lima Class 117 interiors, which were easier to cut up and reform.
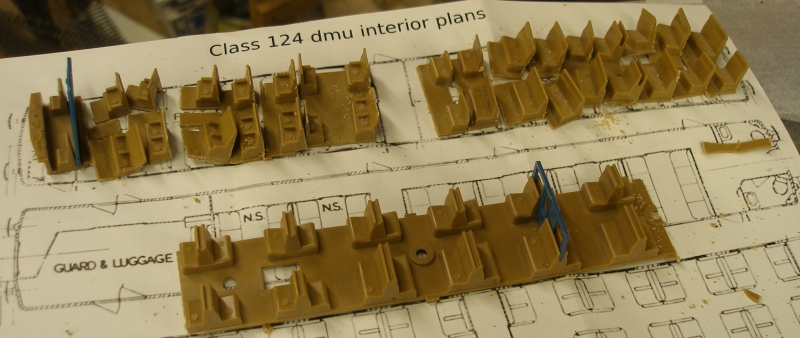
The plastic packaging for the coaches was used to create a base for the Driving Motor interiors, and here are the interiors primed but not yet painted. There seem to be no colour photographs of the original interiors, although there are a coupe of BTC films that provide fleeting glimpses on the early interiors. The best surviving and restored interiors of the Swindon Inter-City units is the preserved Class 126, and views of the stunning restored interiors featuring the various seating types and colours can be viewed here. Humbrol Matt 88 appears to be spot-on for the regular 2nd class seating; although probably too dark, I have used the Railmatch DMU green for the non-smoking 2nds, and Humbrol 15 for the 1st class (although gloss, it is a pretty close match and I will matt varnish the seats).
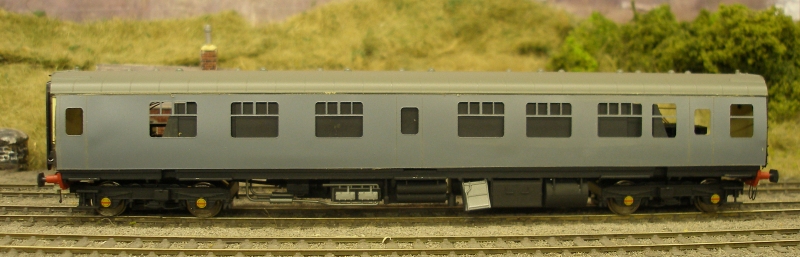
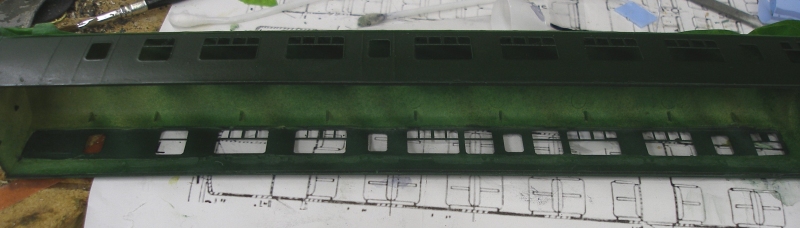
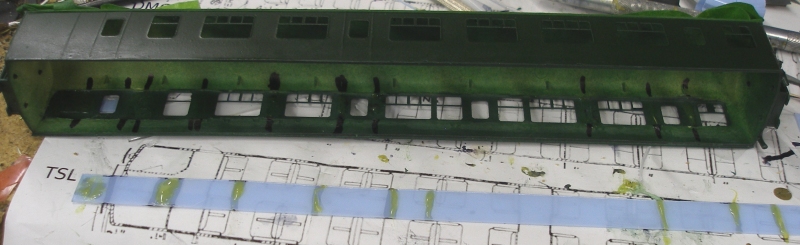
All the sides were primed, and then the initial coats of green were sprayed on, using Railmatch DMU green. It will be noted that there are some lighter patches appearing. I have not had this problem before with this combination of primer and top-coat, and can only think it is either something to do with the overlay or the primer. I have also made sure to only spray at the warmest time of the day. Either way, the solution has been to touch up the patches using the same paint from the bottle, and then gently use wet-and-dry to rub down the surface of the brushed paint. A further spray coat then gives the desired finish.
4 November 2018
Rectifying defects in the paint work has taken a few days, but one time consuming but essential task has been to paint and populate the interiors.
As previously noted, the Class 126 DMU Preservation Group has done some stonking restoration work on their interiors, and the three colours selected come pretty close to the real thing. The exception is the non-smoking seconds, which I feel should be an orange-brown, but am uncertain, as this often seemed to be a later Blue-era seat covering, so for now have stuck with the known-knowns.
And whilst the Railmatch spray cans were out, attention has also been paid to the cab ends. The plan is to have yellow warning panels, so the later Green-era livery. Although starting with a primed surface, the yellow has proved difficult to get sufficient depth of colour despite careful 'filling-in' by brush to build-up the areas around the headcode box frame.

The painting of the bodies took longer than expected. There were odd patches where the spray paint did not adhere to the grey primer, and these were touched up with the matching Railmatch bottle and then rubbed down and resprayed. The buffet car was particular bad, and had to be fully rubbed down and resprayed.
It took quite some time to perfect the glazing routine. Silver Fox supplies a neat sheet of pre-cut strips, which have a protective film on both sides. These need to be cut from the sheet, and then gentle trimmed till they fit inside the rebate formed on the inside of the coach body. The fit should good, and not 'clip' in, as this will deform the relatively weak sides.
The critical thing to note is that the contact adhesive must be applied sparingly. And then left for the full curing time, so that no 'liquid' excess oozes out around the frame. John at Silver Fox strongly advised NOT to use Superglue for this purpose, and I concur. If the Superglue oozed out onto the visible glazing, there would be no way back, as it would not be possible to remove and replace the glazing strip, as once the Superglue went off, the join would be permanent. Whereas using contact adhesive it is still possible to remove the glazing and live to fight another day.
It was apparent that at the rate that the glazing pack was being used-up that there wouldn't be sufficient to complete the model. I therefore bought a sheet of the 1mm clear plastic sheet from the appropriately located Todmorden Model Supplies. I will just add that their delivery was immaculate, the sheets arriving within 24 hours. My first attempt to use this sheet failed, as I didn't spot that there is a protective film on BOTH sides of the sheet: one opaque and one clear! You've been warned.
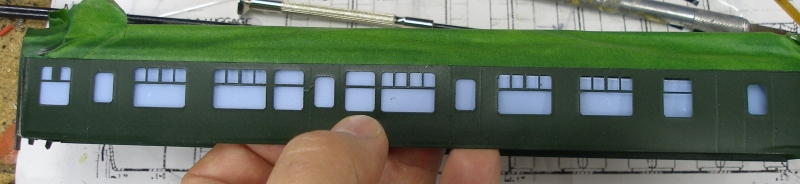
The first image shows the inside of the window strip, and the recess that the glazing strip has to be trimmed to fit.
The trimmed strip is offered up, and then checked from the outside to ensure that there are no gaps.
Taking care to ensure that the opaque strip is uppermost, a felt tip marker is used to draw a line from top to bottom to indicate the areas that the contact adhesive is to be applied to. Note how the line starts and ends on the body side: a vital alignment aid when fitting the glued window strip.

The image below illustrates the clear protective layer being removed. This is the side that the contact glazing will be applied. Note the black felt tip line showing through the opaque protective film.
The contact adhesive is sparingly applied to the positions previously marked up. Note how the area with the two half windows flanking the door have no adhesive applied. It proved too challenging to effectively apply glue to such narrow areas without damaging the glazing.
The strip is gently fitted into the window recess, and the glued areas pressed down firmly. Here is the glazed side, still with the opaque film in place.

Difficult to tell in this shot, but here is the fully glazed side. One small point is that the Todmorden Model Supplies glazing material is marginally thicker than that supplied by Silver Fox, making for slightly sturdier sides.

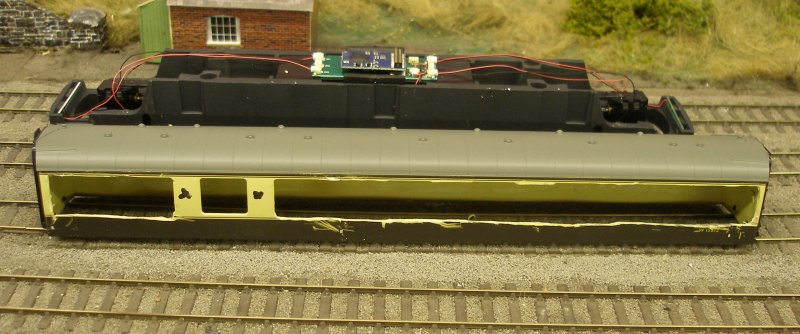
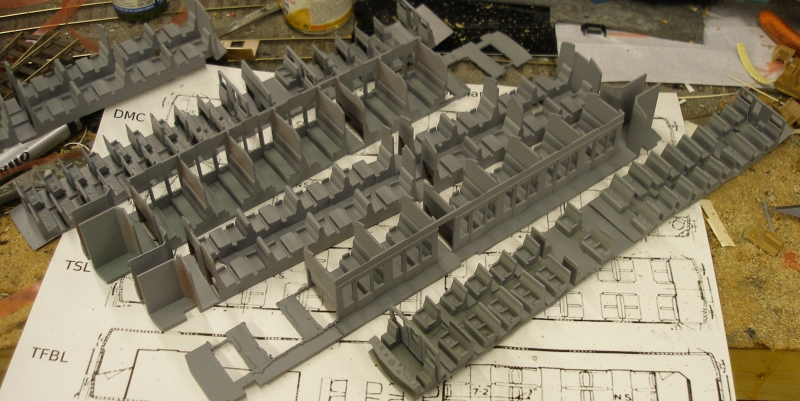
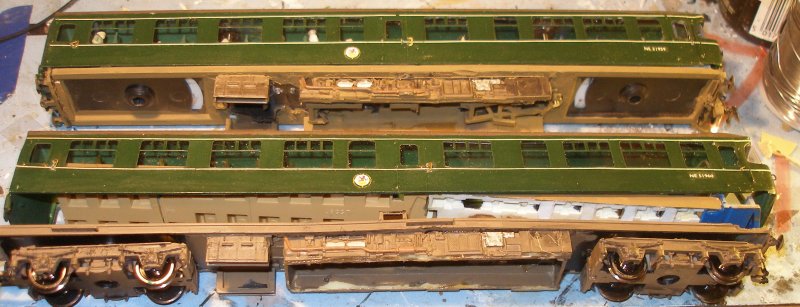
With the bodies initially painted, and part glazed, thoughts turned to the underframes. The undergear was made up exactly as per the Silver Fox instructions, and then compared to photos of the actually thing, and the various models that have been posted on the Web. The following views very much a record of work in progress, but are primarily to illustrate the nature of the Silver Fox resin mouldings. Take as read that the bent chassis seen on one of the Brake will be corrected (the missing Driving Motor had a similar defect and doesn't appear in this sequence as it was being fixed). The interface between the top of the side overlay and the roof guttering needs sorting, and it is also apparent that a method to fix the body to the chassis has yet to be devised. The vent on the buffet car is wrongly positioned and too high and will also need correcting.
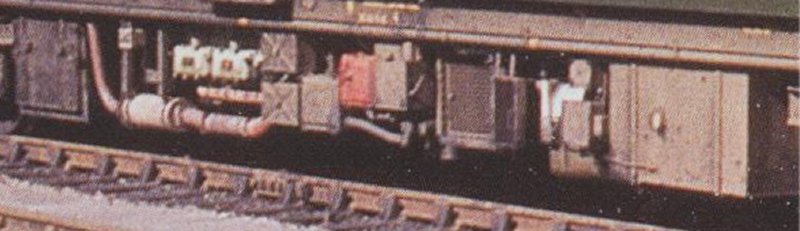
The critical issue is that the underframe casting for the motor cars is clearly not right. The fuel tank looks the part and is correctly positioned, but the exhaust from the actual engines is very distinctive on the 124 and not at all like the casting (query whether the engines are in the right place).
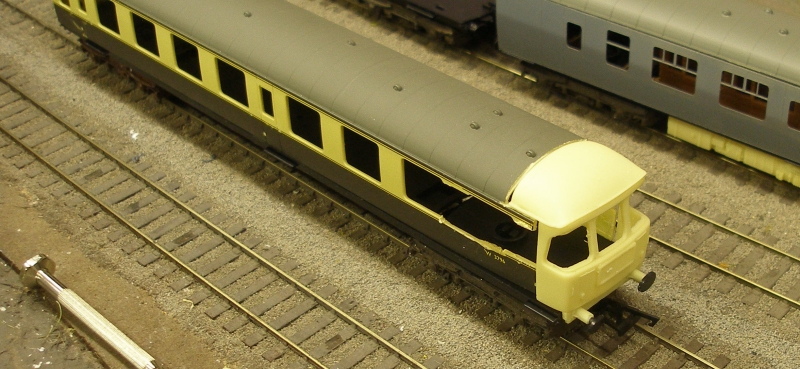
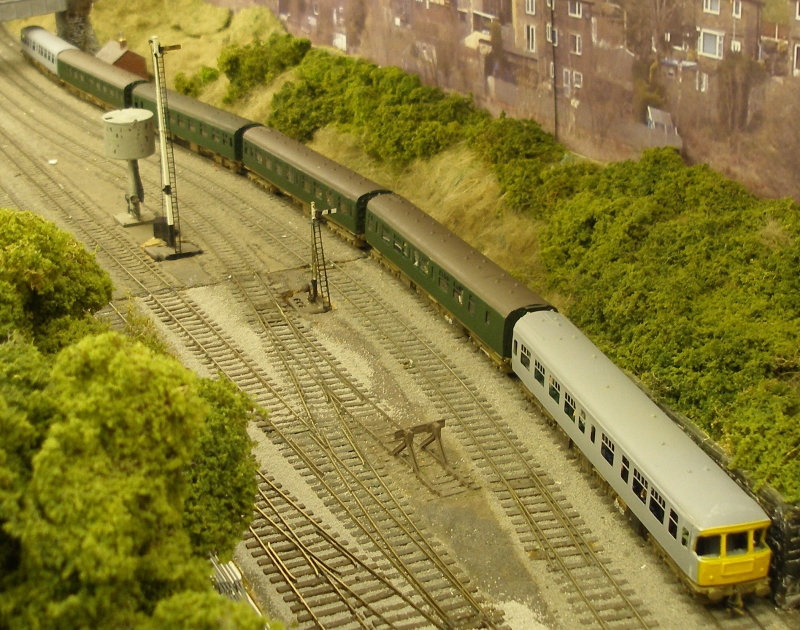
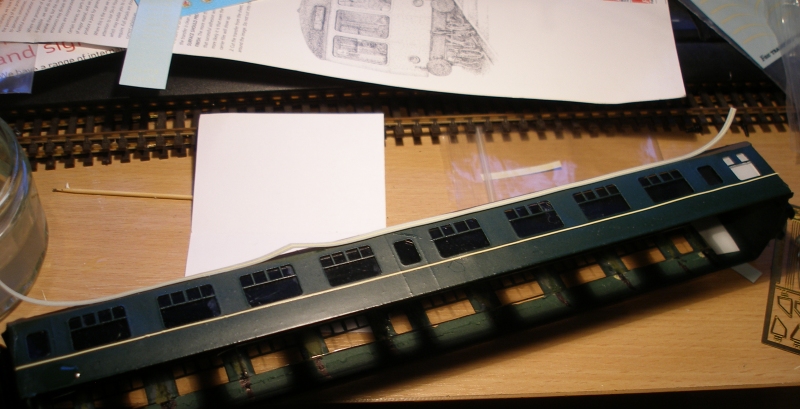
Finally, a view of the full 6-car set to mark the current state of the project.
There are pluses and minuses of batch production: a definite plus is that you get the opportunity to practice techniques; the bad news is that there are long gaps before you can move onto the next task. And so it has been with the lining.
Fox do a series of sheets: the lining is the same on all of them, and the variations relate to the whiskers.
I found I had two sheets, and picked one at random.
I did two sides, and then called it a night. In the morning I discovered to be horror that the tissue I had been using to mop up excess moisture had slipped into the dish with the water, and the water had 'wicked' its way from the dish, via the tissue paper, to the transfer sheet. I first tried to 'rescue' the lining, but was only able to rescue four further lines.
I didn't think this was a problem until I looked more critically at the second sheet, and realised that the lining was slightly wider. Deep breath time. I therefore removed the previously applied lining and started again using the second sheet. And this is how the job progressed.
First, the lining was cut from the sheet, ensuring that a reasonable margin was left on both sides of the lining. The resulting strip was gently coiled-up, and immersed in the water in the dish for 30 seconds before being removed and laid out along the coach side.
It is left for a further 60 seconds or so before gently teasing the lining off the backing sheet with a cocktail stick.
Once all the lining is approximately in place, the backing strip is removed. The lining is now carefully poked into final position, and any excess moisture mopped-up with a tissue.
Approximately 6 minutes of concentrated poking and prodding, the lining is in the correct position. If the lining starts to adhere when not in its final place, just add more water to soften it.
Although not shown in the photos, I have started adding the coach numbers, as supplied by Silver Fox. These don't have a backing film, and have to be cut close to the numbers. But you need to be aware that Fox only supply five sets of numbers for a 6-car rake, and it would appear that there are no numbers for the TSO, so an alternative source will be required.
With the lining done, the next stage is to fit the door and grab handles. Silver Fox provide a self-adhesive sheet, but many years ago I fitted a full set of handles to a pair of bubble cars, which greatly improved their appearance.
The first step was to fit the door hinges. I had both the MTJ and Southern Pride frets to hand. The first step was to pain the hinges.
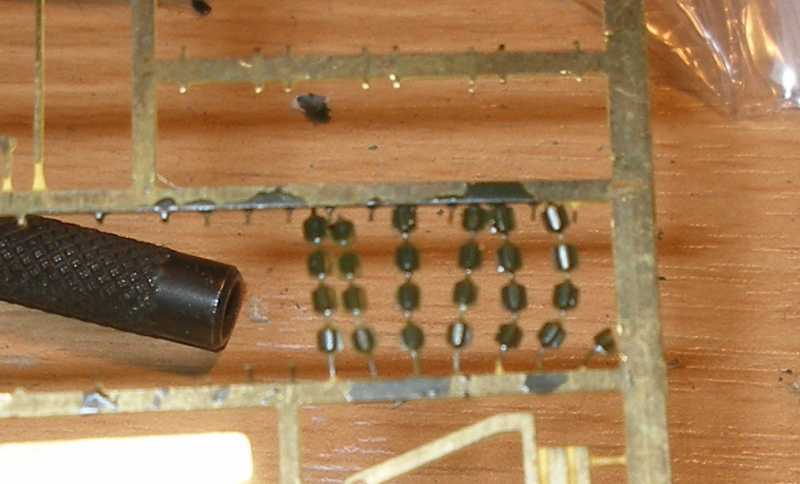
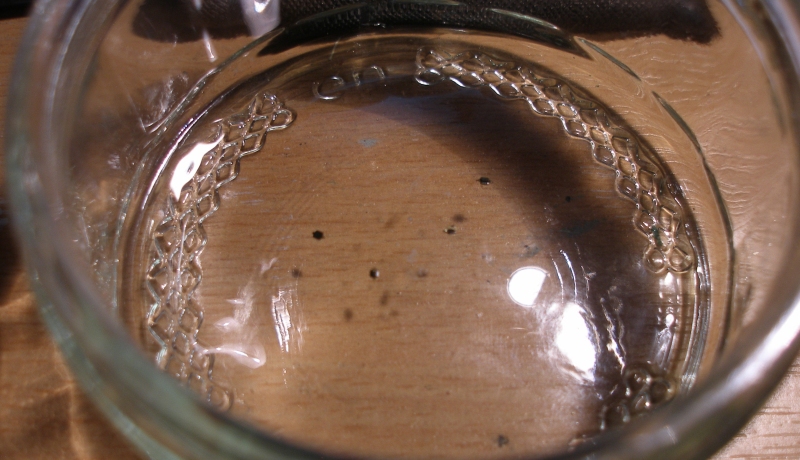
These are very small components, and they were cut off the fret using a pair of scissors over a glass jar.
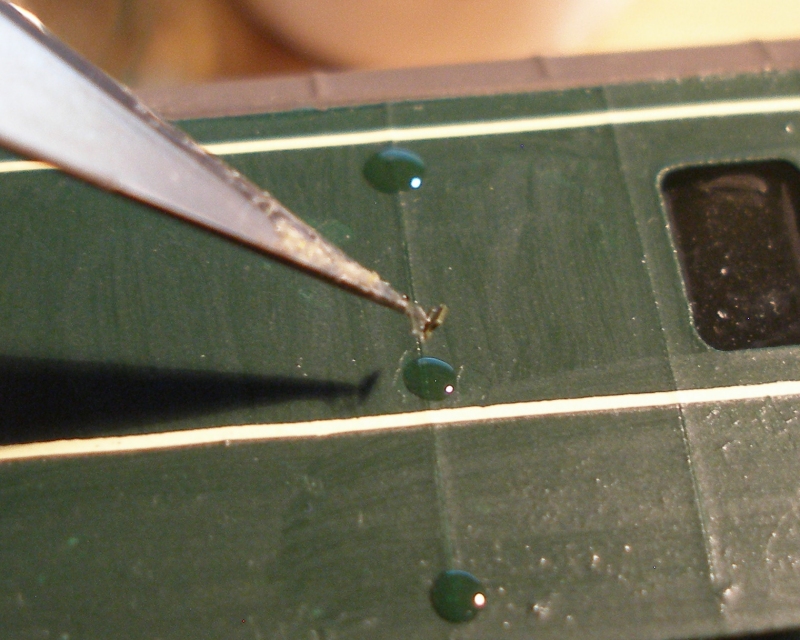
Many years ago I read of someone using varnish to secure the hinges to the body side. Each hinge was individually speared using a scalpel and then gentle dropped onto the dot of varnish.
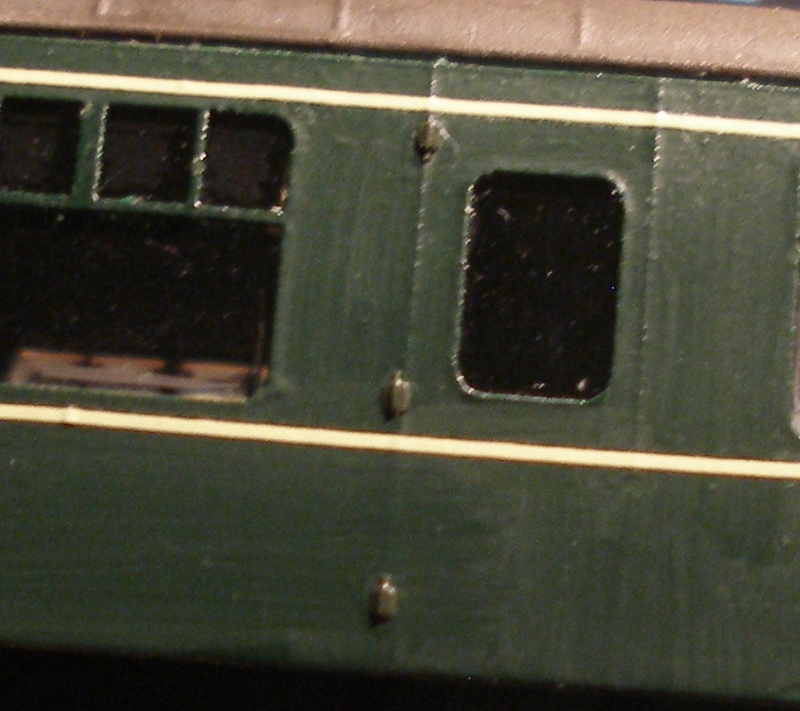
And here is the finished item. The varnishing clerly needs redoing - the beauty of taking photos of the job as it progresses.
I had an idea how to make a set of printed curtains. This is still a work in progress, and the set was popped in its dedicated siding in the storage yard and left for the summer.
A return to the loft in November saw the set recovered and placed back on the work bench with the intention to skill the curtains for the time being, and instead secure the bodies to the chassis.
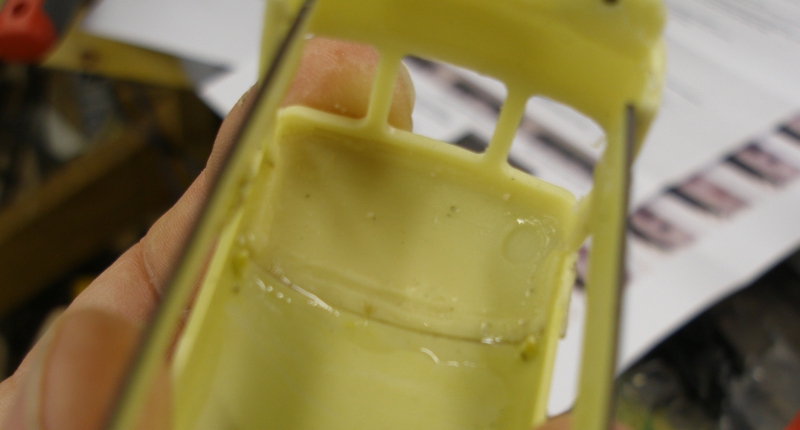
And then the oops moment. I had used Bostick (the pink, now purple solvent based version) to secure the resin underframe gear to the four motor vehicles. It was obvious that three of the four underframes involved had seriously buckled, as per the photo below. The lower chassis shows the serious distortion that had occurred in the centre of the underframe. The upper frame has already been replaced, as there was a spare from the Buffet Car (which houses the motorised chassis).
There was a spare Hornby chassis to hand, and a third was secured via eBay. Fitting the replacement chassis only took a couple of hours.
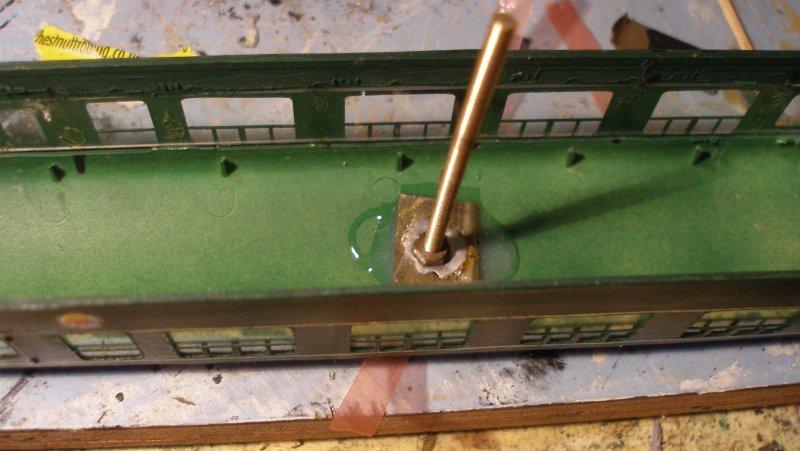
That left the issue of how to secure the body to the chassis. In the original Hornby Mark 1s (the ones with the separate sides that slotted into the common underframe) had two holes at either end of the metal weight, and the positioning was then replicated on the other four cars with Hornby underframes. 6 BA bolts of the appropriate length are difficult to source, so I bought a length of threaded rod. A 6 BA nut was soldered to a small section of metal sheet, the threaded rod screwed into the nut, and the metal plate Araldited to the inside of the roof, using the holes in the underframe to ensure correct alignment. Once the Araldite had set, the interior and the underframe were slid down the two rods until correctly fitted. Then 6 BA nuts were fed down the rod until they met the underside of the underframe. Finally, the excess rod was cut off with the Dremel.
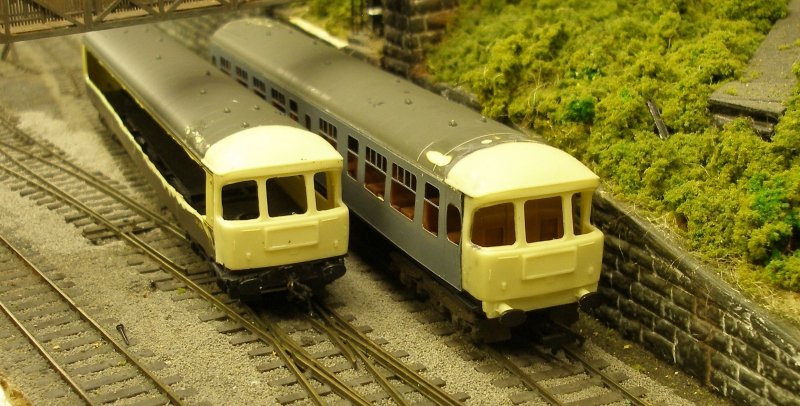
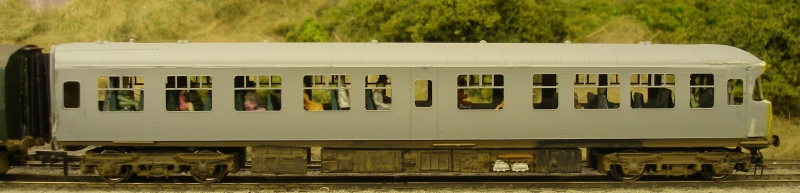
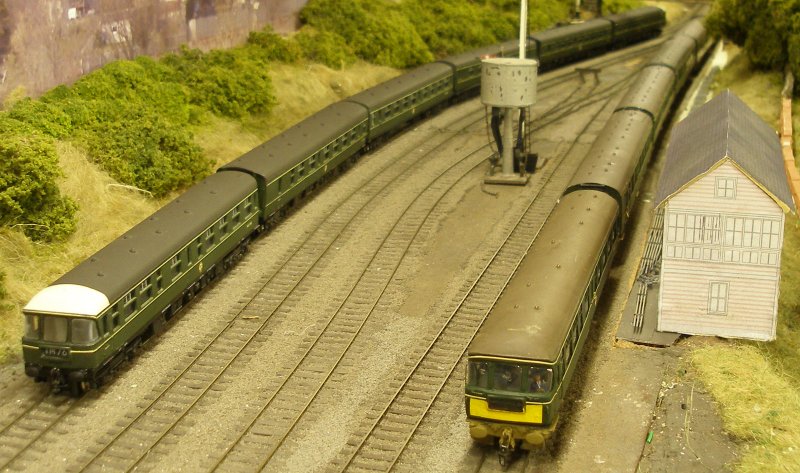
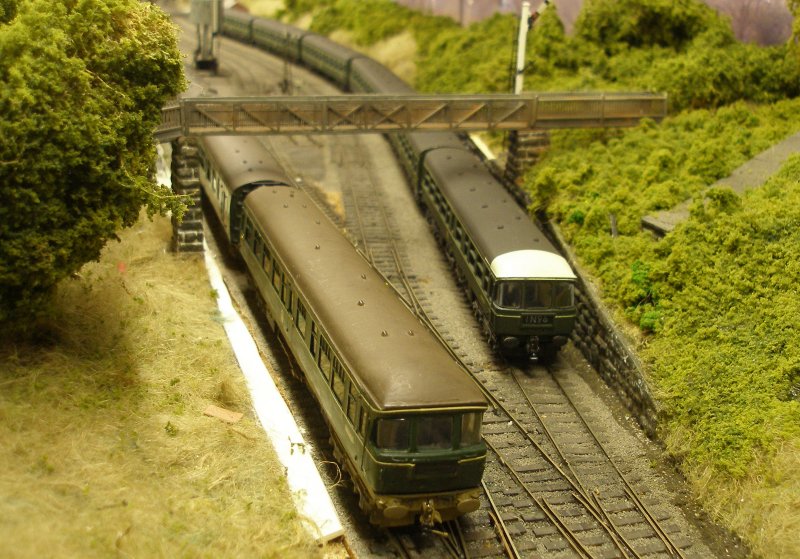
Now was the time for the first test run. The recent acquisition and completion of a 6-car Trix Class 124 project has created the opportunity to compare the Trix 3.8mm scale model with the full size 4mm version.
The following shots allow a comparison between the two, although the 4mm model still requires some detail finishing, including the white cab roofs.
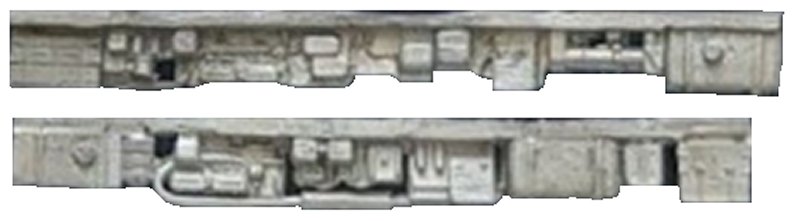
The underframe detail for the motor cars is formed from resin castings, and lack detail. This is how the two sides appear after some key detail has been picked out. The upper image shows the fuel tank to the right (front, cab end), the lower one with the fuel tank to the left.


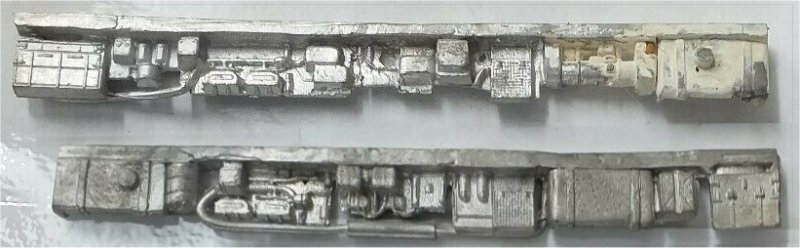
This is how it compares to the Trix version, with the fuel tank to the right in the upper image, and to the left in the lower one.


Modern Traction Kits (MTK) had one of the most extensive range of DMU kits, offering both a Class 124 and a Class 123 kit. This is what their offering looked like, again with the fuel tank to the right in the upper image.
Modern Traction Kits (MTK) underframe castings for the Class 123 DMC.
The well-known plans in the popular 'A Pictorial Record of British Railways Diesel Multiple Units' by Brian Golding, published by Cheona Publications show further variations.


And now another set of drawings, this time from PDH Drawings (P. D.Hulls) 'DieselMultiple Units Volume 4 Classes 124 to 131' and drafted in July 2012.
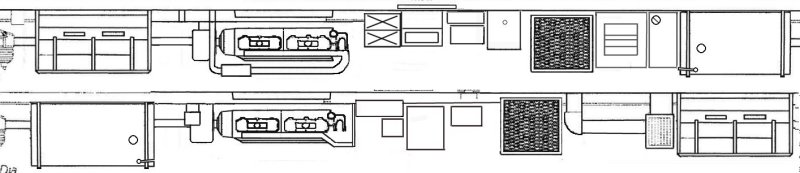
It is immediately apparent that there is little agreement as to the actual arrangement of the various elements making up the power-car underframe between the various offerings. There is a lack of quality photographs of the underframe arrangements of the DMCs and MBSKs either when being built at Swindon or in service.
This rather poorly defined shot shows the second man's side, with the fuel tank (and the cab) to the right. The lower shot show 60% of the driver's side (cab to the left) - the object to the right of the image is the buffer of the unit standing on the adjacent track.
Class 123 - secondman's side (both)

Class 124 - driver's side

Study of the various commercial offerings with the drawings, and the prototype shots suggests that the PDH Drawings are closest, with neither the MTK or Silver Fox offerings resembling the actual prototype. The Trix item may be more accurate, but fails by being virtually a two-dimensional rendering, with obvious gaps between the various elements.
16 November 2019
This conversion has utilised the Hornby Class 110 bogie, although the Swindon DMU bogie differed in detail. A set of Dapol Class 124 bogies was obtained from eBay. Although the Dapol/Trix model used an odd-ball 3.8mm scale, the bogies were correct for 4mm. A pair were worked up for fitting under one of the the Silver Fox/Hornby cars to gauge whether fitting these to the full set was justified.
4mm scale Class 124: comparison shot showing Trix/Dapol Swindon bogie compared to a Hornby Class 110 bogie.

Trix Swindon Class 124 bogie (left) compared to Hornby Class 110 (right)
It is noticeable how the the Hornby bogie has better executed relief and greater depth to the moulding, compared to the Trix item which is less well defined and much shallower. There seems to be a problem with the Trix plastic moulding process, as previously noted, the Trix engine underframe block is almost 2D in character. However Trix did correctly represent the arrangements below the frame between the axleboxes. It had been the intention to re-bogie the Silver Fox unit but the superior Hornby moulding has led to a rethink.
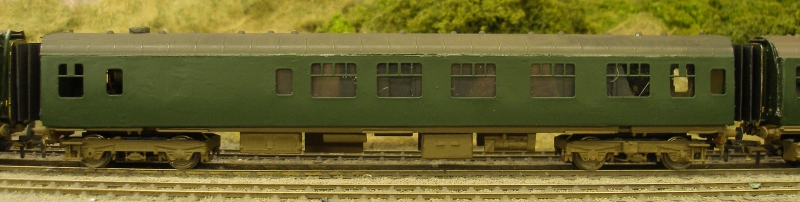
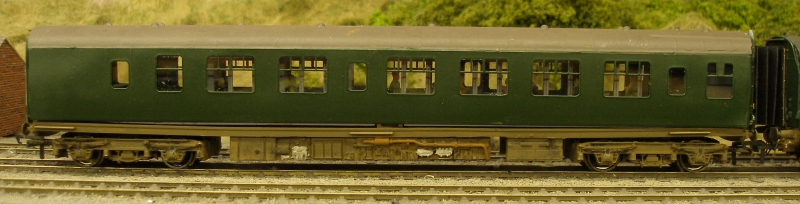
One of the things that marked the Class 124s out from lesser DMUs was the ful set of curtains that they were equipped with.
When built, and in green livery, the colour was quoted as 'Repton Green', but when painted in blue/grey. the curtains were swapped for the standard orange.
I considered buying the cast whitemetal type, but these were relatively expensive, required painting, would add weight and would be fiddly to fit.
The solution was to photograph actual curtains (!), Photoshop them to achieve the desired medium rich green (based on the green uniform of Repton School, obviously) and then produced artwork that could be printed out for each vehicle type.
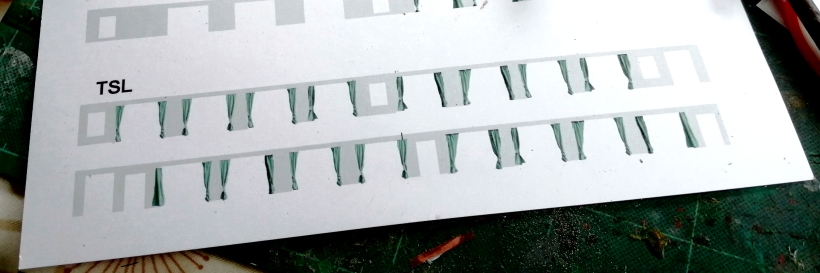
The curtains are then cut round using a scalpel.
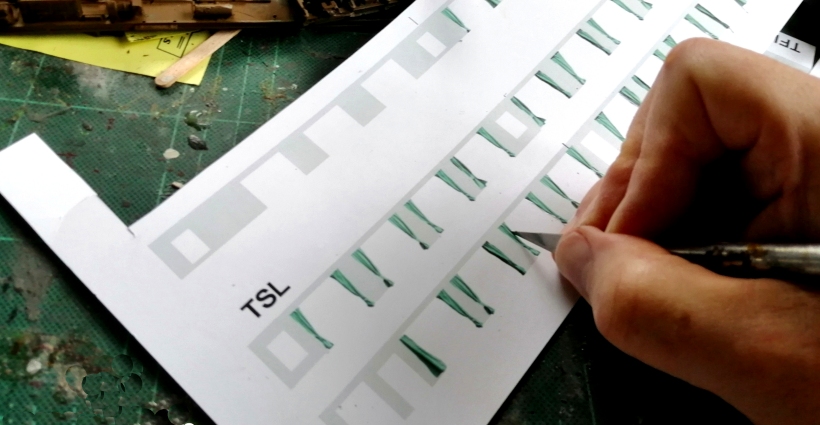
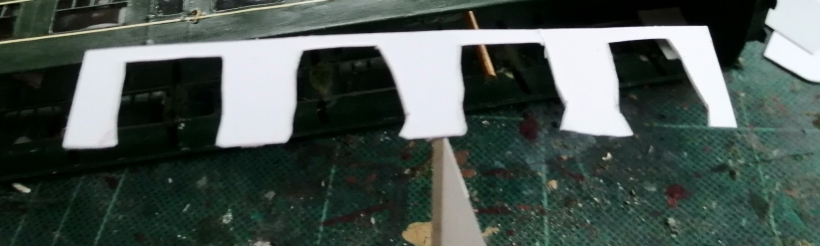
Having cut out the sheet, it was laid on the side of the coach to check the spacing.
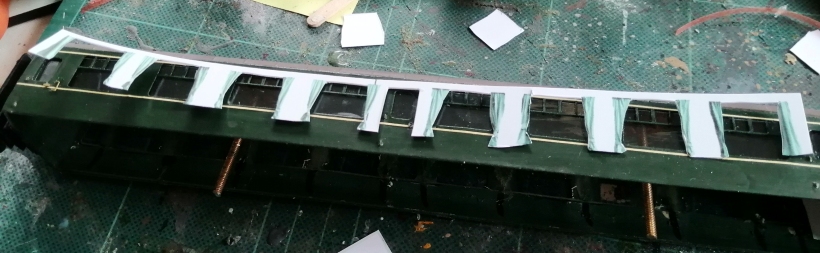
For ease of fixing, the card was cut into two sections and then red double sided tape affixed to the areas between the window pillars.
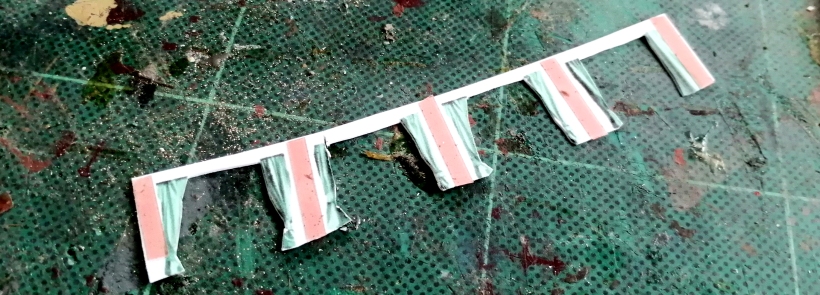
The 'red' protective film was gently picked off with the scalpel, and then affixed to the end of the scalpel blade so that the 'live' adhesive side can be accurately positioned.
The sheet(s) are pressed down firmly once the optimum spacing has been obtained. As can be seen, to alter the spacing, the connecting rib has been removed between some sets, with the two on the far right hung as self-contained units.
The finished coach side.
I am now going to share what might be the ultimate bodge!
If you have read the preceding notes you will know that the Heljan Class 128 chassis was chosen, primarily because it is such a powerful unit, and wasted under a single Parcels Van (my Class 128 can comfortable tow 19 bogie parcels vans: far beyond what the prototype was ever asked to do).
It is worth noting that Replica do a powered chassis with the chassis block designed to be below the window line. There were two types, 57' and 64', but the latter is now out of stock. However, the 57' version was used to power the Trix Class 124, as the 64' type would have been too long for a 3.8mm scale model, and it was thought it would be easier to lengthen a 57' type anyway. In fact, the Replica chassis, once run in, is very good and would have coped with the 4mm model.
The other option considered was the chassis from the Dapol bubble cars, but at the time these were new models fetching a premium at the time, so were not considered for this project.
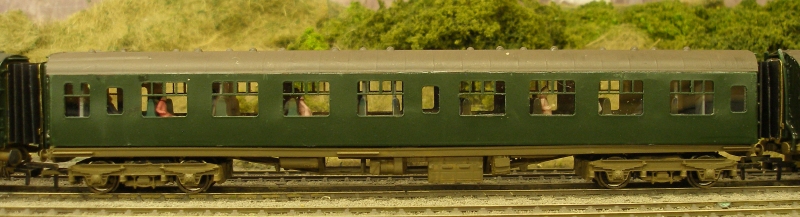
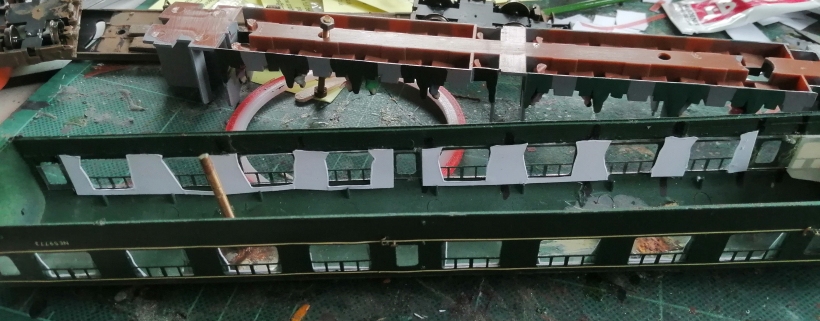
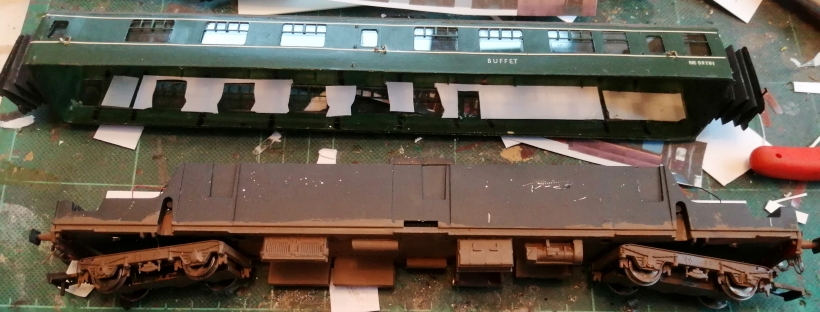
The idea was to place the body over the chassis, with the curtains fitted, so in part obscuring the black chassis block filling the interior.
Let's just say it didn't really convince, as the eye subconsciously noted that the buffet car was 'different' in some way.
Recently there was an article in 'Model Railway Journal' where somebody had created 2D figures in period dress to populate his carriages. In this was the germ of an idea. Having produced the artwork for the curtains, a very pleasant evening was spent scouring the Internet for pictures of Mark 1 interiors to create an 'interior' view that could be stuck to the chassis block so that it appeared in the window and door apertures to mimic the view through the carriage. As te artwork for the curtains was to hand, there was already a correctly dimensioned piece of art onto which could be pasted the graphics.
The image below shows the Heljan chassis on the bench, with the buffet car body aligned ready to slide onto it, and with the curtains already hung.
With the body used to guide the positioning of the interior overlay, a piece of red double sided tape was affixed to the chassis block and then the overlay carefully pressed down.
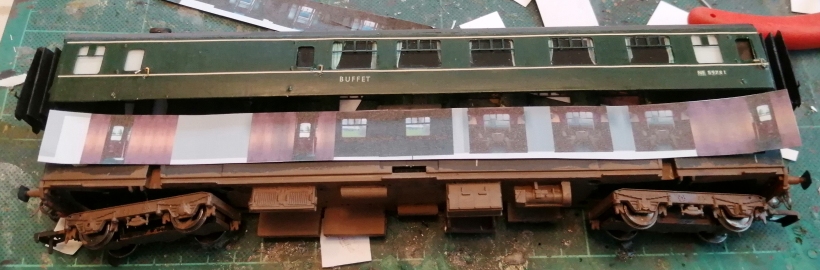
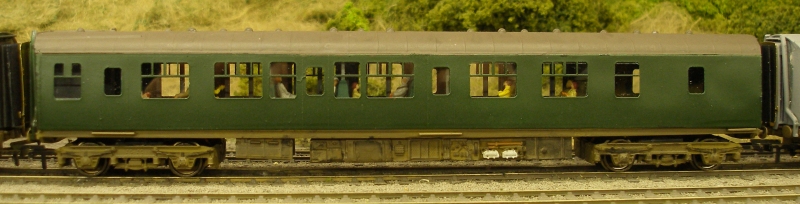
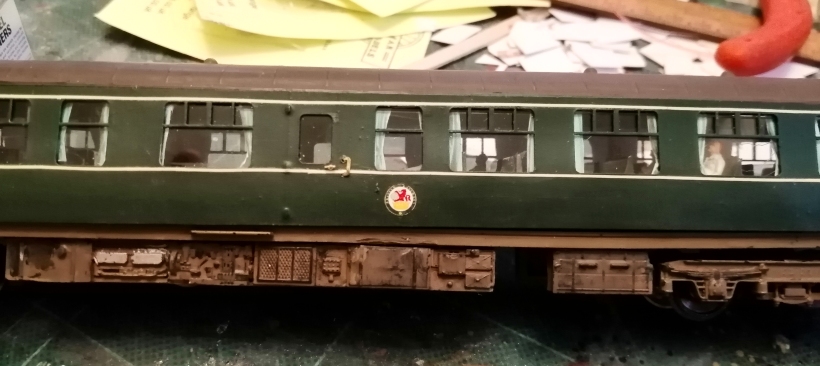
Finally, the finished vehicle!
Does it work, and have I got away with it?
It certain looks much better than with just the bare chassis block visible through the windows. One thing I did find was the images did need considerable toning down to match the regular vehicles in the train. Basically model carriage interiors are quite dark, and the overlay was adjusted accordingly.

15 February 2022

Copyright J K Wallace, t/a 'Hall Royd Junction' 2013-2023 email: Hall Royd Junction
7 Portobello Close, Chesham, Bucks. HP5 2PL, UK
tel: +44 (0)7513 412880