
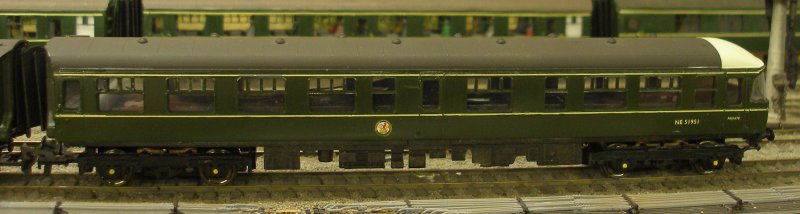
Trix Class 124
eBay can be a thundering nuisance.
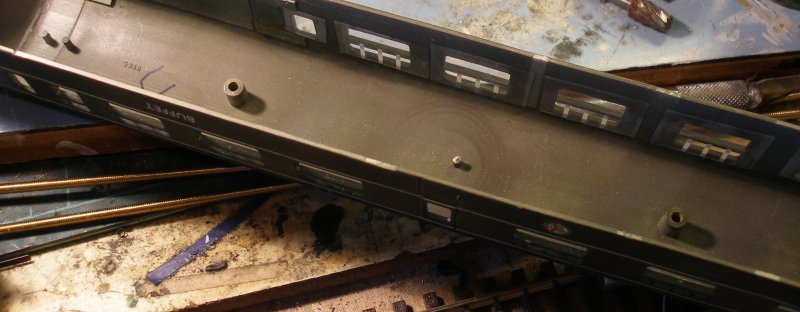
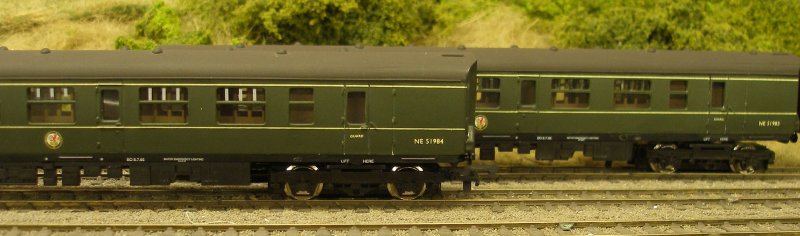
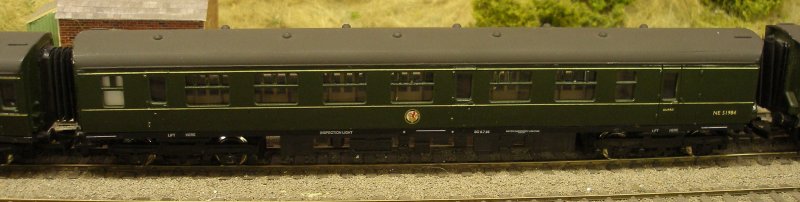
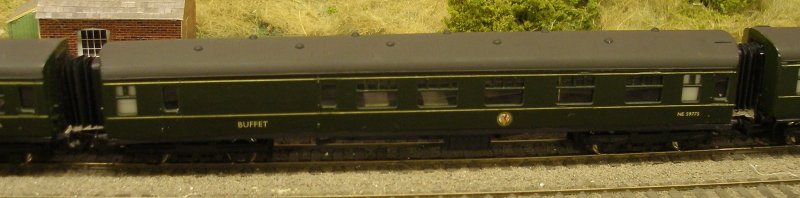
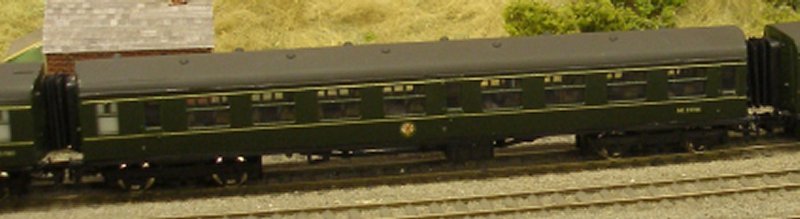
I didn't really want a Trix Class 124 InterCity DMU as it is dimensionally compromised, and Trix (and successors Lilliput and Dapol) only made the Driving Motor cars. Trix attempted to bridge the gap with their standard BR Mark 1s painted in DMU green (so two Motor Brake Corridor Seconds (MBSLs); Trailer First Buffet (TFLRB) and the Trailer Open Second (TSL).
This was unsatisfactory for a number of reasons. As well as being just plain wrong, the windows on the loco-hauled Mark 1 are larger than their DMU equivalents; Trix shipped the coaches with Commonwealth bogies; and the layout of the coaches varied significantly from the prototype vehicles. Yet despite these major faults, the original Trix intermediate vehicles are highly collectable!
However, a complete and accurate (but unfinished) 6-car set turned up on eBay, all fashioned from Dapol body shells. This is the only accurate rendering using Trix shells I have seen, and I put in a modest bid, not expecting to win it, but at least thinking I should make an effort.
And this is what I acquired for £88.
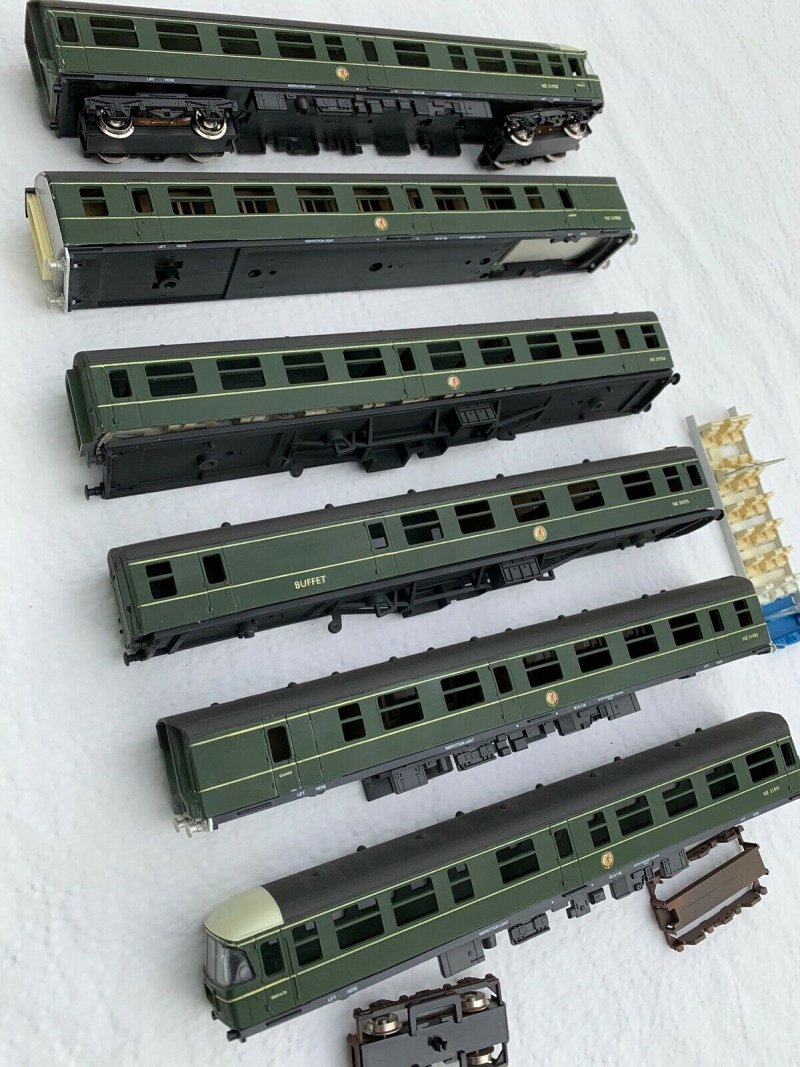
The modeller responsible for this outstanding effort is David Bateman, who undertook this work whilst posted out in Iran.
Parts not supplied were:
1. glazing
2. corridor connections (working or otherwise)
3. some buffers
4. buck eye and screw couplings for the ends of the set
5. couplings for the intermediate vehicles
6. power bogies
7. replacement wheels for the non-powered bogies
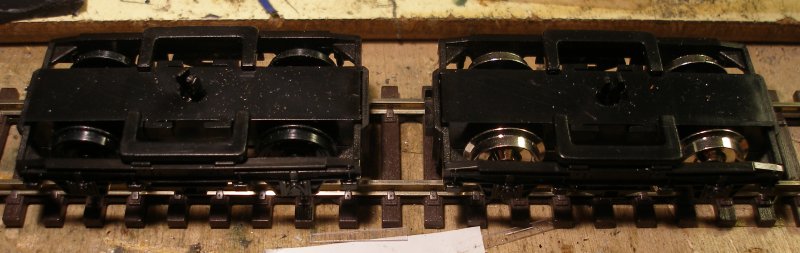
The Trix/Dapol wheel flanges looked rather deep, and as I am not a fan of shiny wheels, a set of Gibson 4009 DMU wheels were purchased.
eBay is also a remarkable resource, and glazing for the Trix unit and the Trix PECO-style couplings were quickly sourced. David had used MJT retracted BR buffers for the some of the coaches, and a pack of these, together with MJT buck eye couplings was ordered from Dart Castings. I wanted flexible corridor connections, but the 4mm BR-type were too large, so a set of 4mm LMS ones have been used instead. It is not clear why the LMS ones seem markedly smaller that the BR type but crucially they fit the Trix body.
That just left the small problem of the power bogies. The Trix Class 124 features an odd - if not bizarre - mix of scales in the model. The buffer height, bogie wheel base and body width are all 4mm scale. But the body length and height are to 3.8mm scale. This means that any 4mm proprietary motor bogie can be used, but it is more of a challenge if a double power bogie configuration is required. BR had two vehicle lengths: 64 and 57 feet. The Class 123 and 124s were 64 foot long, whereas the majority of DMU types were 57 feet. The Trix vehicle helpfully scales out at around the 61 foot mark!
The double-power bogie chassis that are currently available are the Heljan Class 129 parcels unit and the Dapol Class 121/122 and both are 64 foot vehicles, so would need shortening to fit. However Replica Railways make a 57 foot unit which features two motors, and so can more readily cut in half and lengthened. This seemed to be the best way to proceed.
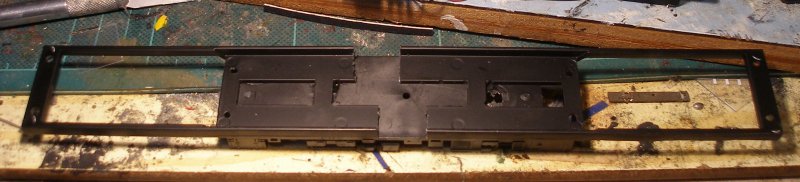
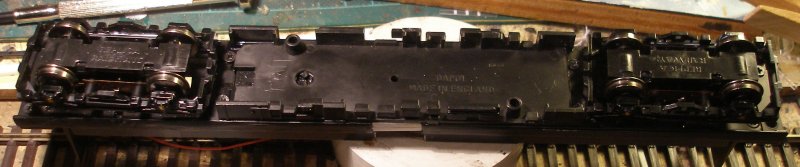
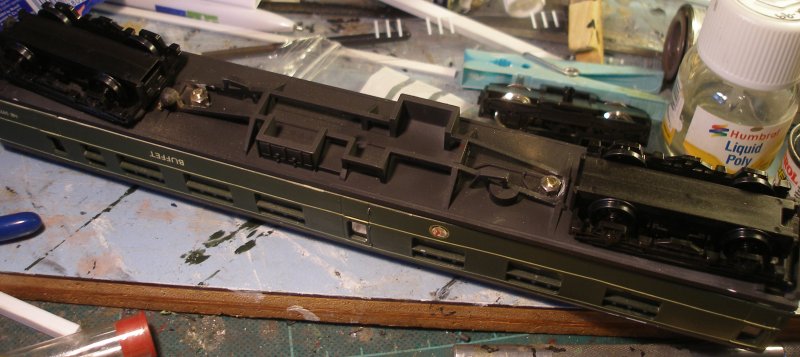
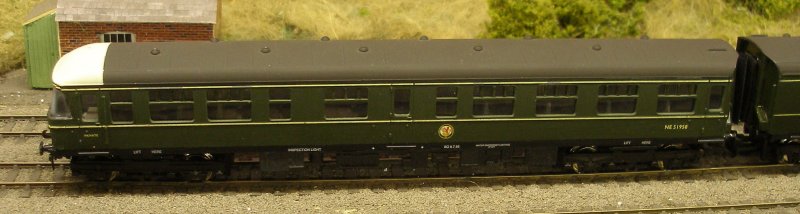
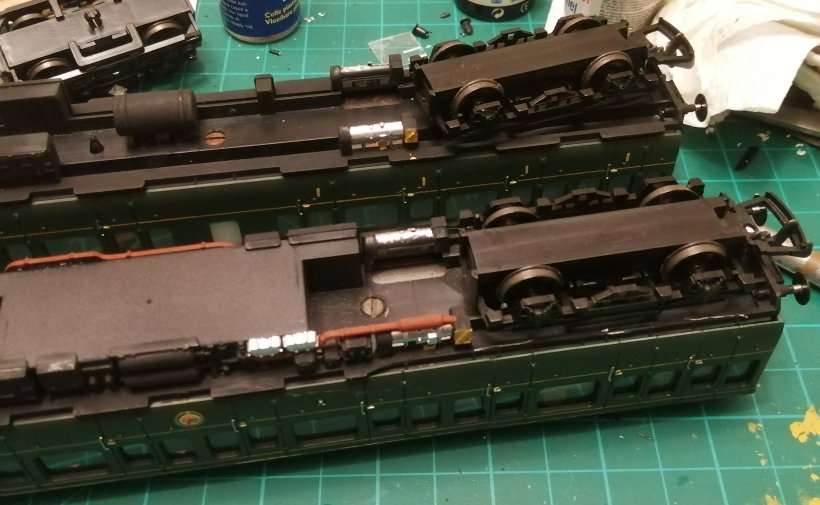
Model-wise, the prototype had integral bodies and therefore didn't require underframe trussing. But, as can seen on the photos above, the model employs standard Trix Mark 1 underframes for the Trailer First Buffet (TFLRB) and the Trailer Open Second (TSL), and I might opt to leave this as supplied.
29 October 2019
The first job was to sort out the glazing. In the original Trix scheme of things clear moulded glazing strips were provided, but these can only be sourced from old, discarded bodies. However help is on hand from Dave of trixtrains-wba-online on eBay who provides a glazing alternative.
This consists of clear plastic sheet cut into strips with three small vertical bands printed on to represent the standard BR sliding quarter light windows. This is glossy on the printed side and more subdued on the reverse. I decided to mount these with the printed side on the inside (so the reverse of what was intended) as they should really be green. I also had an idea for converting these into 'green' bars, and thought having the acetate on the outside might facilitate this process in due course. The sheets for the Driving Motor Open Composites (DMC) fit without modification, but need extensive cutting to fit the other cars. Technically, only the DMCs had the BR logo, but its a nice feature on the other coaches, so I won't be removing them. Note also that the MJT 'working' corridor bellows have been fitted to one end of each coach. The white glazed toilet windows have been created with white insulation tape applied to the inner surface.
It seemed prudent to focus on the power unit early in the build process. Gareth at Replica provided detailed instructions on how to lengthen the chassis - in his worked case, it is the Lima GWR 'banana' diesel unit that has been converted.
The Trix underframe comes with neatly printed lettering, and first thoughts were to modify the original underframe, as per the Replica instructions. This involves cutting the die-cast inner frame (that supports the motors and gear towers) in half, and them mounting them on the original Trix underframe (with holes cut for the gear towers).
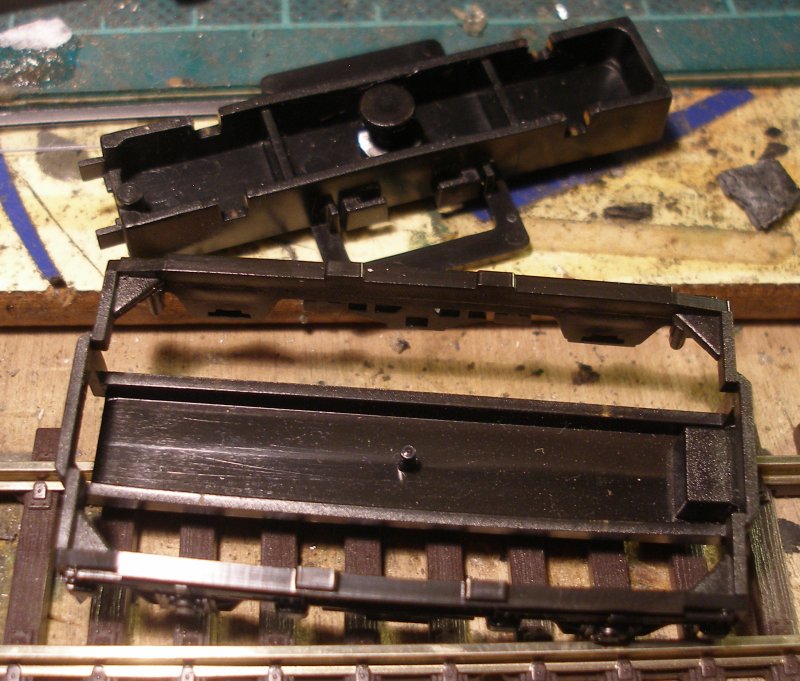
Although a 'success' in that it all went back together (and worked!), the ride height of the buffers was noticeably lower than previously. This was due to the thicker floor employed by Trix. The photo below shows the chassis dismantled again. The diecast unit is in the background. The modified Trix unit is in the centre of the image (an attempt to remove the undergear has failed, having been glued rather firmly in place). In the foreground is the Replica outer plastic frame, now cut so that it can be lengthened.
Moving on, a replacement Dapol undergear frame has now been glued in place on the extended Replica frame. Note how the frame has been cut back so that the four screw holes can be accessed.
For clarity, here is the underside of the diecast inner frame. This was supplied in a uniform black but the glue used in the first effort has lifted the paint. The residual glue was removed before the frame was re-united with the Replica plastic outer frame.
Bit of a leap forward here. The two Replica frames have been reunited, and the four securing screws reinserted. Just visible underneath are the two cab partitions that have been refitted. Finally, the Trix bogie frames have been glued to the Replica 'blanks'. To get a firm fit, shims of 10 thou plasticard were first glued to the Replica 'blanks' before the Trix frames were slid over the bogie and glued in place. The Trix bogie frames are handed, and passive provision has been made for fitting Trix PECO-style couplings by ensuring the horizontal cut-out in the bogie stretcher bar is facing outwards.
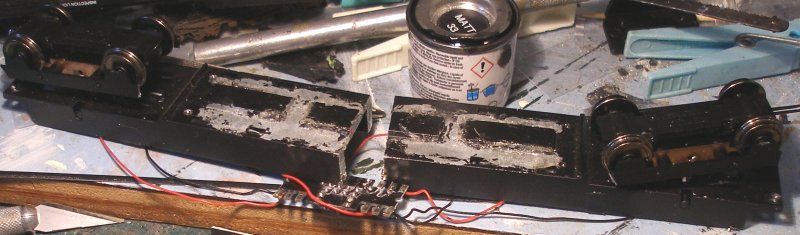
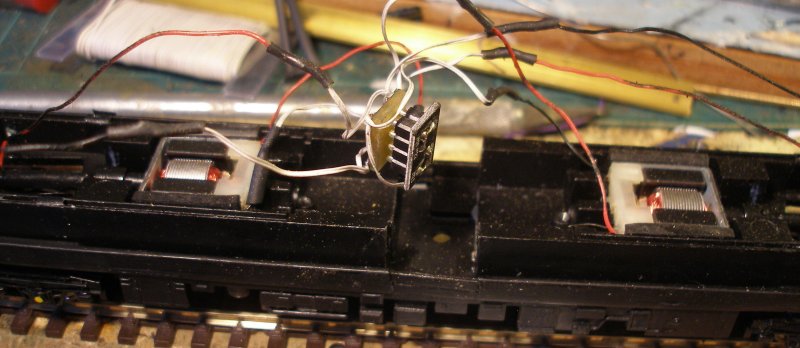
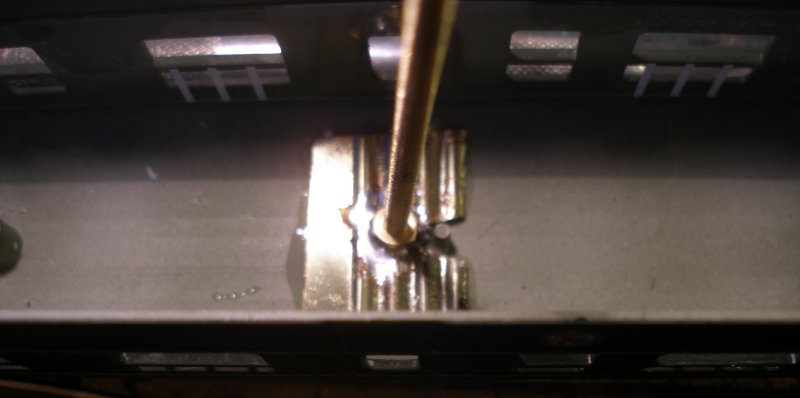
The Replica instructions suggest that the chassis is fully dismantled before cutting, but this isn't strictly necessary. However, the circuit board is vulnerable, and for those tempted to remove it (or need to reattach wires that become detached) here is a guide to what the various tags do.
1. right hand track pick-up (front bogie)
2. common (+)
3. function output B
4. function output B
5. common (+)
6. right hand track pick-up (rear bogie)
7. left hand track pick-up (front bogie)
8. farside right and left hand motor feed (red and black wires)
9. function output A
10. function output A
11.nearside right and left hand motor feed (red and black wires)
12.left hand track pick-up (front bogie)
29 October 2019
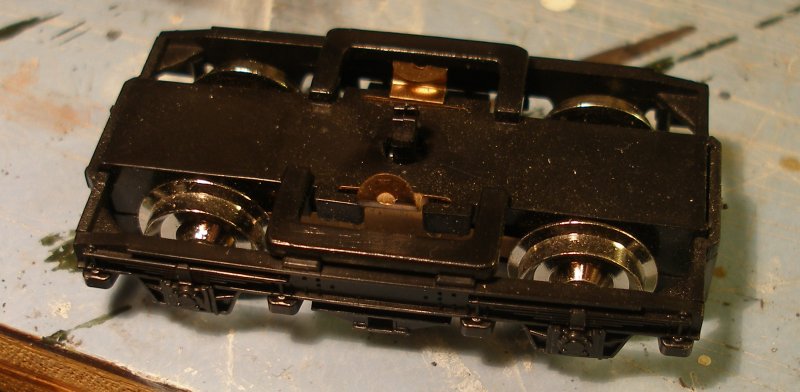
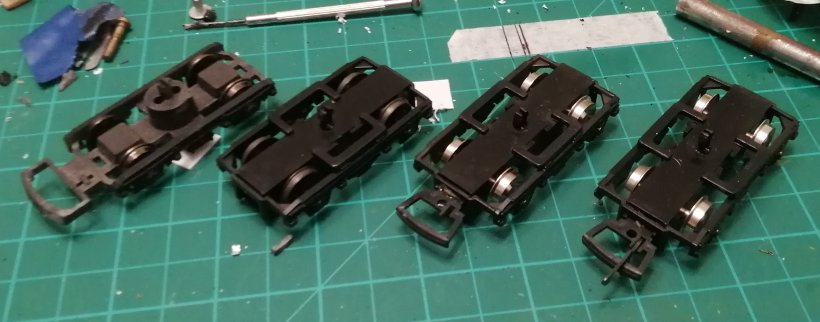
I had previously bought an original Trix trailer to compare with my 4mm Sliver Fox unit. It was apparent that Dapol had made a number of significant changes to the original Trix model, and in particular to the bogies.
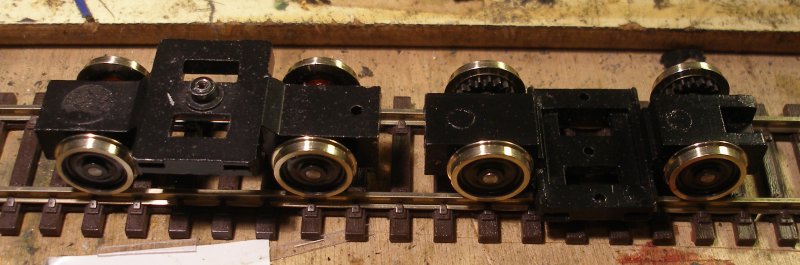
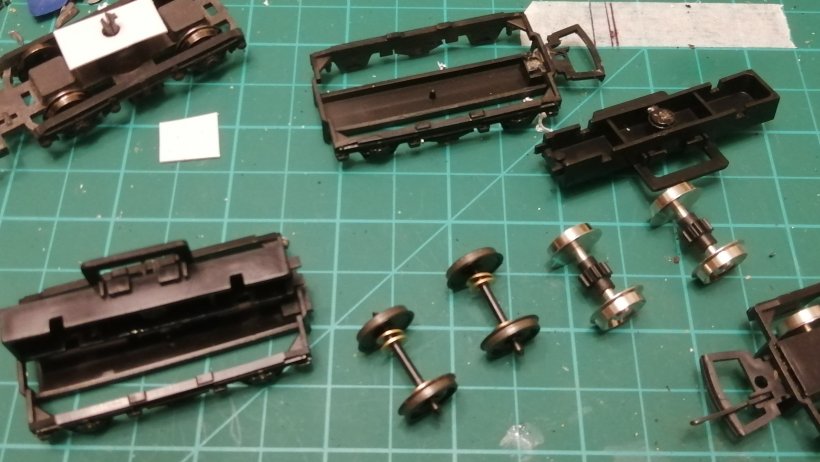
The Trix bogie had a metal inner frame, with axle holes drilled through the block. These original bogies do not roll very well, made worse by the fitting of a stiff set of pick-ups on both the motored and un-motored cars. I did attempt to improve the running of these bogies by removing the pick-ups and replacing the wheels with a set of spare Ultrascale wheels. These had slightly thinner axles, but even with the new wheels, although running was improved, it remained sluggish by modern standards. The problem seems to be that the axle hole runs the full width of the inner frame block, so creating a greater surface area to retard the free turning of the axle.The bogie was fixed to the plastic frame by a spigot which was secured in the underframe by a screw.
The bogie to the left is the right way round, with the spigot that engages with the hole in the underframe uppermost. The right hand bogie shows the underside, and highlights the fact that there is no cut-out in the frame where the axle passes through the block. The wheels are Ultrascale.
In contrast, the Dapol bogie is all plastic, with an inner plastic frame clipping into the plastic outer frame. A separate plastic clip is then a push fit into the hole in the underframe to secure the bogie. The very good news is that this design is free running, and it is a matter of moments to unclip the outer frame, insert the new wheels and clip the frame back together.
The Dapol bogie also features a neat current pick-up which is effective, whilst allowing the wheels to easily rotate. However, these are not required, and were quickly removed (they are a single brass fitting which is a push-fit in a slot on the side of the inner frame).
This image shows the later Dapol all-plastic bogie, complete with its pick-ups.
...and the underside
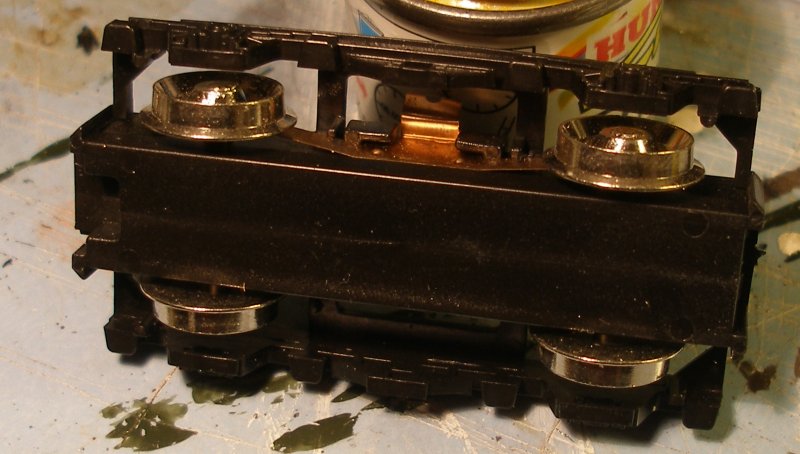
The right hand bogie has the original, shiny wheels with deeper flanges, whilst the left hand one has Alan Gibson wheels.
The underframes supplied featured holes of various for fixing the bogies, and it seemed that the Dapol clip were too short for easy engagement. It was possible to get greater length by shortening the sleeve through which the clip passes on the underside of the inner bogie frame. A piece of plasticard was then glued to the base plate so that lengthened clip easily passes through the hole in the underframe.
The motor bogies also came in for revision. The Trix bogie had a MW-style 5-pole open frame motor perched on top of the front bogie (and mounted in the cab for all to see) whereas Dapol produced a neater design featuring a 'ringfield' motor in the style of a Lima diesel or a Hornby tender drive.
29 October 2019
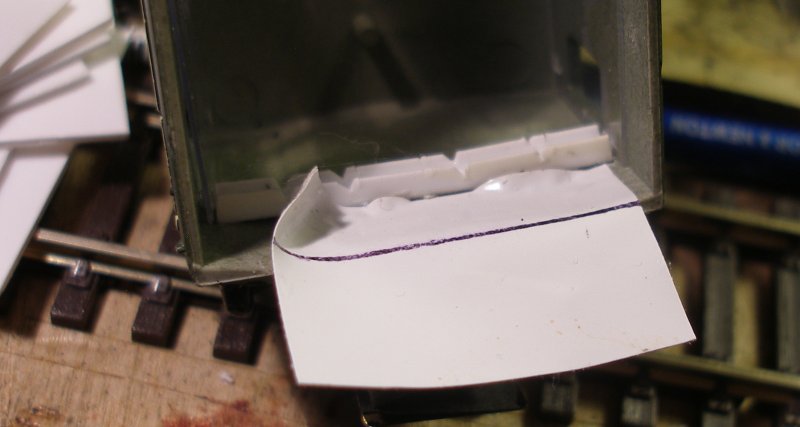
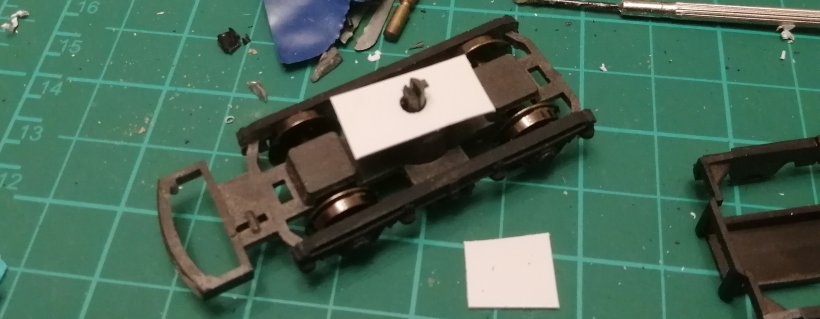
Accurately locating and securing the Replica chassis in the Trix body shell was a major concern. The Trix model employs a lug which engages in a hole in the cab front (why they did this in such an obvious and visible location is another mystery that detracts from an otherwise neat model). I decided to replicate this but was concerned that the lug had to be securely fitted to the Replica chassis. A section was cut from the plastic Replica outer frame, the cab section glued and screwed into position, and then additional pieces of plasticard built-up to make a solid unit. Although the cutting is less than optimal, it fits neatly within the bodyshell.
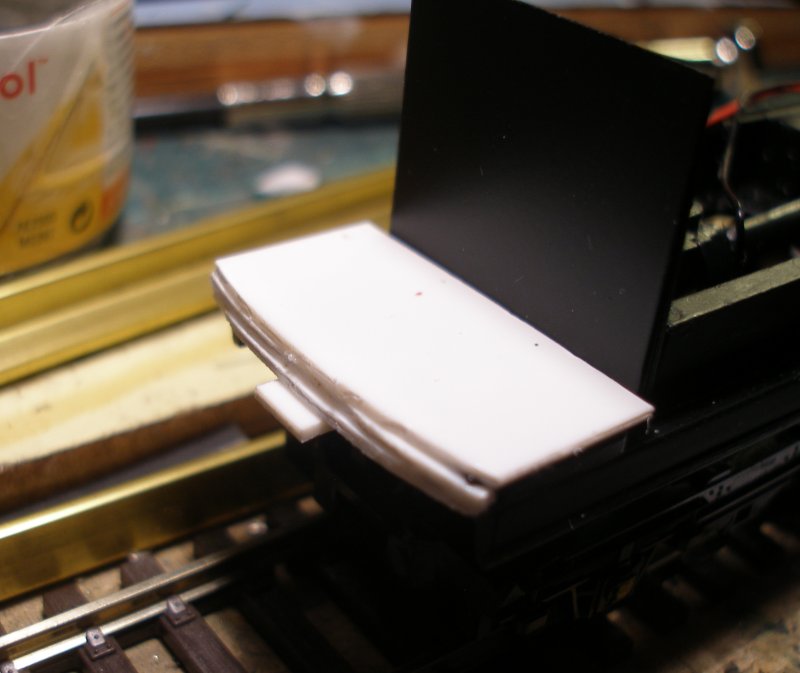
A similar profiled 'floor' to match the Trix body was also glued to the 'cab' piece at the rear end of the car. Remember if doing this conversion, the fuel tank on the underframe is towards the front, and the battery box towards the rear.
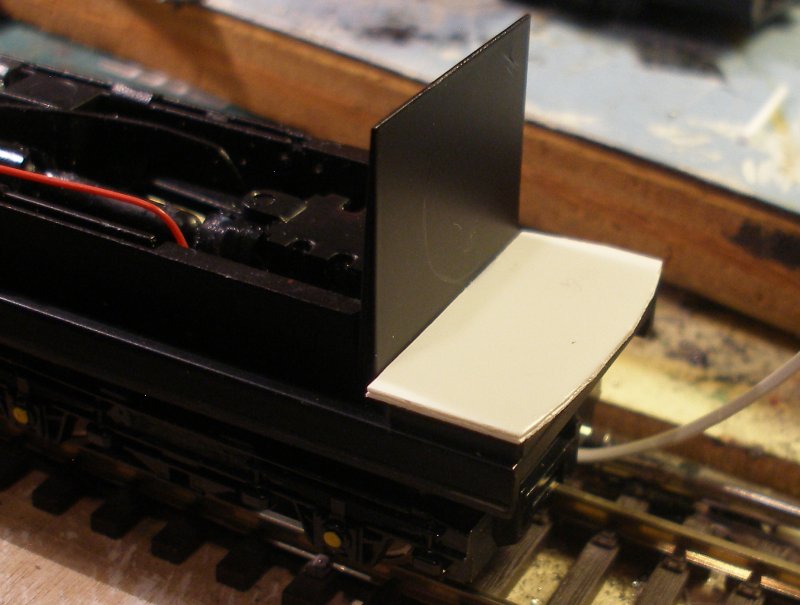
This rear platform needs to rest against a stop glued to the rear bulkhead. The measurement for this was calculated, and then marked on a piece of insulation tape which was then stuck to the bulkhead to allow the 'stop' to be accurately located.
The next step with the underframe is to glue the angle strip to the top of the diecast chassis halves to create a rigid unit. This was a challenge, given the assembled nature of the chassis. Packing pieces were inserted under the underframe until it was level.
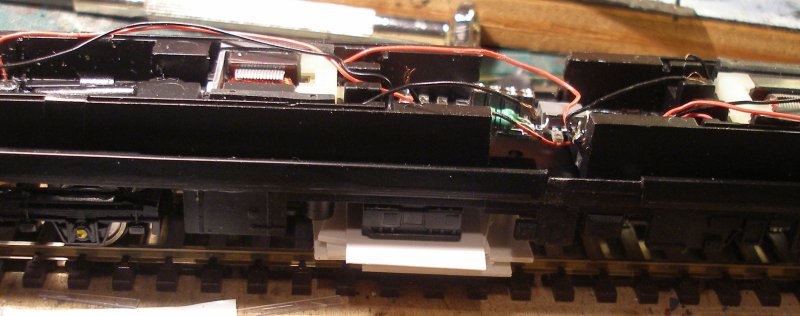
The powered chassis was put to one side to allow the glue to fully harden, before adding the buffer beams and the brass angle to stabilise the two halves of the cut die-cast chassis.
Attention has therefore moved to bolting together the trailer cars.
In the Trix scheme of things each body was secured to the chassis using two 1.25 inch screws. 12 are notionally needed for the six-car set, and I had four. A trawl of eBay revealed a seller with the original Trix screw at a handsome £1.50 each: £18 seemed a lot so another solution was needed. Checking out various Websites revealed that 6 BA 1 inch screws are quite common, but not 1.25 inch.
I was also having a problem using the original screws, as it was very difficult to accurately locate them in the roof aperture (I don't remember having this problem with the original Trix Mark 1s that I had back in the 60s).
The solution adopted was to buy three 12 inch 6BA threaded rods, knowing that I could get 9 x 1.25 inch rods out of each full rod, or a cost per item one third of the original item.
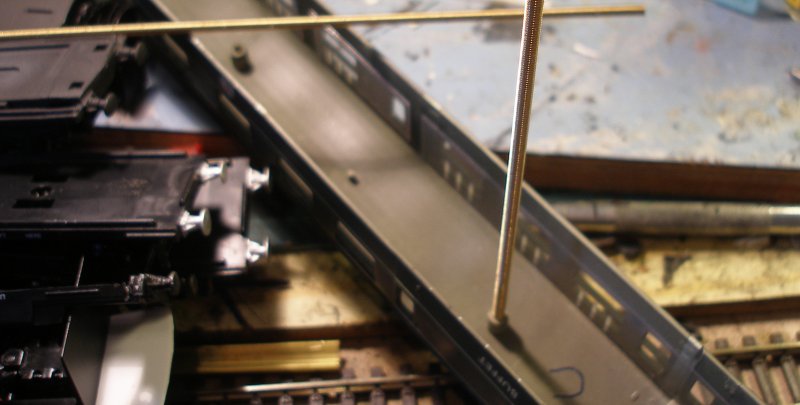
Here is a shot showing the inside of the roof, with the two apertures for the screws.
The first full length rod is screwed into the roof aperture, and then the second, as shown below. I used a pair of mole grips to ensure the rod was firmly screwed in.
The interior was supplied ready-made, and a very neat buffet counter had been grafted on to an original Trix set of compartments.
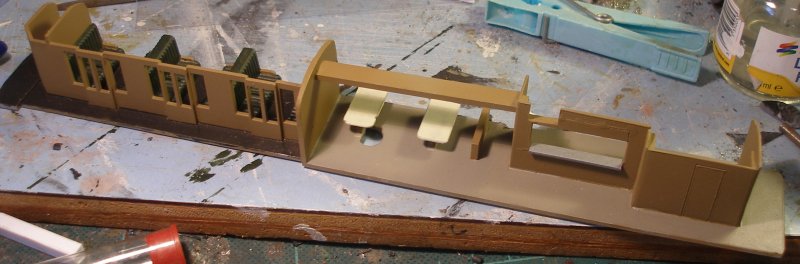
A hole was drilled through the buffet counter to accomodate the screw, and then the seating slid down the threaded rods and into place within the body.
The chassis is now also fed down the rods, and clicked into place. A 6BA nut is screwed down each thread until it can be gently tightened against the underside of the chassis. The Dremel now comes into play and the surplus rod is cut off, ready to be used on the next vehicle. Note that the trussing is still in place.
31 October 2019
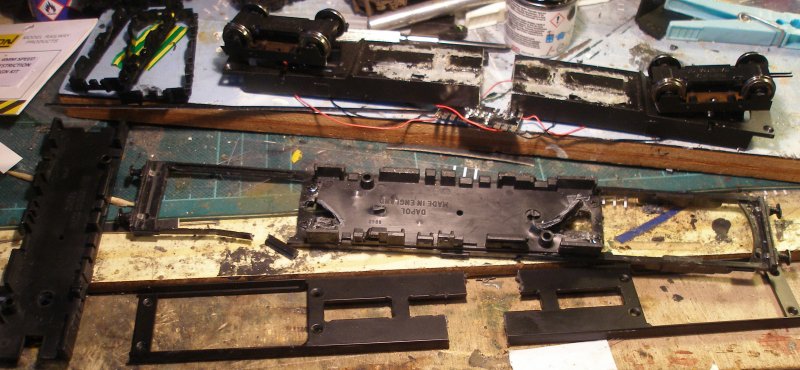
Attention now turned back to the Replica powered chassis. The Replica instructions provided for the Lima GWR car suggested stripping the chassis completely before doctoring it. Looking at the relatively small of cutting required, it opted to do it with the drive trains and electrics in situ. This worked - except two wires did inadvertently get cut. This appeared to be a simple job of soldering the ends together again (ensuring that the solder joints were suitable insulated).
Put back on the bench track on DC (with the blanking plate inserted) it didn't work. Using the Motorist's 12 volt testing screw driver established that the power was present and correct up to one of the motor connections on the circuit board. I think was probably a dry joint or a joint that had suffered when the block was being cut, but attempts to solder it failed, and one the non-DCC blocks on the circuit board started smoking - never a good sign. I therefore replaced the circuit board with a Gaugemaster DCC socket. The wires need lengthening, and shot shows the new wiring and DCC socket installed.
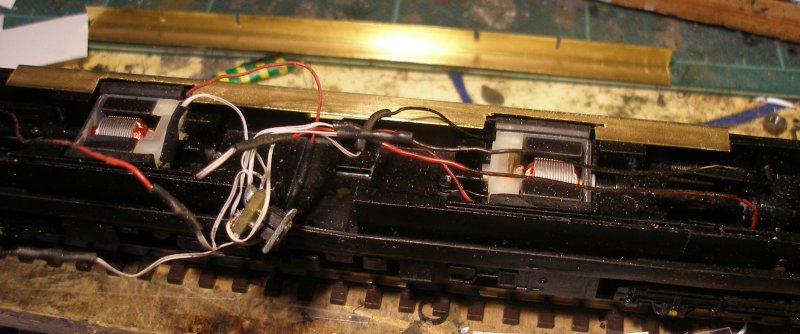
With the wiring now reworked and tested, it was time to add the K&S brass angle. For the avoidance of doubt, the specification was #9882 W: 1/4" (6.35mm), H: 1/4" (6.35mm), T: 1/64" (0.39mm), L: 12" (305mm).
The image below shows the first piece in place, and the second behind awaiting for the cut outs to be completed. Not the greatest piece of metalworking, but note how two cut outs have been created to allow for the rubber padding that surrounds each motor.
With the two brass angles now firmly Araldited in place, it was possible to offer the power chassis up inside the body. The Replica chassis is designed to sit so that the die-cast chassis is below the window line in a 4mm scale coach, and therfore a floor with seat backs and partitions can be added.
It is at this point you can see the problem with the Trix 3.8mm scaling, as the brass angle can be seen just above the window line. There is no way this can be lowered, and the only option is to paint the brass angle black.
Although the body is secured at the front, it was felt desirable to fit a bolt and nut to secure the body to the chassis. A 6BA nut was soldered to piece of tin can, which was then Araldited to the underside of the roof, above the hole in the centre of the underframe module.
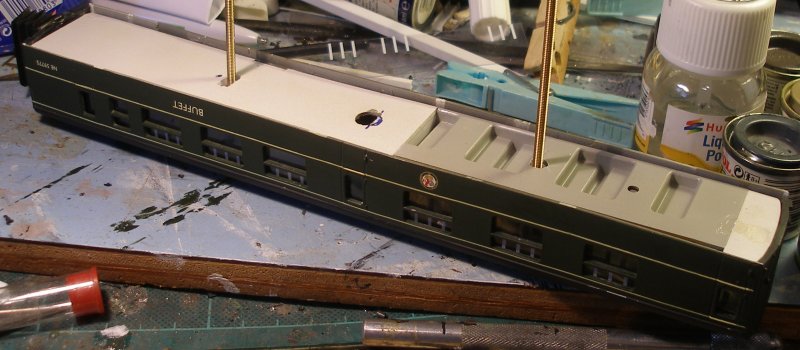
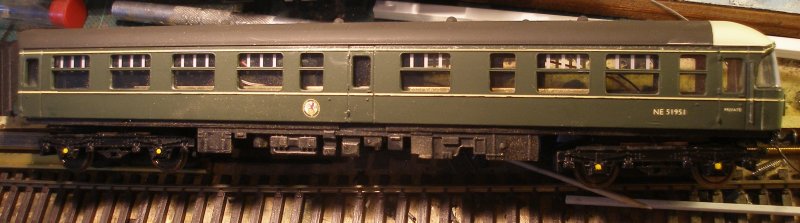
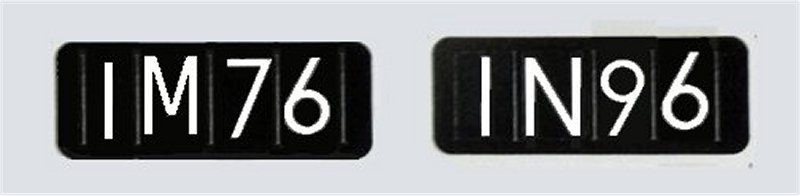
And a first look at the full set. The couplings are still awaited, having ordered the wrong type. The headcode boxes are glazed but not yet populated. These will be '1M76' and '1N96': '1' described the train type, in this case 'Express'. The second character denoted the destination region: 'M' for Midland and 'N' for North Eastern'.
![]()
Earlier reference was made to an idea for improving the rather basic glazing strips currently available from eBay. These are acetate strips with white glazing bars to match the window spacing of the Trix/Dapol DMC cars. These are only available in white and are presumably intended for the blue/grey livery. Trix did produce a glazing strip which featured moulded glazing bars, but these do not appear to available as spares, and because of the Trix 3.8mm scale, there is no effective way of utilising 4mm glazing, as produced by Hornby or Bachmann.
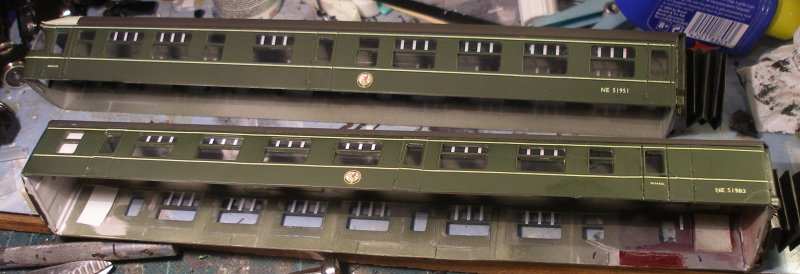
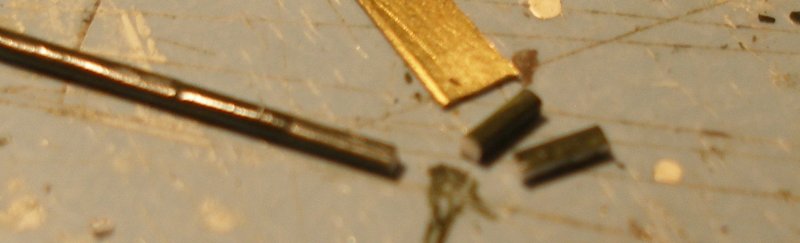
The solution adopted has been to pre-paint 1.00mm x 1.00mm (.040" x .040") Plastruct Styrene Square Rod strip ( Cat. No. MS-40) with Railmatch BR DMU green on three sides, so leaving one side unpainted. This is clearly still rather chunky in appearance, but scales out at 3", and is a good visual match to the horizontal glazing bar provided in the Trix moulding.
There was a piece of old etch lying on the workbench which was exactly the depth of the vertical glazing strips. This was used as a template/cutting edge to cut three short pieces which then lifted into place with the tip of the scalpel. These were carefully prodded and tapped into position until they were vertically and fully covering the pre-printed while strips on the glazing strips previously installed.

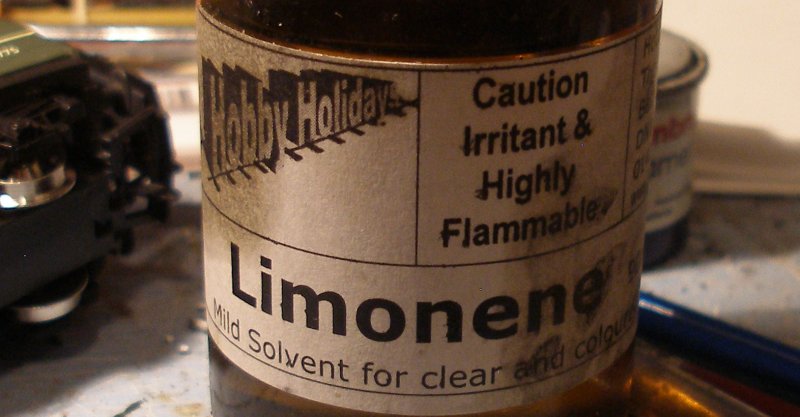
Finally, they are secured in place with Limonene. D-limonene is basically Orange oil. This is a slow-acting styrene solvent which was originally recommended by Geoff Talyor in 'Model Railway Journal' specifically for windows, Geoff suggesting that the solvent did not cloud the window glazing material. It is perfect for this particular task, and is easily applied to the glazing bars. The solvent does not appear to attack the paint, and any that does get on the bodywork can be gently lifted with a tissue. These orange oil type products apparently dry VERY slowly, and some blogs suggest that up to a month should be allowed.
The glazing for the toilet compartments are formed with two vertical green strips applied in the centre of each window.
The original matt finish that the bodyshells arrived in didn't look right. I have recently been struggling to find a satin varnish that dried a) satin and b) didn't show the brush strokes. Even my previously trusty favourite Johnson's floor polish when applied to these bodies dried patchy. The solution has been to revert to an old favourite, the Ronseal solvent-based range. The satin seemed possibly too glossy and a 50/50 mix with the matt produced the desired result.

Finally, some shots of the motorised power car. The top of the die-cast Replica motorised chassis can be seen appearing just above the bottom of the windows; this is a reflection of the 3.8mm scale of the Trix body whereas the Replica chassis was designed to fit within 4mm vehicles. The bogie frames are original Trix ones, and fit neatly on the Replica blank frame plates.
29 November 2019
And there things rested for nearly two years before it was taken out for a spin in the run-up to Christmas 2021.
Not good :-(
With the powered end car propelling the set consistently derailed on the return loop. This, of course, was one of the darkest and most inaccessible locations.
The first suspect was the PECO Code 83 US-style curved point. This was switched out for a standard Streamline OO/HO small radius point. It also looked as if the flexible corridor connections were exerting pressure on the vehicle ends, such that the propelled vehicles were being pushed outwards on the curves. I concluded this might be a weight issue, but the conundrum was that increasing the weight of five vehicles might then be too much for the Replica power car.
The Dapol version of the Trix bogie was also suspect. The photo below shows the original Dapol bogie with its shiny wheels, a Dapol fitted with Romfords, and then on the left, a Lima bogie with replacement wheels from Peter's Spares/
The next photo shows the arrangements for securing the axles. The Dapol Class 124 bogie inner frame is shown standing on its side to illustrate the squared axle slots into which the round (obviously!) axle sits. The original slivered Dapol wheels are next to the replacement Romfords, with their spacer washers to ensure the wheel set did not move from side-to-side.
I was unhappy with the square cornered axle slot, particularly as although the bogies ran freely, they did not compare with the very free running Lima type.
The decision was therefore made to replace the correct Dapol Class 124 Swindon DMU type with the incorrect, but very free running, Lima type.
The issue then was sourcing the replacement bogies, and perhaps rashly I acquired two 3-car Class 117s from eBay, and swapped the bogies over. The final move will be to put the re-bogied Lima units back on eBay.
The boss on the underside of the Dapol/Trix coaches was routered off with the Dremel, and then a square of Plasticard with a hole drilled in it slightly smaller than the Dapol hole in the chassis glued on the upper side of the chassis. The photo below shows the Plasticard square trial fitted to the Lima bogie before being affixed to the chassis.
This just left the matter of attaching the Dapol bogies to the Lima Class 117 cars. There is a boss on the underside of the Dapol bogie which the securing spigot passes through which needs to be Dremelled off. The removal of this boss means that the spigot is now long enough to engage in the holes in the chassis. No further adjustment or packing is required, as the ride height is correct. The photo below shows the Dapol bogies now attached to the Lima Class 117 bodies.
The Lima bogies are a really neat item, and it is a shame that they are narrower than other makes, so require wheels with shorter axles. This is probably something to do with Lima being primarily an HO manufacturer, and the axle length is not a problem in a European model market context.
The final modification was to bring the weight of each car up to a consistent 163 grams.
Was it worth it? A resounding yes, as the 6-car rake now holds the track extremely well at a very high scale speed!
18 December 2021
And finally, here is how it was described on eBay:
RARE CHANCE TO MAKE YOUR OWN BR CLASS 124 TRANS PENNINE 6 - CAR DMU
I’m having a loft clear out and have come across this project that I must have abandoned more than 10 years ago when I changed to 0 Gauge. A lot of work has already been done by me, but needs some more to finish off. It is mainly based on DAPOL parts, which were left over when they reintroduced the H0 LILIPUT/TRIX Twin 2 car unit (driving and trailer car).
I’ve tried to show everything in the photos, so please study carefully. Briefly, the following is included :-
2 x Driving Motor Open Composites (DMC’s). These are standard Dapol bodies on their under frames. One coach is already fitted with Dapol bogies and 2 Dapol bogies are included for the second. No side glazing and no interiors yet, but have included some different coach seating units that could be cannibalised.
2 x Motor Brake Corridor Seconds (MBSL’s), These have been made using spare Dapol driving motor body shells and modified to suit. Have Dapol under frames and fitted with corridor partitions and seating units. 2 Dapol bogies for each coach included. No blazing fitted.
1 x Trailer Open Second (TSL). Again, this has been made using spare Dapol motor body shells, modified to suit. This has a TTR Mk1 coach under frame and is fitted with seating units from the same source. 2 Dapol bogies are included for fitting. No glazing fitted.
1 x Trailer First Buffet (TFLRB). Again, this has been made using spare body shells, modified to suit. This has a TTR Mk1 coach under frame and is fitted with seating. 2 Dapol bogies are included for fitting. No glazing fitted.
As well as all the necessary Dapol bogies mentioned above for each coach, I’m also including 4 seating units from another source to enable seats for the motor cars to be adapted. There are also some small plastic exhaust pipes/silencers for fitting under the under frames of the power cars. There is also a set of drawings for each of the 6 Class 124 coaches as a guide.
PLEASE NOTE THAT THERE ARE NO POWER BOGIES INCLUDED. I did think that I did have some of the correct (and new) Dapol power bogies somewhere, but have not been able to find these anywhere. So, a suitable power bogies will have to be sourced by the Buyer
Will be well packed for posting. Happy bidding.

Copyright J K Wallace, t/a 'Hall Royd Junction' 2013-2023 email: Hall Royd Junction
7 Portobello Close, Chesham, Bucks. HP5 2PL, UK
tel: +44 (0)7513 412880