
Eastwards to Halifax and York
On this page, we look eastwards from Hall Royd Junction.
Photographer Graham Roose; Copyright JK Wallace
BR Class 40 40126 exits Castle Hill Tunnel (171.61 metres) and approaches Millwood Tunnel (213.13 metres) on 26 August 1983
Photographer Graham Roose; Copyright JK Wallace
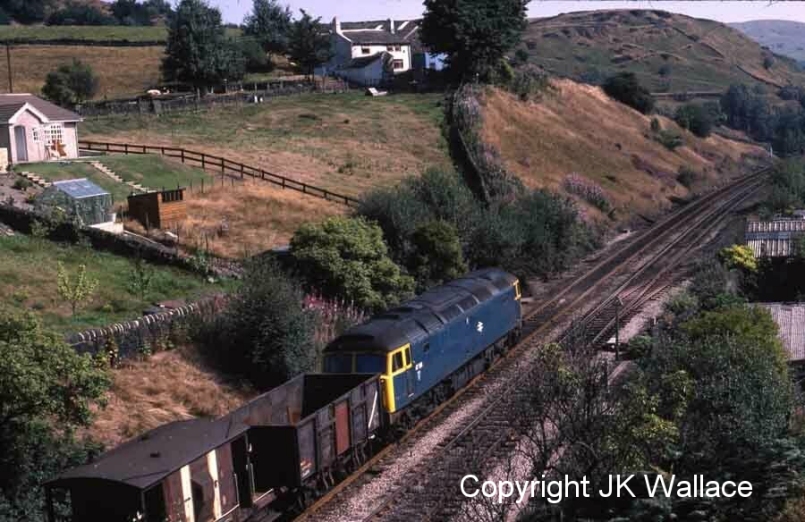
BR Class 47 47136 approaches Horsfield Tunnel on 26 August 1983
Photographer Graham Roose; Copyright JK Wallace
An eastward bound Class 110 approaches Horsfield Tunnel on 26 August 1983.
In the beginning there was the Manchester and Leeds Railway engineered by one George Stephenson which approached Todmorden from the South West via Summit Tunnel, passed through Todmorden in a easterly direction before reaching Hall Royd Junction and Millwood Tunnel. Approaching Todmorden from the North East was the line that created Hall Royd Junction: the line to Copy Pit and Burnley.
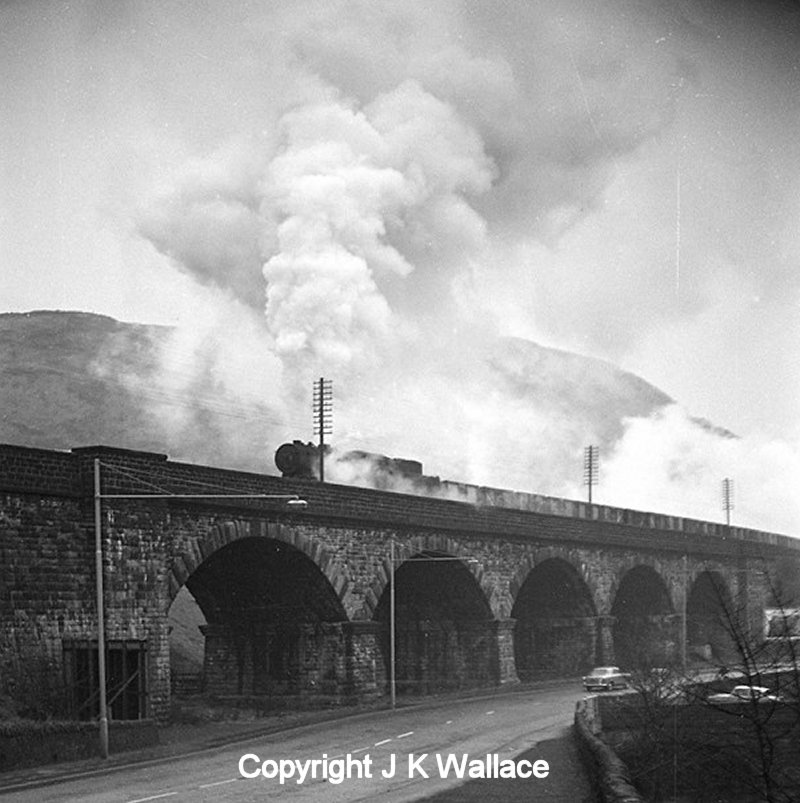
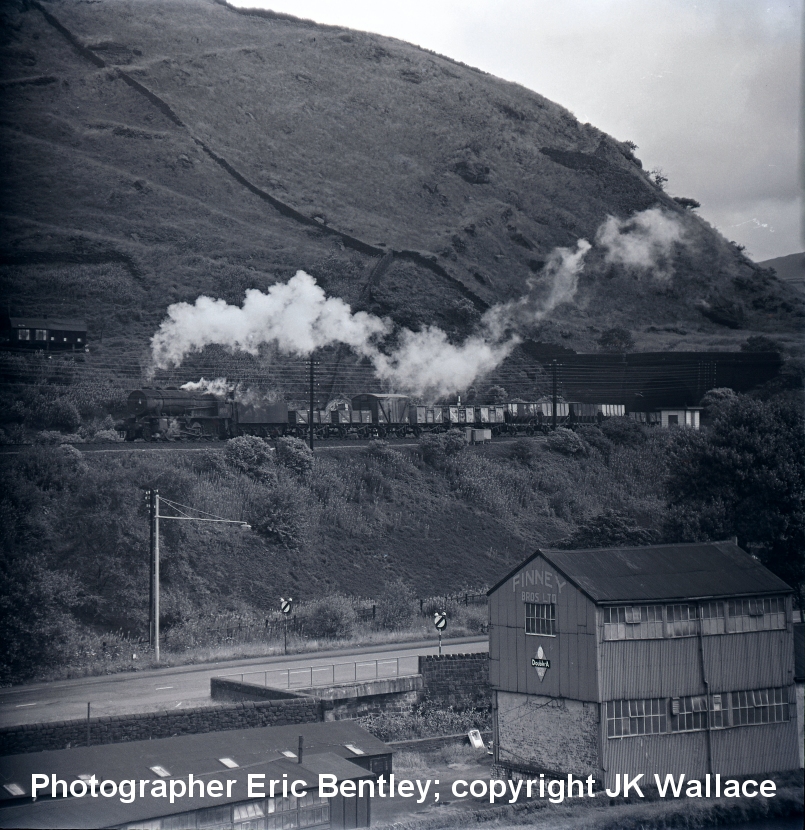
We start our journey eastwards at Lobb Mill viaduct on Saturday 30 July 1966, with 90481 heading a westbound mixed freight.
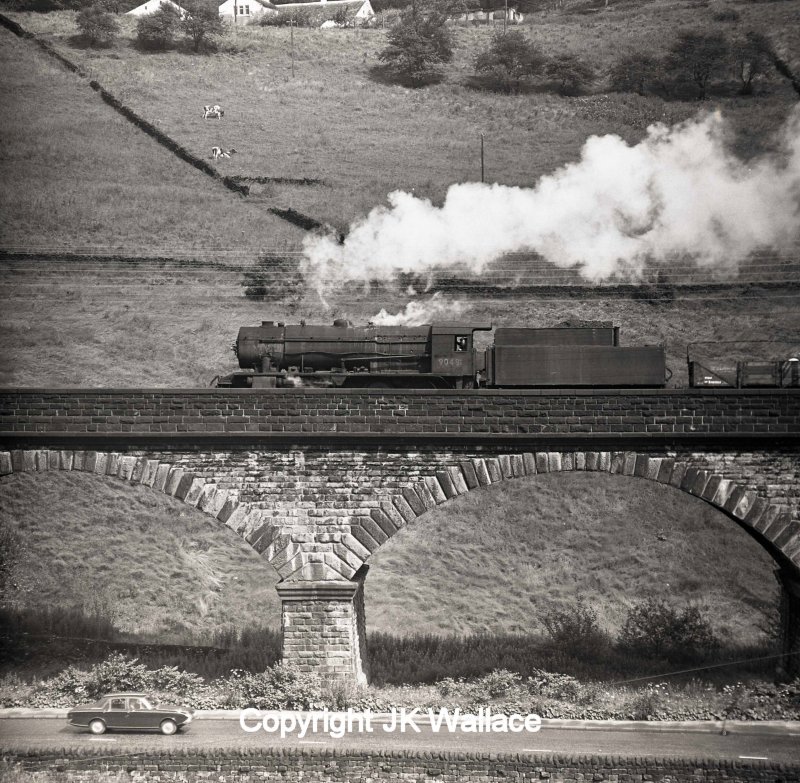
Photographer Eric Bentley, copyright JK Wallace
Copyright JK Wallace
An WD Austerity 2-8-0 heads out of Horsfall Tunnel and onto Lobb Mill Viaduct, Todmorden with a westbound mineral trains c. 1963
Copyright: J K Wallace, all rights reserved 2013
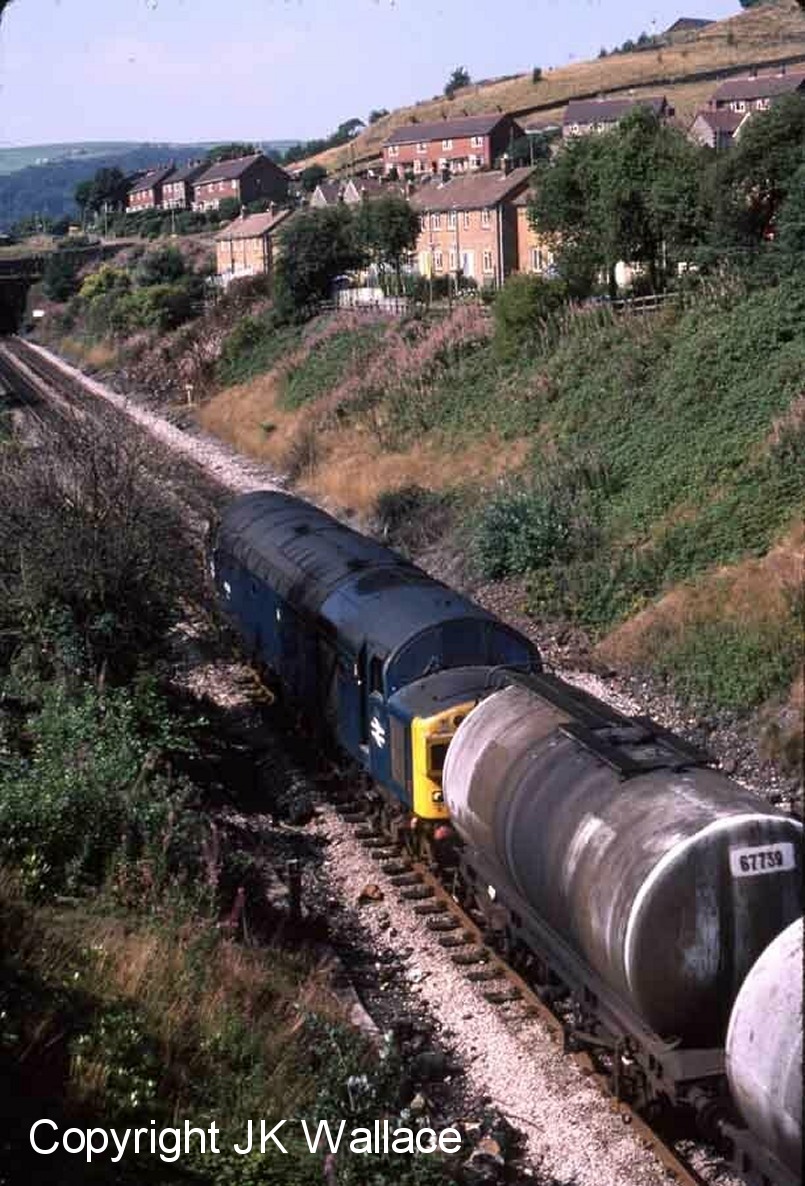
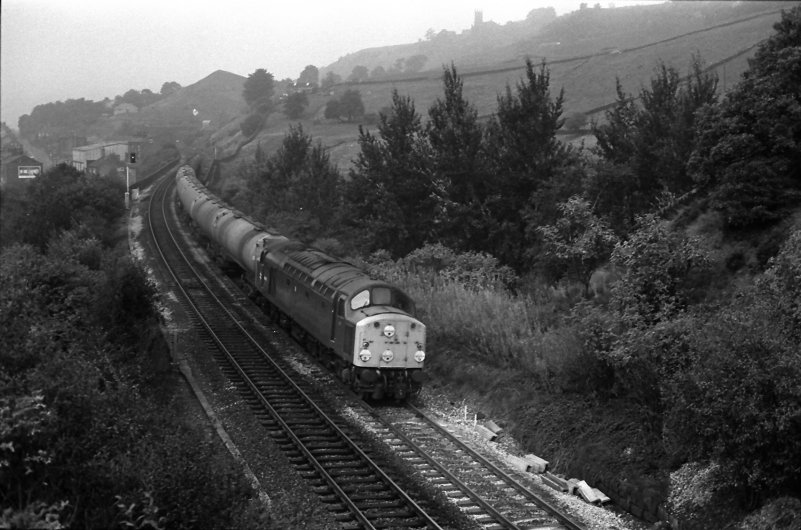
Class 40 40118 at Horsfall Tunnel with east-bound tanks.
Copyright: J K Wallace, all rights reserved 2013
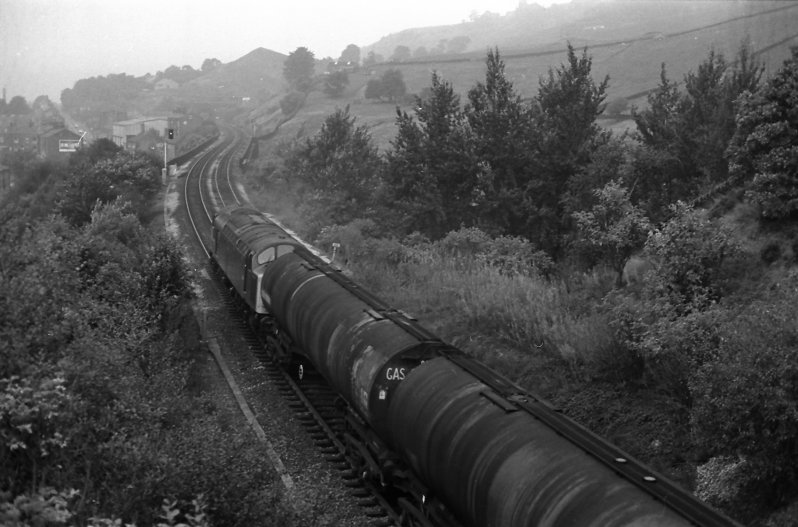
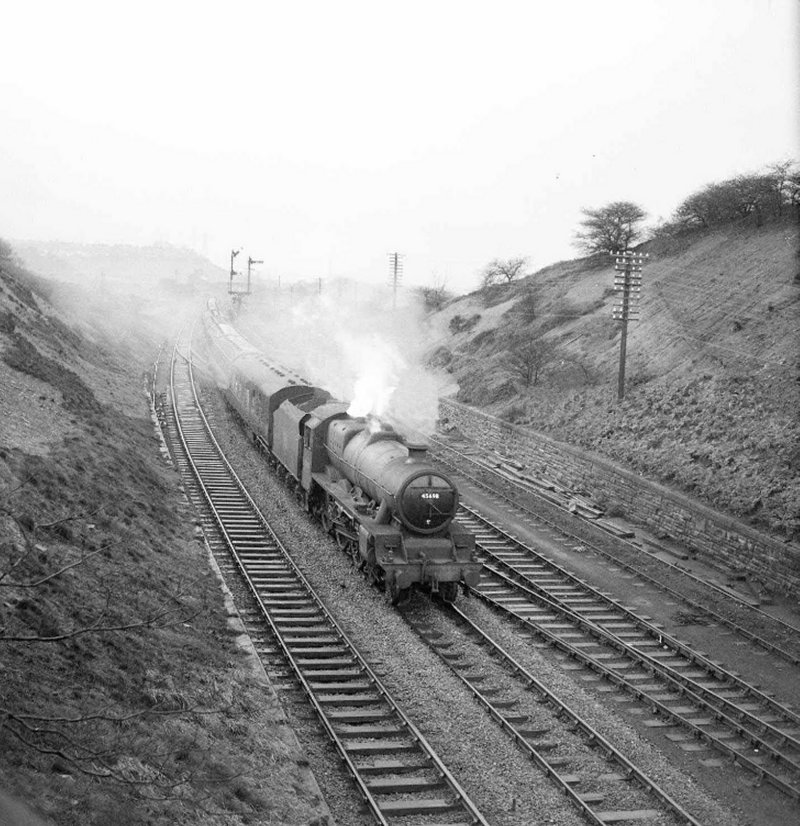
Class 40 40195 heads westwards at Horsfall Tunnel Todmorden on 28 September 1983
Copyright: J K Wallace, all rights reserved 2013
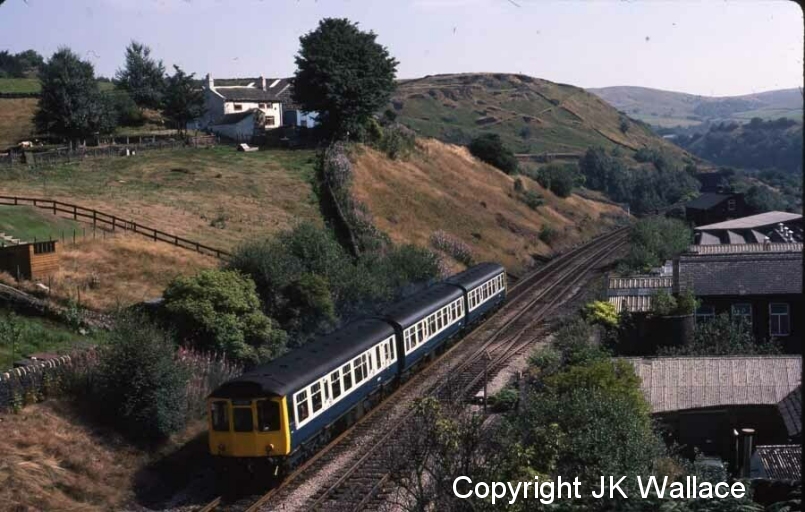
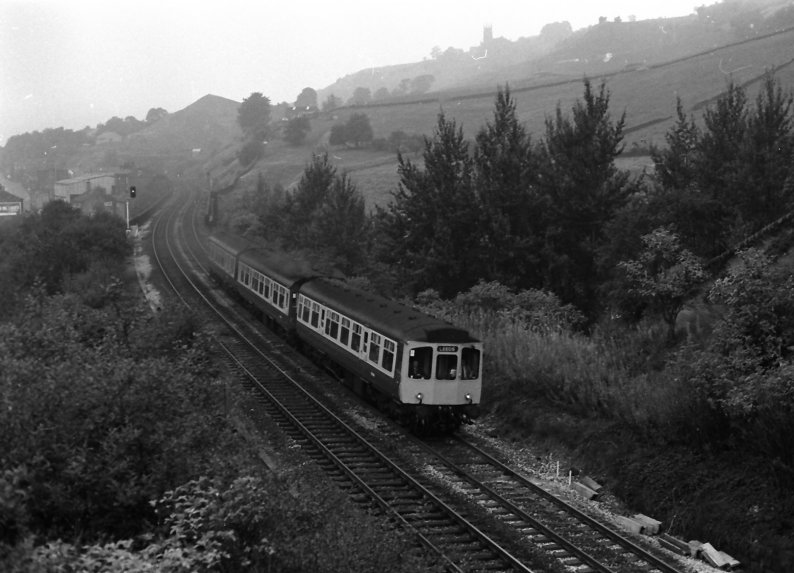
3-car Class 110 DMU in BR blue-and-grey livery at Horsfall Tunnel with an eastbound service on 28 September 1983
Photograher Eric Bentley, copyright JK Wallace
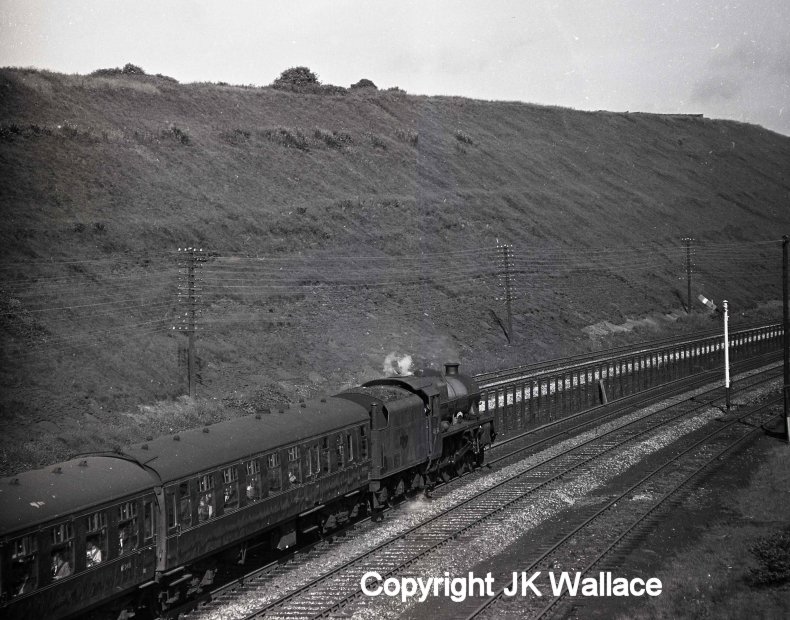
WD 2-8-0 90481 exiting Horsefield Tunnel between Hebden Bridge & Todmorden with a westbound mixed freight 30 July 1966.

Eric Bentley caught Hughes/Fowler 2-6-0 Crab 42942 heading 1X50, the LCGB Tour Liverpool Exchange - Goole at 10.42 on Saturday 8 October 1966 east of Hall Royd Junction after the Black 5 pilot was detached at Stansfield Hall Junction. Eric chased the train, photographing it twice at Manchester Victoria and also as Helmshore (so cutting across country to catch the train here). The date gives a clue as to when the various signalling modifications were carried out at Hall Royd in late 1966. These included the removal of the LNWR-style gantry signal at the western mouth of Millwood Tunnel; along with the bracket guarding the entry to the Up loop beyond Hall Royd road bridge. These were replaced by a colour light signal with two feathers at the eastern entrance to Millwood Tunnel. In the original semaphore era, this in turn was proceeded by a LYR bracket sporting the splitting distants. The colour light signal to the left of the train is therefore of significance, as it may have been newly erected in connection with these works at Hall Royd. Note the newly laid concrete troughing. At the same time, the single slip at the junction was also removed. I am grateful to 225 Studios for permission to use a screen grab extracted from their DVD 'York - Leeds - Manchester' cab ride showing the same location as it appears today.
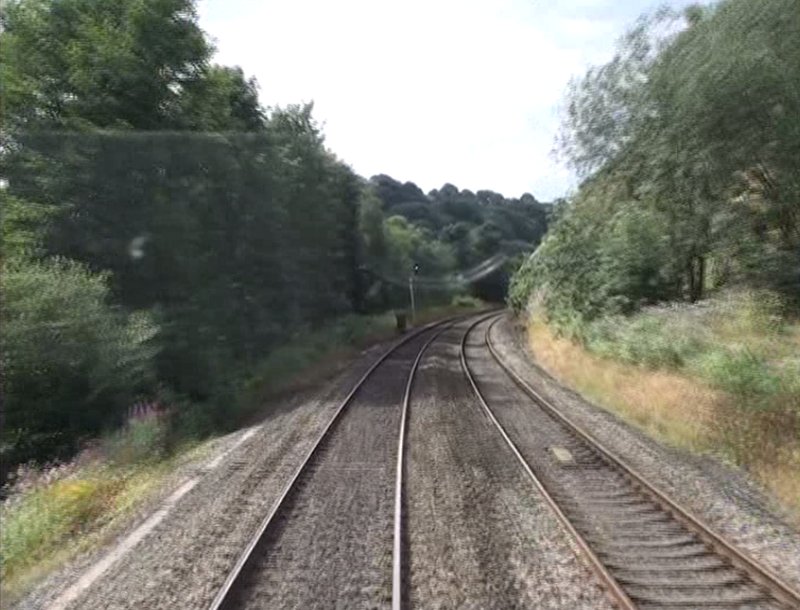
Image reproduced by kind permission of www.225studios.com; all rights reserved
Signal PN309, located on the approaches to Horsefall Tunnel. The image is taken from the 'York - Leeds - Manchester' cab ride DVD produced by 225 Studios.
Copyright JK Wallace
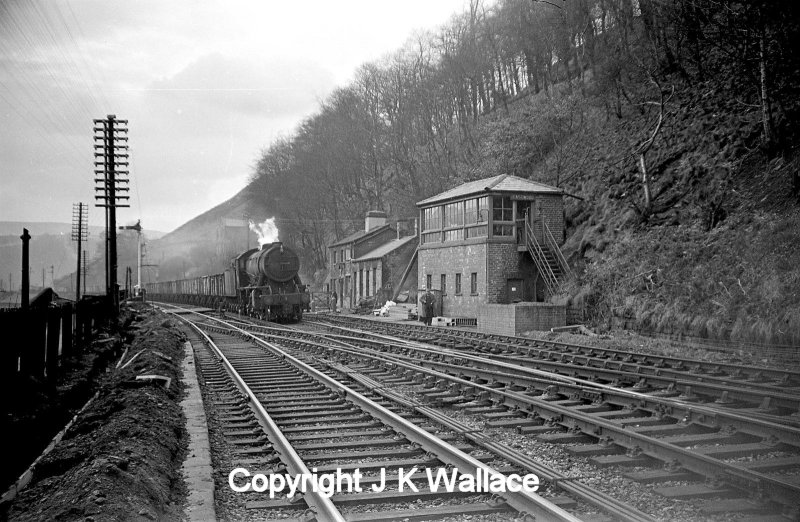
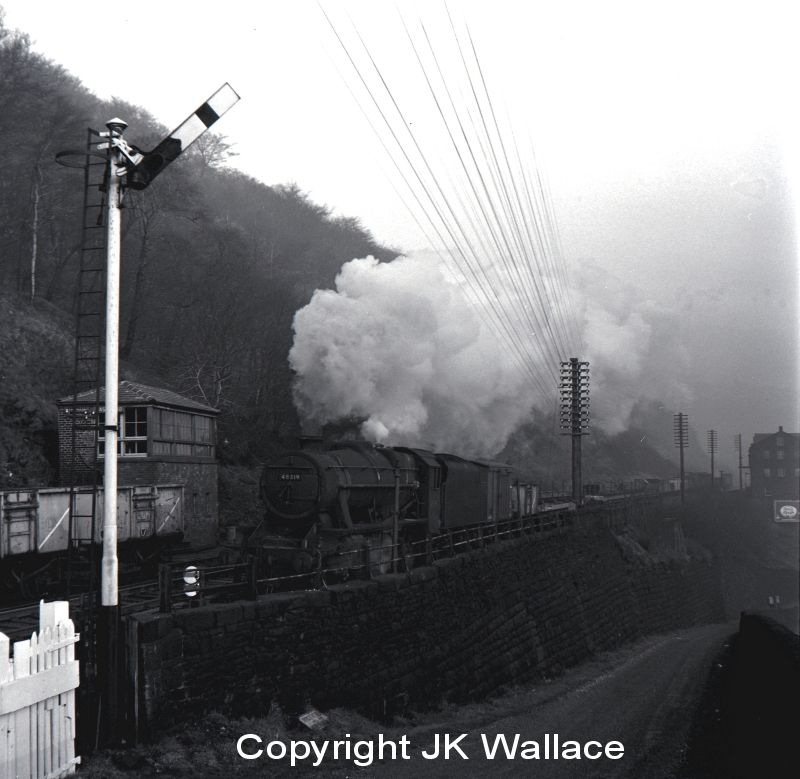
A WD Austerity 2-8-0 drifts pass Eastwood signal box with an eastbound empty mineral train in the early 60s.According to the Weekly Operating Notices (WON), the platforms that formed Eastwood station were finally removed on 28 July 1974.These were offset, and the one that would have been located in the foreground appears to have already been removed. The Down platform was behind the train, on the other side of the level crossing.
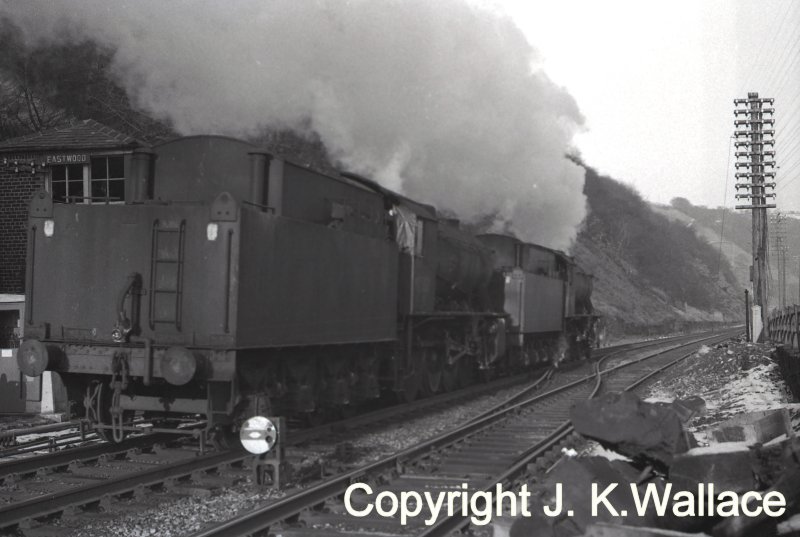
A pair of WD Austerity 2-8-0s running light steam past Eastwood signal box heading towards Healey Mills in 1965. Note the tarpaulin filling the fireman's side window and filling the gap between cab and tender. Only the lead locomotive appears to be under steam, the line falling steadily from Summit Tunnel down the valley.
Photograher Eric Bentley, copyright JK Wallace
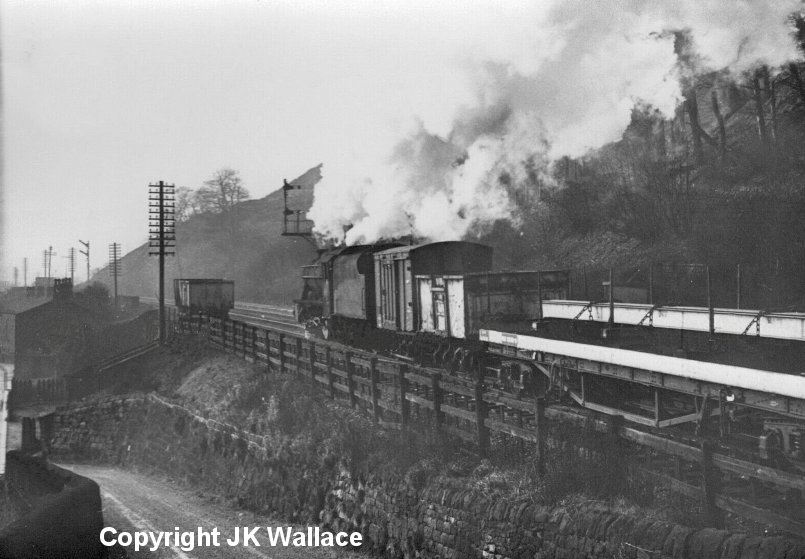
LMS Stanier 8F 48319 passing Eastwood with a westbound pick-up freight at 10.50 a.m. on Saturday 28 December 1963.
Photograher Eric Bentley, copyright JK Wallace
Stanier 8F 48319 passing Eastwood signal box near Todmorden on a westbound pickup freight 10.50 a.m. on Saturday 28 December 1963.
Copyright JK Wallace
A WD Austerity 2-8-0 drifts past Dover Bridge signal box in the Calder Valley with a guards van in the early 60s. There were two loops on the Up, westbound side between Dover Bridge signal box and Eastwood. The signal controlling access to these loops is in the foreground. It is unusual in that it is a LYR post that has been upgraded with LMS upper quadrant arms but still retains its LYR finial. Most upgraded signals were fitted with a LNWR-style cap.
Copyright JK Wallace
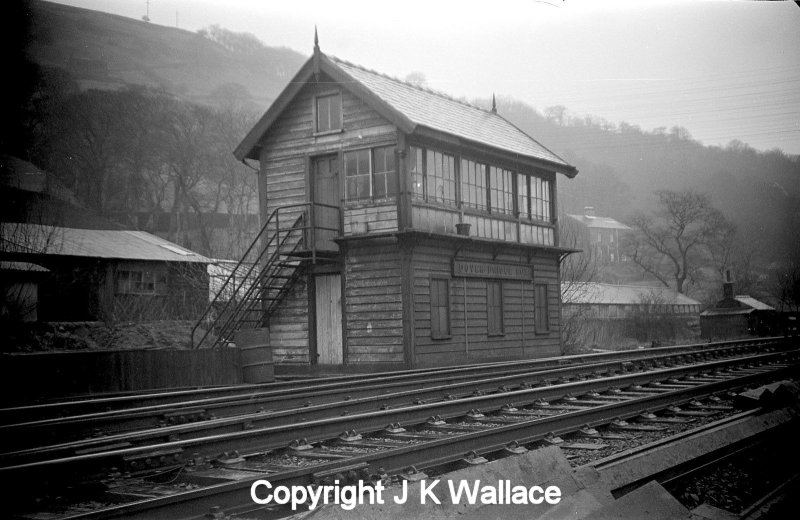
Dover Bridge signal box on the LYR Calder Valley in the early 1960s. The box still has its original LYR nameboard secured to the front of the box, although the staircase has been replaced with a modern metal one.
Copyright JK Wallace
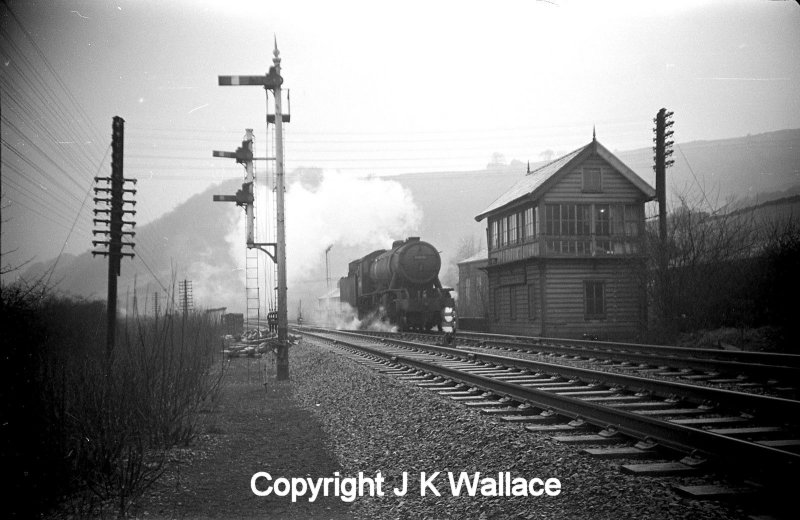
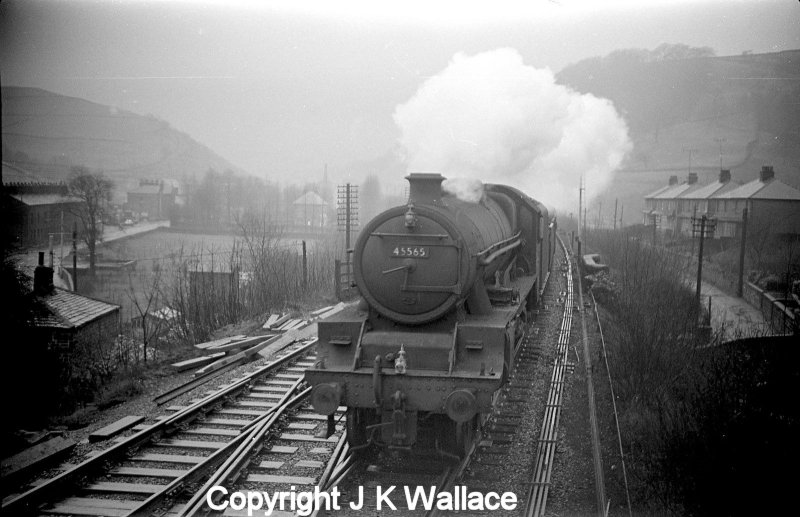
LMS Jubilee 45565 'Victoria' approaches Dover Bridge signal box with an eastbound passenger train in the early 1960s.
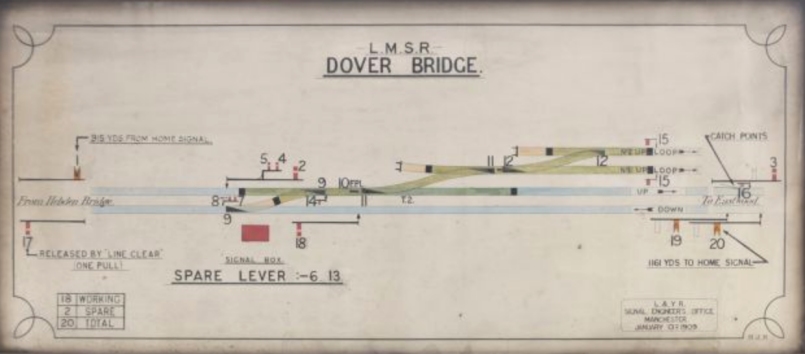
I am grateful to the current owner of the LMSR Dover Bridge signal box diagram for permission to reproduce it here, along with the accompanying notes.
Dover Bridge signal box, which was situated on the Down side of the line between Eastwood and Hebden Bridge (at 22 miles 124 yards from Manchester Victoria), opened in 1910 (or possibly late 1909) and in effect replaced the 1900 “Charlestown” box which was situated some 861 yards to the east (also on the Down side of the line).The new box was inspected on 19th August 1910; It was a wooden L&YR standard structure (size 5, 22’9¼” x 12’0” x 8’0”) which was equipped with a 20 lever Horwich-built L&YR frame (on a girder for 28). It controlled the entrances to two new Up Loops which ran from Dover Bridge to Eastwood box, some 1172 yards to the east. In April 1960 the main lines were reported to be controlled by “combined block instruments with separate bells” (presumably standard L&Y equipment), with Tyer’s recording block instruments controlling the Up Loops; the box was also equipped with a closing switch.
The accompanying signal box diagram seems to have been drawn for the new box some months before it actually opened; it is dated January 13th 1909 and initialled (somewhat elaborately) “H.J.H.” by the draughtsman concerned. It was hand-drawn in ink on to thick linen-backed paper and subsequently hand-coloured.
It would seem very likely that the same diagram remained in the box throughout its existence. When alterations to such hand-drawn diagrams were required they were executed with great care by scratching out details and drawing in the revised arrangements; such was the skill of the draughtsmen involved that these alterations were usually virtually invisible.
Research has shown that several such changes must have been made to the diagram throughout its ‘active life’, and these are explained below.
1.The locking diagram drawn for the box indicates that the original proposal was for just one Down Distant signal; on that, 16 was spare, the slot (dual control) on Eastwood’s shunting signal for setting back into the Up Loops was worked by lever 17 (not 16), the Down Starting was 18, the Down Home 19 and the (only) Down Distant 20. However, the box is quoted as having 19 working levers and 1 spare at the time of inspection, and by the time of the Charlestown accident of 21st June 1912 there were definitely both Outer and Inner Down Distant signals - in his evidence, the Driver of the locomotive which derailed referred to the “…Eastwood advance signal, which is on the same post as Dover Bridge inner distant” (author’s italics). It is obvious that the numbers of the Down Starting and Home signals have been altered on the diagram; it seems likely, given the evidence above, that this alteration was executed before the box actually opened in 1910, due to late changes to the plans.
2.Lever 13 originally operated worked catch points in the Up Main, listed as being situated 140 yards in rear of the Up Starting signal in the January 1931 and March 1937 Sectional Appendices. Their location in the Up Main on the diagram can just be made out below the right-hand end of points 11 and the left-hand end of points 12. These worked catch points (probably operated by a slotted joint mechanism) were recovered at some time between March 1939 and December 1940, and the lever became spare.
3.Initially, the Distant signals would have been coloured red like the stop signals (as the actual signals were), but as these changed to yellow “outside” (probably during the 1920s) they were also altered on the diagrams.
4.Track circuit T.2 was added in the 1950s (possibly in late 1956 or 1957). On the diagram, the section of line involved received a dark colourwash and the ends of the TC were delineated by the black squares. The bar associated with FPL (Facing Point Lock) 10 and a fouling bar in No.1 Up Loop for points 12 were erased, and signals 15 were moved on the diagram from near to the right-hand end of points 12 to the right of the ends of the TC.
5.The distances of the Distant signals from their respective Home signals have been added at different times.
6.The “Released by ‘Line Clear’ (one pull)” legend for signal 17 is a later addition.
7.For some reason, the section of the main lines to the extreme right of the diagram (including the unworked catch points and the slotted shunt signal 16 on the Up) seems to have been added some time after the original drawing (the blue shading is a different colour); given that the slotted signal was apparently part of the planned layout from the outset it was presumably originally shown on the diagram in a different way.
8.Most obviously, “L.M.S.R.” has been added above the title of the diagram, and “SPARE LEVERS” (originally 6 & 16) has been altered to “SPARE LEVER”, presumably when the changes were made to accommodate the two Down Distants and 16 was put into use. 13 was of course added when the worked catch points were recovered (see above).
9.It is thought that the “Working / Spare / Total” table is a later LMS period addition.
Another interesting detail on the diagram is the short black line to the left of the left-hand end of points 12; this indicates that these points were equipped with an Economical Facing Point Lock (‘EFPL’ - on the working sketch of the layout this is described as “Westinghouse motion and plunger”). This means that the points were moved and locked by the operation of one lever in the box (normally two levers are used for facing points, one (black) to move the points and another (blue) to operate the Facing Point Lock). Lever 12 was presumably, therefore, painted blue (top half) and black (bottom half).
A scheme plan was drawn up in April 1960 (issued in June 1961) to abolish Dover Bridge box, to provide extra Track Circuits, to motorise the points giving access to the Up Loops and to operate them from Eastwood box. This plan was finally realised in 1965; in preparation for the work crossover 9 and shunt signals 7, 8, 14 & 15 seem to have been recovered in May of that year, although no permanent alterations were made to the diagram to indicate this. The work was completed, and Dover Bridge box closed, on 19th September 1965.
Copyright J K Wallace
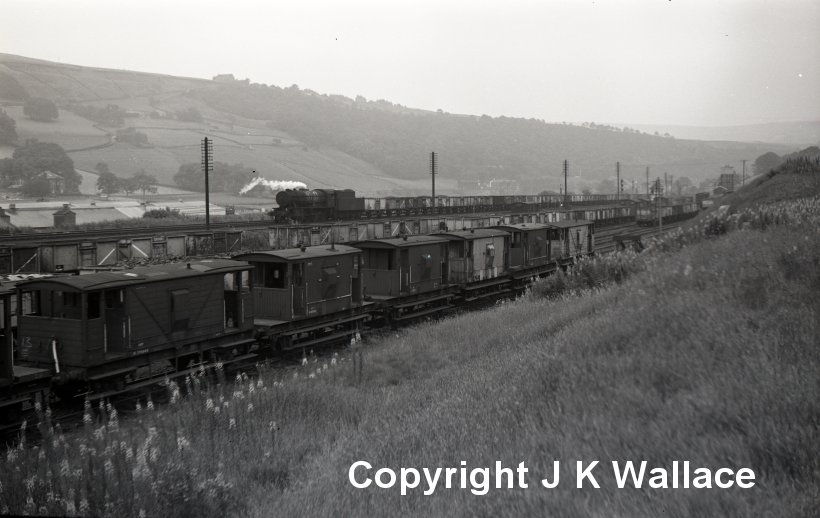
An unknown WD 2-8-0 passes Mytholmroyd sorting sidings with a westbound mineral (coal) train in 1963.

Photographer Eric F Bentley, copyright J. K. Wallace
45697 Achillies working 1Z13 excursion to Blackpool North, Baird television Ltd at 09.15 on Saturday 10 June 1967 passing the site of Luddenden Foot station on the Calder Valley main line.
Photographer Arthur R Wilson, J. K. Wallace collection
LYR 0-6-0s 12326 (pilot) and 12352 pass Milner Royd Junction sometime in the late 1930s. The signals appear to have 1912 pattern arms, but the nearer signal has already lost its finial. The lead locomotive carries a train number, suggesting this is a summer excursion heading for the Lancashire coast.I am grateful to Darwin Smith who observed that the reporting number looks like '550', so confirming it is an excursion train, although the number is not in either the 1936 or 1938 WTT. Numbers were from 1 upwards; with lower numbers for regular trains and higher numbers for extras and excursions. These were generally C xxx for Central Division, W xxx for Western Division and M xxx for Midland Division. Sometimes only the numbers were used without the letter. N for Northern Division does not seem to have been put on trains, but there are some numbers assigned in the time tables
Whilst Class 40s were much sought after as 'classic traction', the day-to-day menu were the Class 110 3-car Calder Valley units. They provided the backbone of the service from their introduction in mid-1964 through to the mid-1980s. The Class 110s were the dominant DMU - there is the odd shot showing a Metro-Cammell Class 101 added to meet a upturn in demand. It was only later - from the 1980s really - that Classes 108 and 101 started to work the Calder Valley on their own. Here is a Class 110 on a regular working for the class, as it leaves Halifax forming the 10.45 Blackpool-Leeds service on a wet 2 January 1987.
Copyright: J K Wallace, all rights reserved 2013
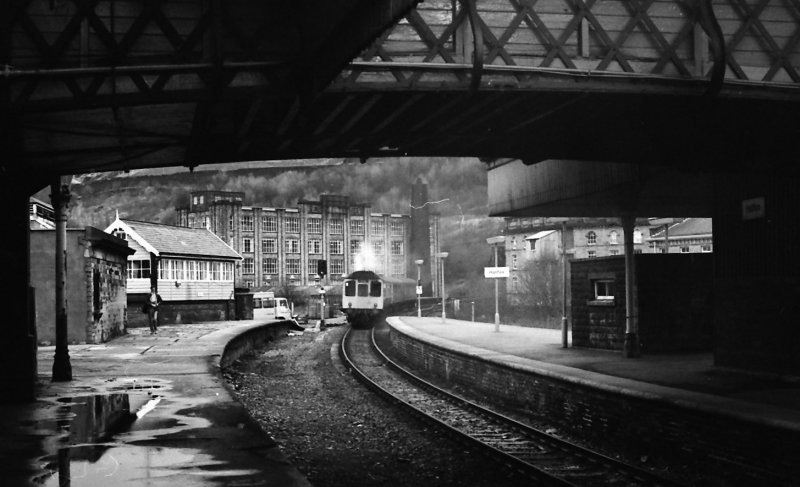
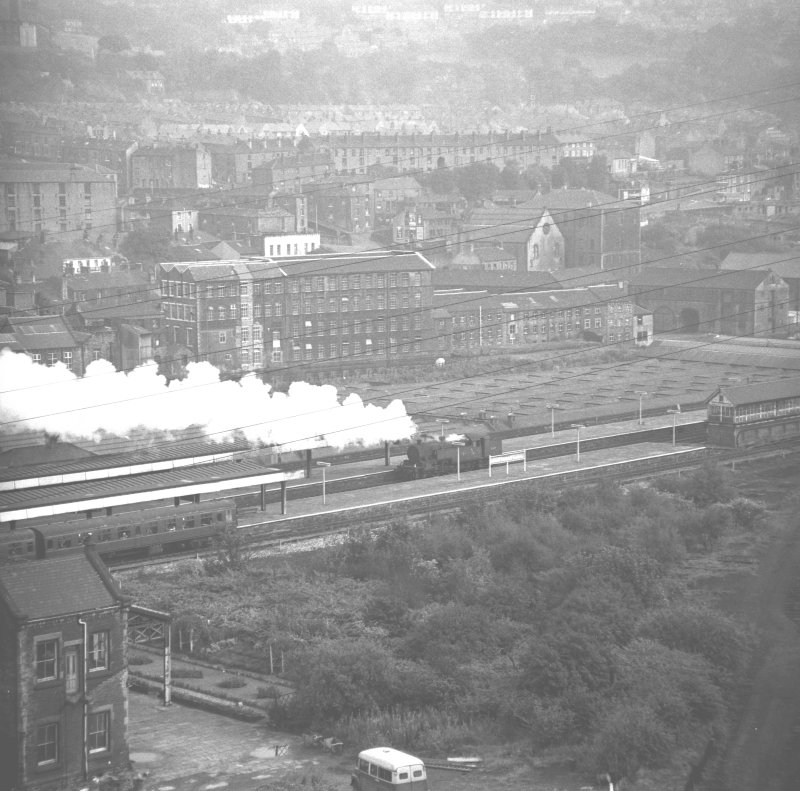
Sowerby Bridge was a major station which would have been a key location had the Rishworth branch matured into the alternative L&Y main line.
Copyright: J K Wallace
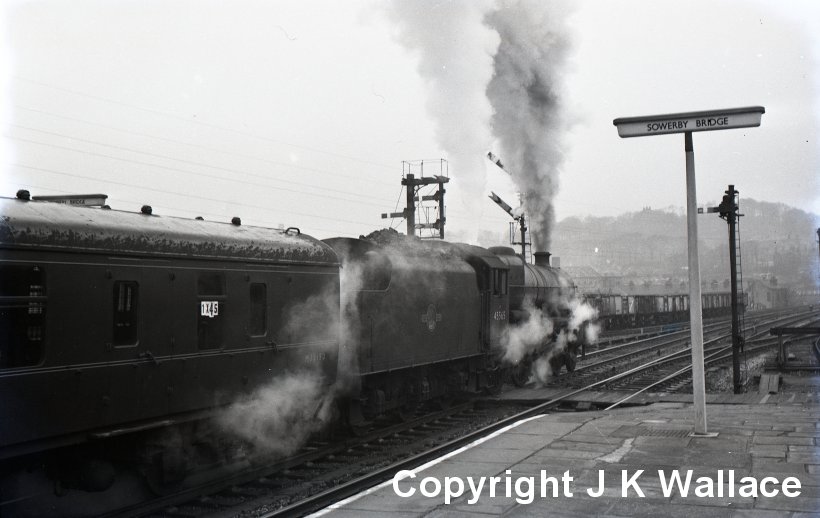
LMS Stanier Jubilee 4-6-0 No. 45565 'Victoria' departs from Sowerby Bridge station westwards with excursion 1X45.
This atmospheric shot by Eric Bentley shows 4MT tank 42410 running round the Leeds portion of Leeds + Bradford – Blackpool excursion on Saturday 2 October 1965. Eric's notes suggest he later caught this train approaching Copy Pit later in the day. Note the area in the immediate foreground which was immediately in front of the imposing station buildings, but never developed.
Photographer Eric F Bentley, Copyright: J K Wallace
Stanier Jubilee 4-6-0 45694 'Bellerophon' is seen departing from Brighouse with the 08.05 Summer Saturdays only Castleford Central – Blackpool North at around 08.48 on Saturday 9 July 1966.
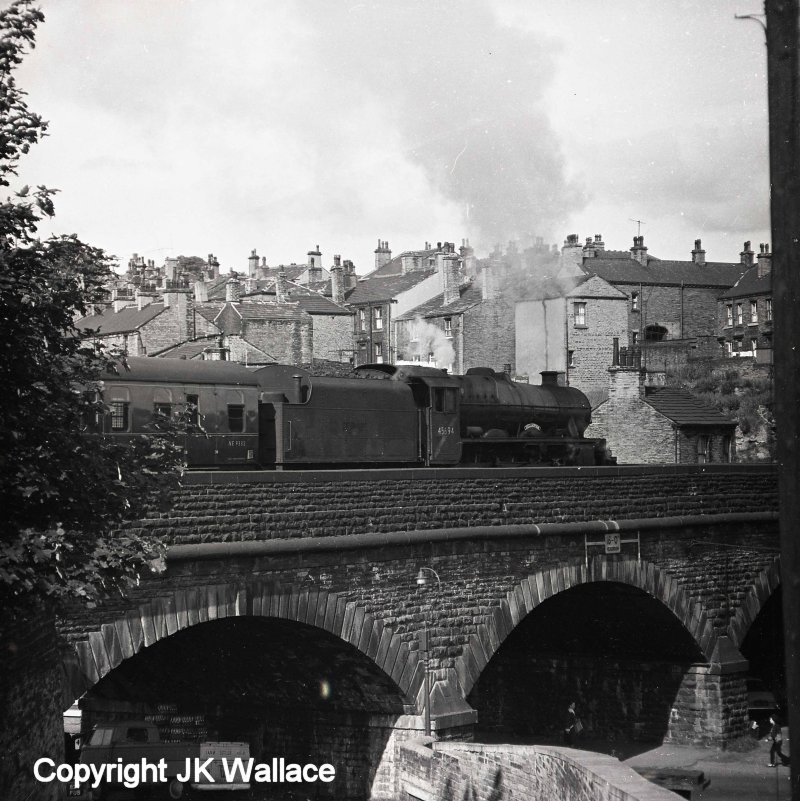
Photographer Eric Bentley, copyright JK Wallace
Stanier Jubilee 4-6-0 45694 'Bellerophon' is seen approaching Brighouse with the 08.05 Summer Saturdays only Castleford Central – Blackpool North at around 08.48 on Saturday 9 July 1966. The train is approaching on the slow lines, and has still to pass the exchange sidings before arriving at Brighouse Station. The train will have first passed Bradley Wood Junction and then Anchor Pit Junction to arrive here.
Photographer Eric Bentley, copyright JK Wallace
The L&YR main line technically ended at Goose Hill Junction, where it joined the Midland Railway to gain access to Leeds.
BR (LMS) Stanier Jubilee 45695 'Minator' passes Goose Hill Junction, Normanton, on 11 December 1960. The view is taken from Boundary Lane bridge and is approximately a quarter of a mile north of the actual junction, which is beyond the end of the train. This is most likely a Midland route train, although traveling on the tracks that Lanky trains off the Calder Valley would have used to access Normanton (behind the camera) and tracks onto York. Today the original Midland has closed but the tracks still occupy the same alignment, and there are still a couple of sidings to the right.
A glance at a map will show that this was not really the best way to Leeds, but it did allow easy and direct access to York via the Great Northern Railway. The Liverpool-Manchester-York trains were one of the longest runs that the old L&YR could provide, so it seemed entirely appropriate that the last of the Hughes 4-6-0 Dreadnaughts. The final version of these locomotives looked a neat and purposeful design - and there is so obviously an echo of the Black 5s that were to follow.
The LMS's first take on the design was that it looked as if it had potential as a front-line express loco, as it was close to a GWR 'Castle' in both wheel arrangement and number of cylinders. More were built in the early LMS period with some of the class being put through their paces on the West Coast Main Line over Shap. There are a number of theories as to where the short-comings lay: valves and grate area being two often noted. Certainly the grate was small for the boiler and the work required, and they had to be worked hard on their daily schedules leading to higher maintenance and coal bills.
So the Dreadnaughts were passed over, and the Scots filled the gap at the top of the LMS rosters, with Derby knocking out Patriots to meet the need for a smaller express loco. This latter class acquitted themselves well through Hall Royd, with 45517 of Bank Hall being a regular daily performer, and one of the last in service before the Calder Valley DMUs took over in the mid-60s.
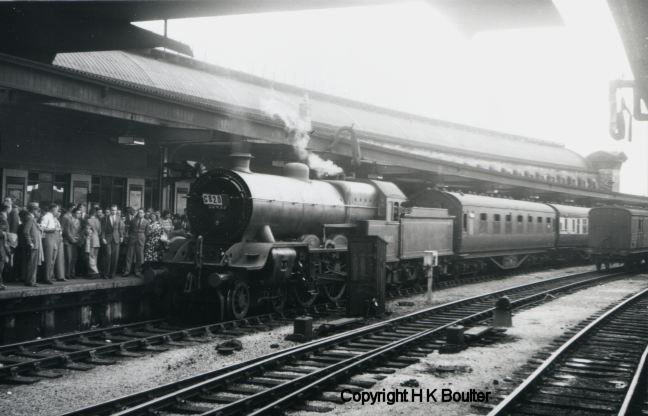
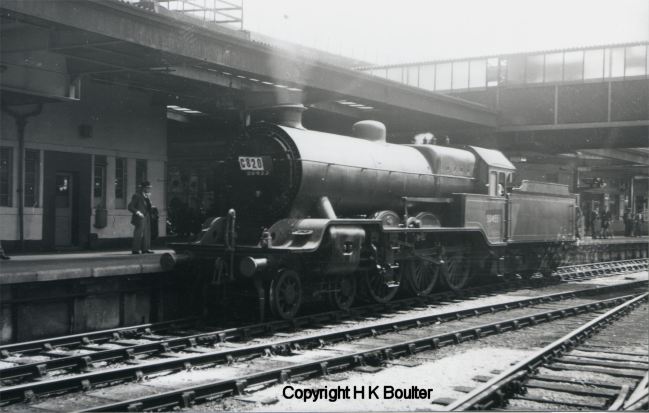
So this review ends with two shots of Hughes Dreadnaught 50455's final working on 1 July 1951, when it hauled an enthusiast's special from Blackpool Central to York, and return. The outward journey encountered engineering works on the Down Main in the Hall Royd area, which involved a time consuming reversal onto the Up main and wrong-line running through the area.

Copyright J K Wallace, t/a 'Hall Royd Junction' 2013-2023 email: Hall Royd Junction
7 Portobello Close, Chesham, Bucks. HP5 2PL, UK
tel: +44 (0)7513 412880