
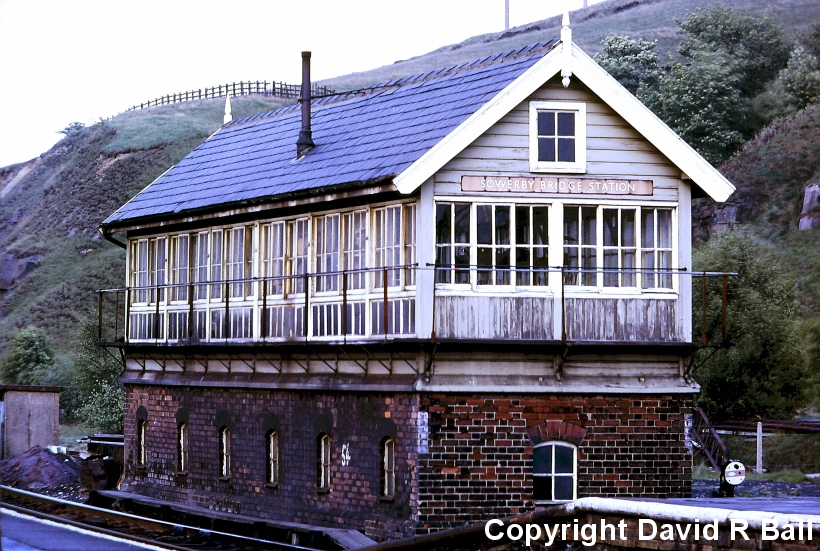
Sowerby Bridge Station and Signal Box
What would Sowerby Bridge have been like had the LYR's plans during the latter part of the 19th Century come to fruition?
Copyright David R Ball; all rights reserved
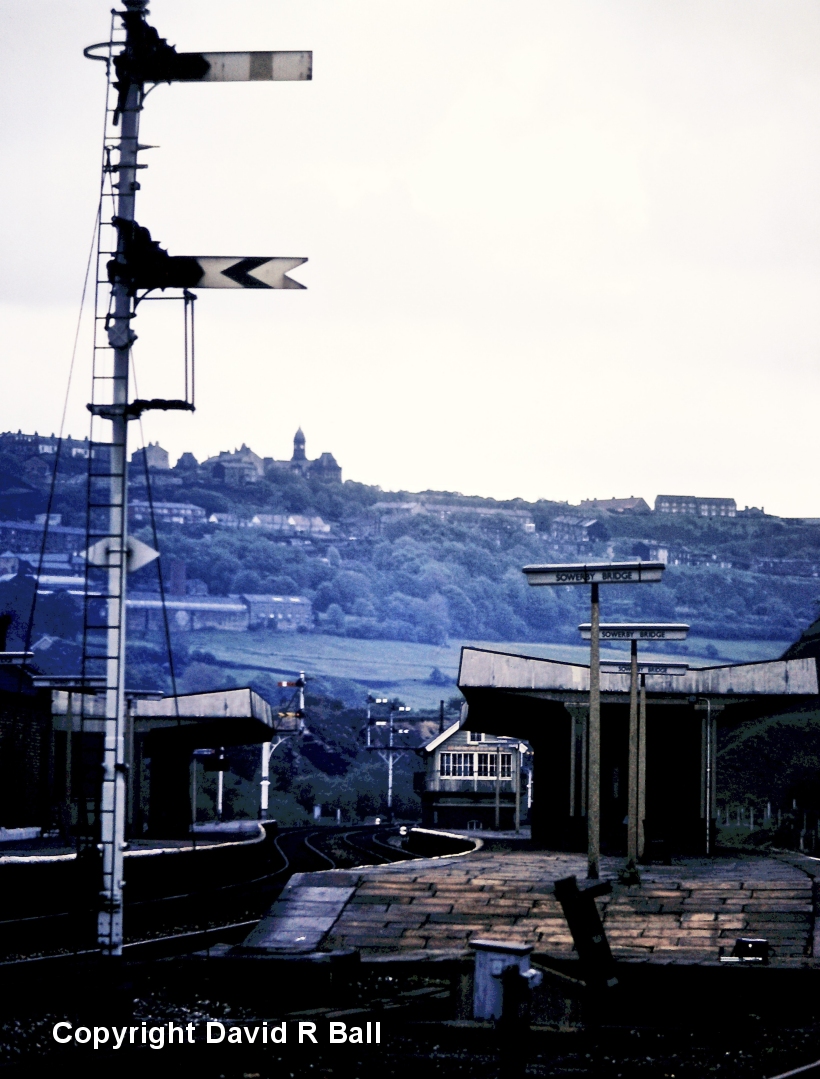
Sowerby Bridge signal box looking east towards Bradford and Halifax in 1971
In Tom Wray's L&YR chronology the first significant reference to Sowerby Bridge is in the Manchester Guardian dated 30 May 1840 when the Manchester and Leeds Railway invited tenders for the erection of one or more station houses at Sowerby Bridge, Rastrick, Dewsbury and Wakefield.
Copyright David R Ball; all rights reserved
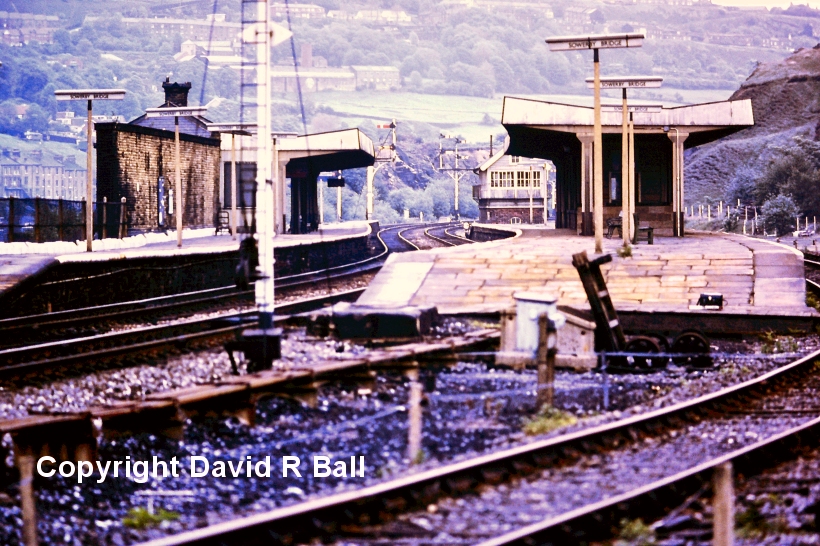
A view looking eastwards showing the two platform roads, with the Up Passenger Loop passing in front of the photographer. In the distance can be seen signal 45 (the distant was worked by Milner Royd Junction), whilst the bracket signal still has arms on the two principal dolls for the Up Main and Up Passenger Loop.
The first hint that Sowerby Bridge was being considered for enhanced status was again a report in the Manchester Guardian of 1 September 1860 of a meeting in Ripponden regarding a proposed railway between Sowerby Bridge and Manchester. In the same month the Engineer (21 September 1860, p.202) noted that a project has been started for a railway through the Ripponden Valley. It was being proposed that the railway would branch from the L&Y line at Sowerby Bridge, and then traverse the south bank of the Ryburn, through the townships of Norland, Barkisland, and Rishworth; and then by Booth Dean to Blue Pits. It was noted that Manchester was some 27.7 miles from Sowerby Bridge by the LYR's Calder Valley main line, but through Ripponden it would be only 20 miles. It was noted that the manufacturers are all but unanimous in favour of the new railway, as well they might be. The report doesn't appear to mention the small problem of a lengthy tunnel being required under Blackstone Edge. But also interesting that such a 'cut-off' was being considered as early as 1860, given that the LYR was still planning additional tracks on its original route up to the start of WW1.
Copyright David R Ball; all rights reserved
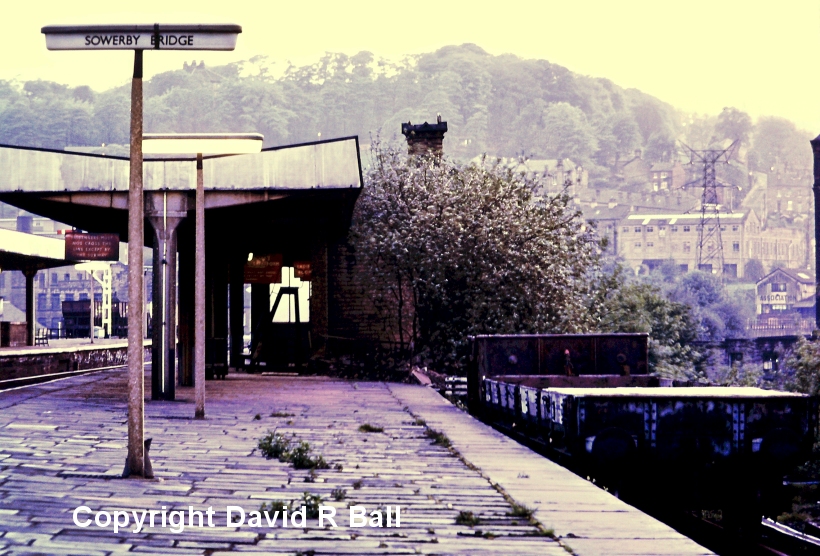
One of those great shots for modellers of an otherwise little photographed corner. This is the end of the Down Bay, looking towards Manchester. Note the two coal hoppers parked up in the goods yard beyond the station.
On 8 April 1865 the Manchester Guardian noted that the LYR had invited tenders for the construction of coal drops and a bridge at Sowerby Bridge. The same paper on 4 April 1873 made reference to a call for tenders for viaduct widening at Sowerby Bridge.
Traffic was clearly growing, and the Manchester Guardian on 13 June 1873 noted that the Company was inviting tenders for the erection of a new passenger station at Sowerby Bridge. The resulting development hinted at greater things for the station, with the new buildings at right angles to the main line, but neatly placed in the V created by the Rishworth branch which would be striking off almost at right angles to the main line. The tender by Messrs Dransfield, Thomson and Holmes of £25,634 for the new station was formally accepted by the Board on 25 June 1873.

Copyright David R Ball; all rights reserved
Another shot looking towards Manchester, and showing the BR-built canopies. The bracket signal controlling exit from the Up Passenger Loop is just visible between the two canopies. In both the 1959 and 1972 signal box diagrams, this signal is shown as an underslung bracket.
By October active preparations were being made on the part of the LYR to erect its 'large and handsome station' according to the Manchester Evening News in its issue dated 11 October 1873. The report stated that the new facilities would include commodious offices, waiting rooms, and station masters house at an estimated cost of £26,000. The contract was let to Dronfield, Holmes and Thompson of Liverpool.
The Ripponden branch was reported to be ready for opening in the 19 July 1878 issue of the Engineer, when it opened for goods and mineral traffic as far as Ripponden the previous Monday. The opening for passenger traffic was set for 1 August. The article noted the intention to ultimately create a new and shorter route on the east-west axis. Subsequent press coverage noted that there had been heavy landslips during the construction of the line at Scar Head and in Rough Hey Wood. The tunnel at Rough Hey Wood is or was supported by an 'immense retaining wall, nearly nine yards thick and twenty nine yards high, while the hill above has been levelled considerably, so as to prevent further landslips' (Manchester Evening News, 6 August 1878).
Copyright David R Ball; all rights reserved
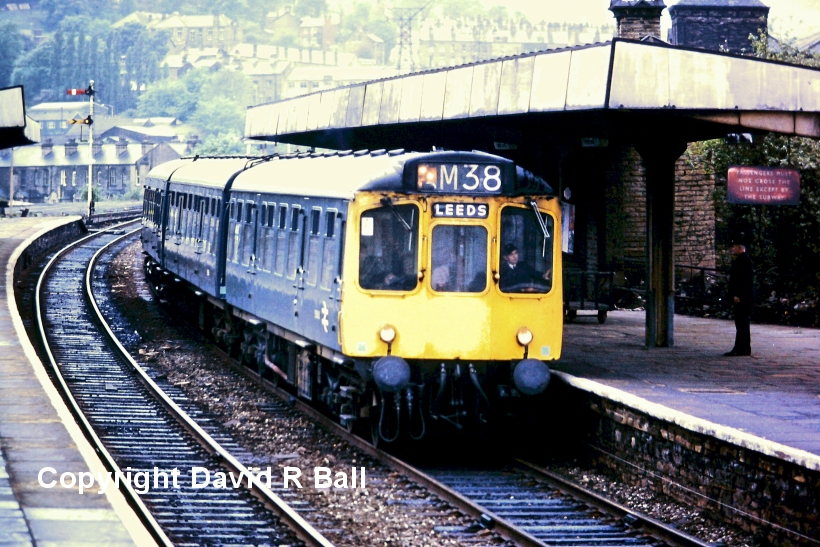
This looks like a 3-car Class 110 unit heading towards Leeds, but the windows of the third car clearly differ, and is probably a Metro-Cammell Class 101 or 111 car substituted for the Diving Motor. The Home Signal at the end of Platform is number 42, whilst the distant is worked by Sowerby Bridge East.
Tenders were sought for the erection of goods offices at Sowerby Bridge the Manchester Guardian reported on 28 March 1885, and again for an engine shed on 9 June of the same year. The LYR Board Minutes of 23 June 1885 record tenders recommended to be accepted from G & J E Read of £11,076-3-6d, for new engine shed, sand furnace, coal stage, etc. at Sowerby Bridge. On 11 July 1885 the Manchester Guardian recorded tenders being sought for the erection of the grain warehouse.
The expansion of the facilities at Sowerby Bridge ad now been concluded, and next report is of a reduction of facilities after a fire destroyed a large warehouse in the goods yard on Friday 21 May 1937. The Guardian of 22 May 1937 reported that the wooden building, which was fifty yards long, twenty five yards wide and twenty yards high, was reduced to ashes in just hours. The warehouse was filled with general merchandise, including oil cake. A large number of railway wagons, filled with goods and seven motor vehicles owned by the LMS, were destroyed.
Copyright David R Ball; all rights reserved
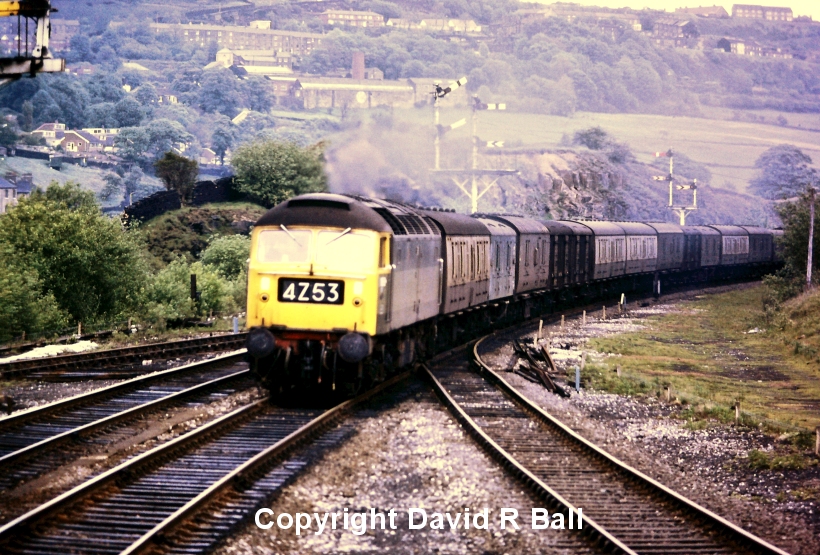
A Class 47 heads a long train of parcel vans, led by a Mark 1 BG and 4-wheeled CCT van. Given the length of this train, it is probably the Heaton - Red Bank empty newspaper vans that ran up the Calder Valley in the late afternoon. Sadly, this train was discontinued once Murdoch took control of various newspaper groups and sought reduced costs.
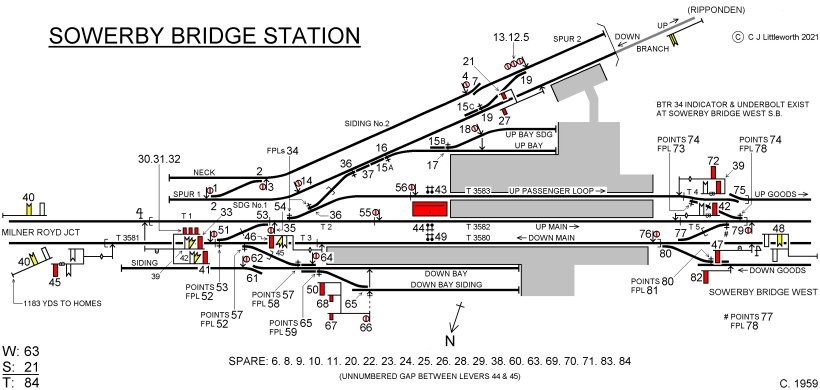
The Rishworth branch closed to passengers on 8 July 1929. The section between Rishworth and Ripponden closed for freight in 1953 and Ripponden to Sowerby Bridge closed completely on 1 September 1958. Chris Littleworth's excellent diagram shows the state of affairs in 1959, when the Rippenden branch had formally closed, but the track still remained in situ.
Copyright C J Littleworth 2021: all rights reserved
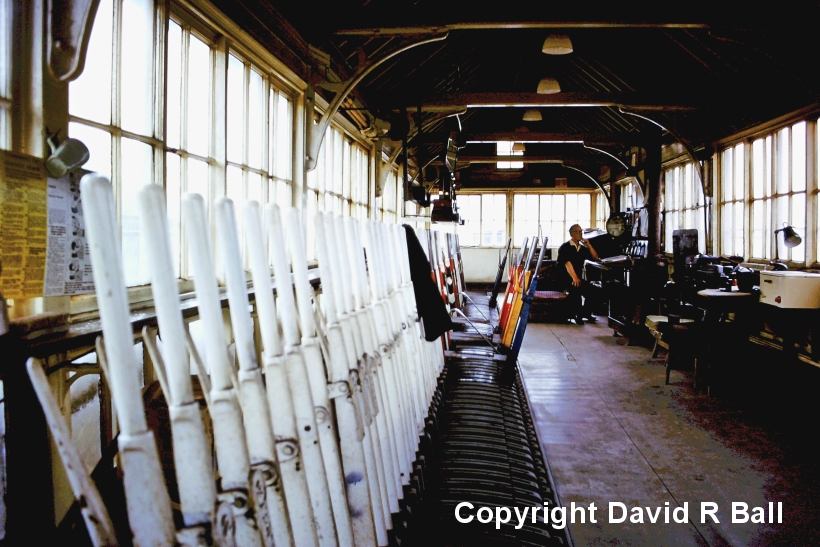
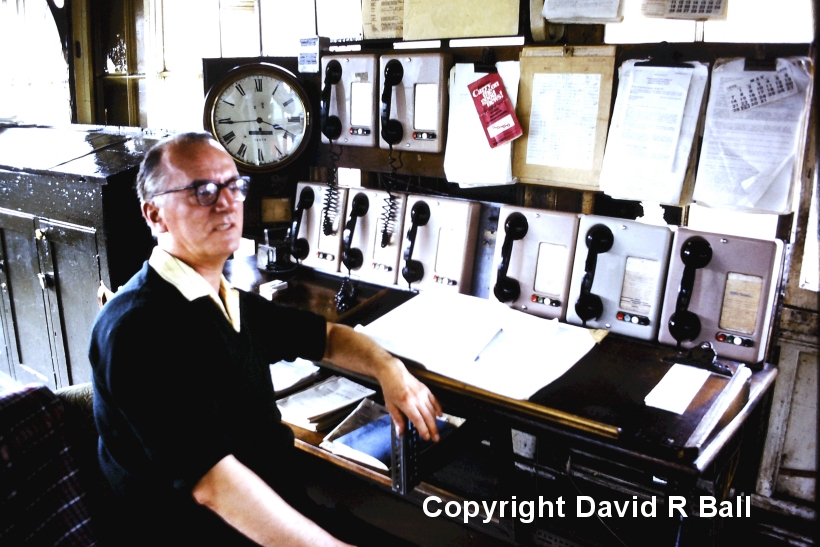
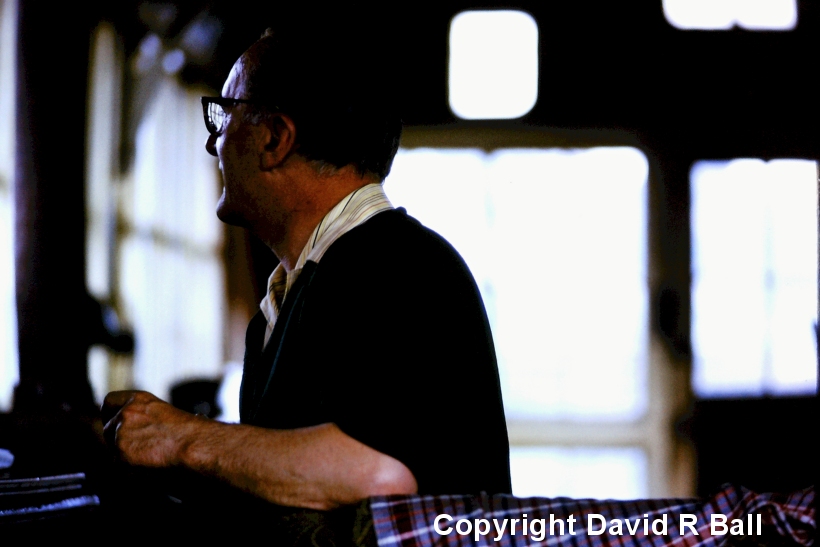
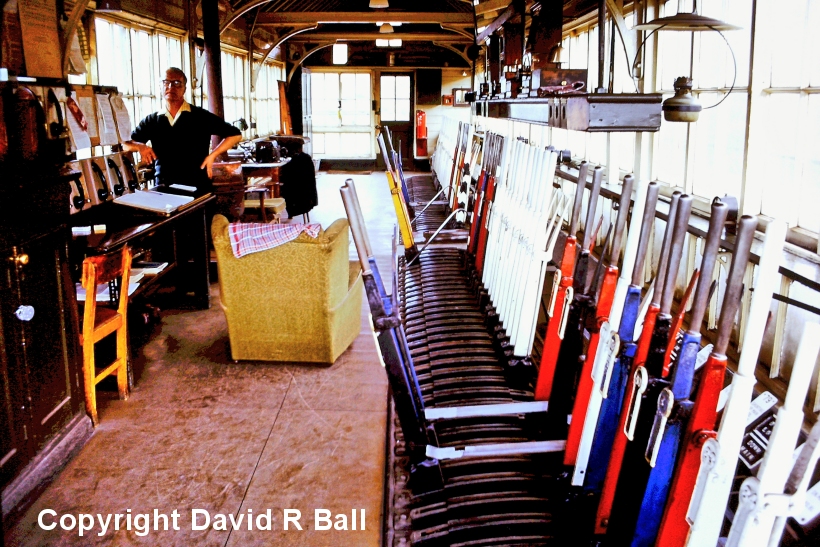
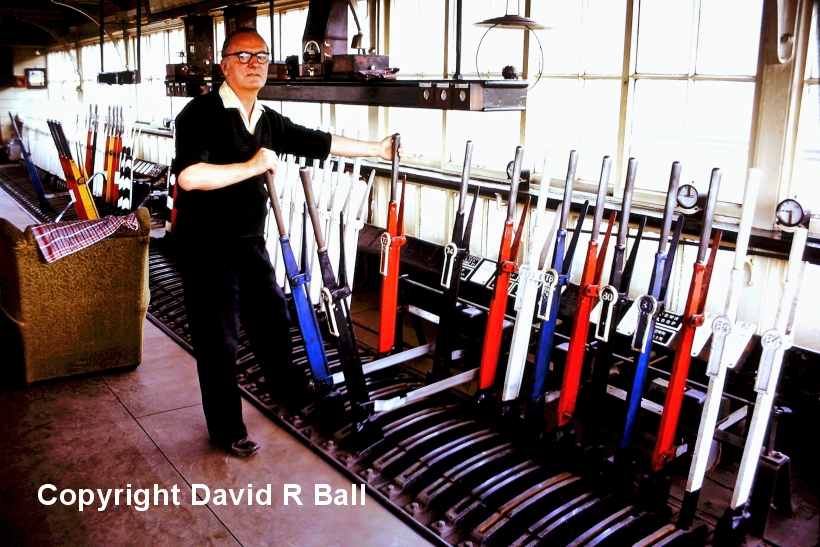
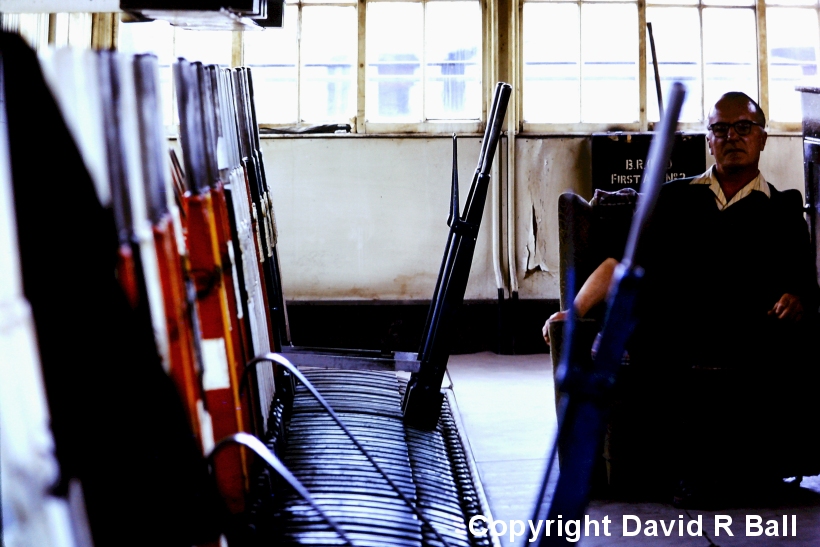
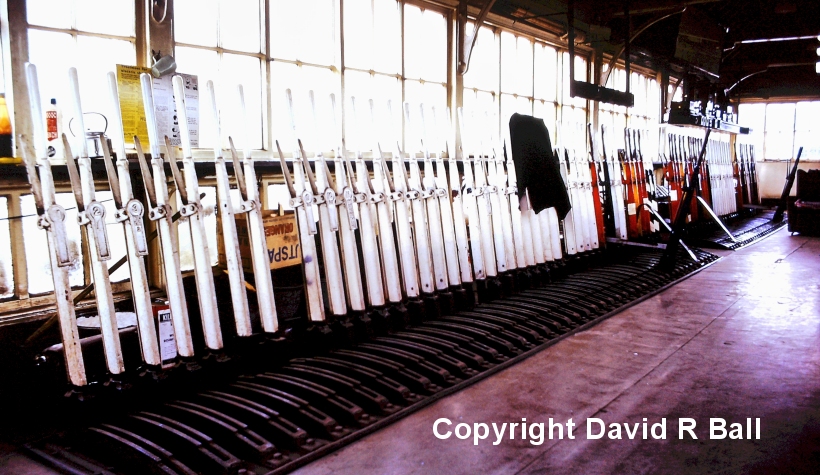
We are very fortunate that local photographer David Ball was able to visit the Station signal box in 1972, and created a unique record of the box and its interior in its later years.
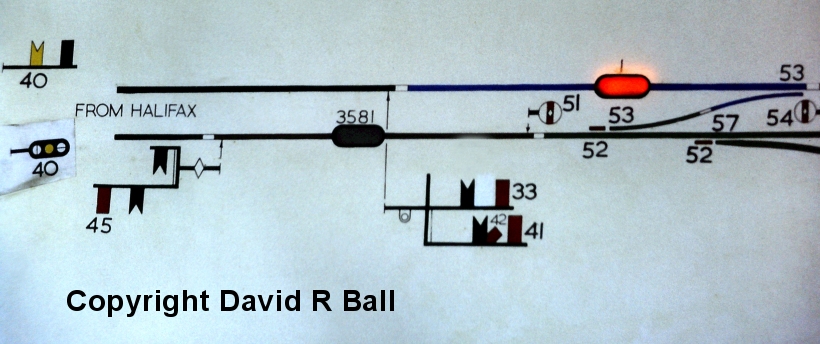
Our tour of the signal box starts with detailed shots of the 1972 signal box diagram.
Copyright David R Ball; all rights reserved
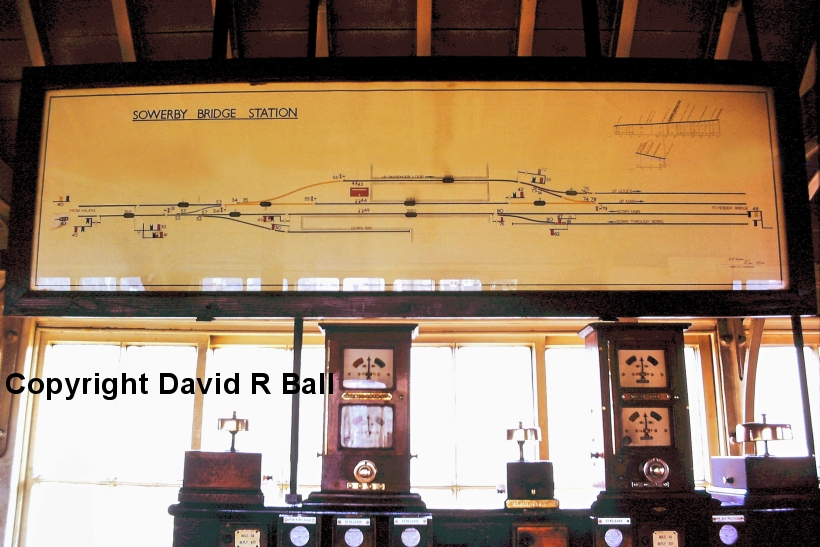
This image shows the greatly simplified layout at Sowerby Bridge in 1972. Since 1959 the Up sidings associated with the Rishworth branch have been removed, and the bays by one sole line trailing into the Down main. There are still four tracks heading towards Sowerby Bridge West. This appears to be a relatively recent diagram, as there is no evidence of the redundant sidings being scratched off the diagram.
Copyright David R Ball; all rights reserved
Copyright David R Ball; all rights reserved

Copyright David R Ball; all rights reserved
Copyright David R Ball; all rights reserved
Copyright David R Ball; all rights reserved

Copyright David R Ball; all rights reserved
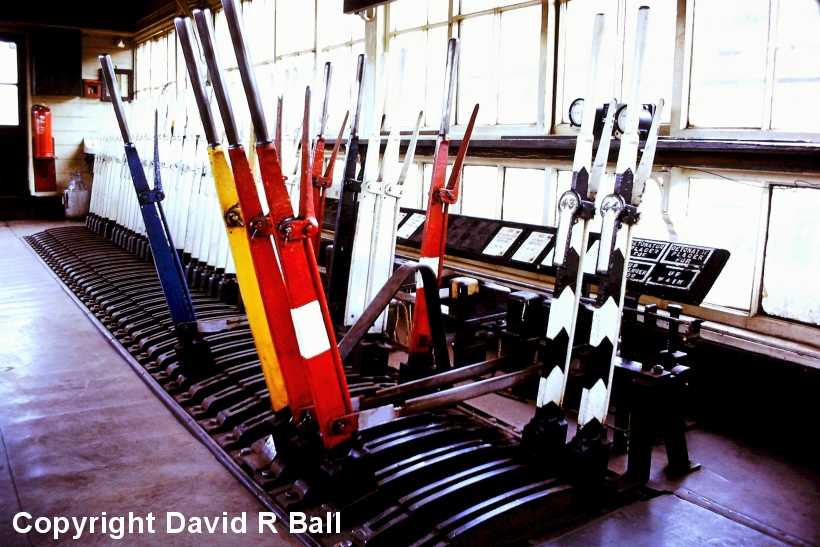
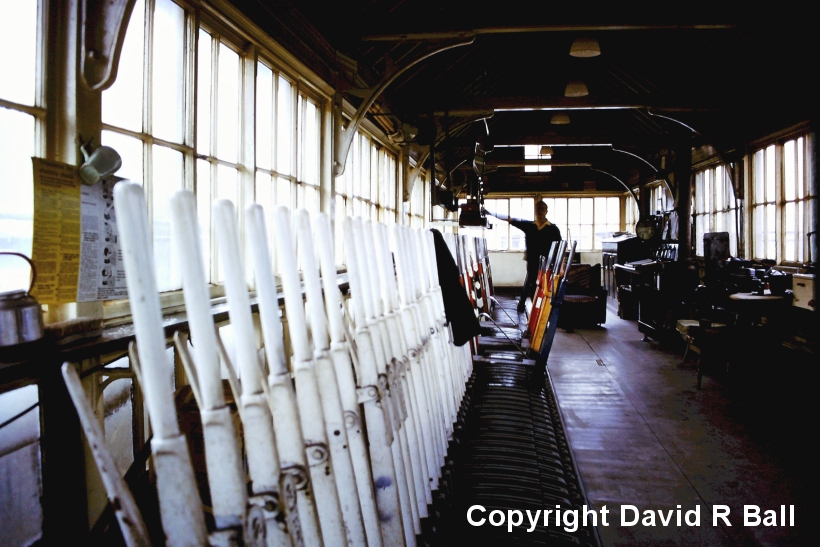
David's shot of the box interior show a working box towards the end of its service life. The large number of white levers is notable, and reflects the changes in the layout with the removal of redundant tracks and points since the 1959 layout shown in Chris Littleworth's diagram.
Copyright David R Ball; all rights reserved
Copyright David R Ball; all rights reserved
Copyright David R Ball; all rights reserved
Copyright David R Ball; all rights reserved
Copyright David R Ball; all rights reserved

Copyright David R Ball; all rights reserved
Copyright David R Ball; all rights reserved
Copyright David R Ball; all rights reserved
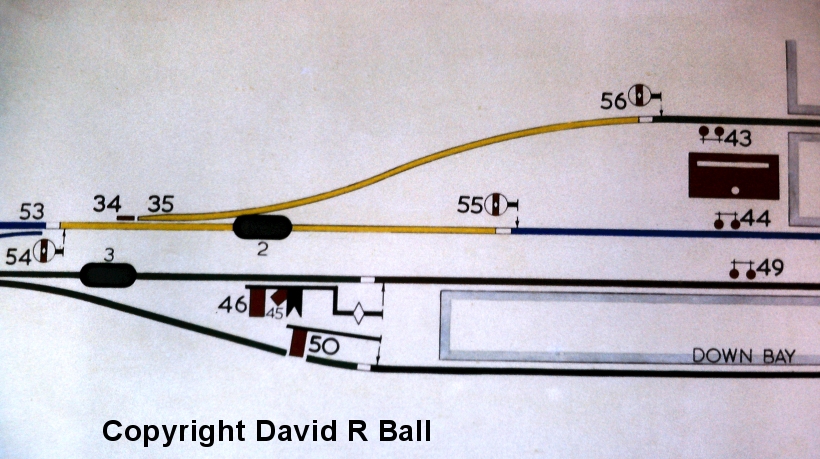
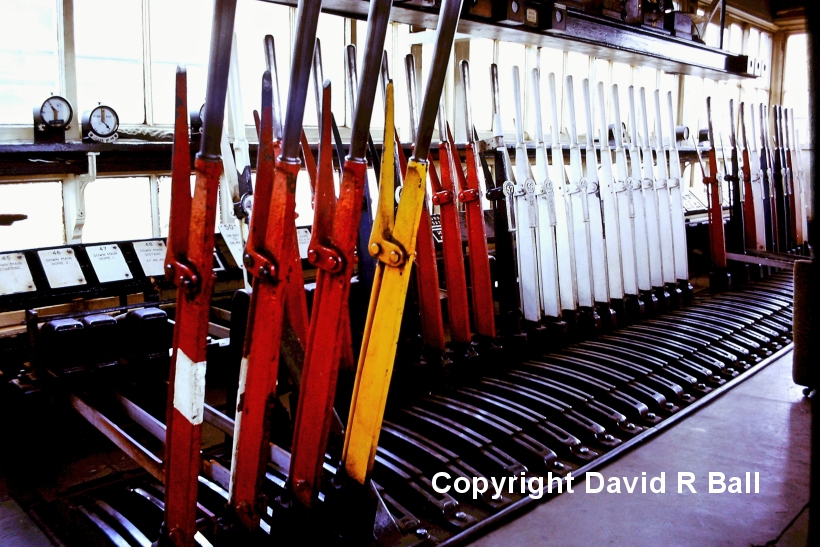
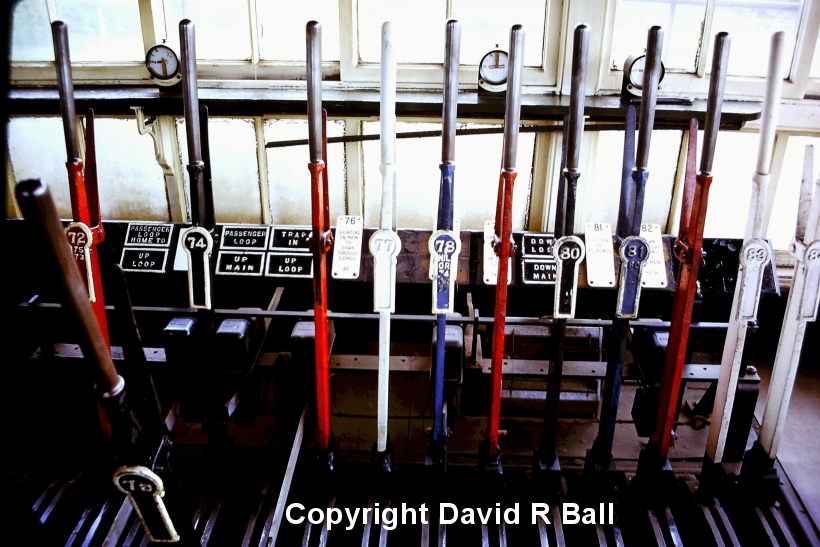
Redundant levers 1 to 15. All these levers applied to the Rishworth branch and associated sidings, with 15 controlling the locking bars for the Up Bay and associated siding.
Copyright David R Ball; all rights reserved
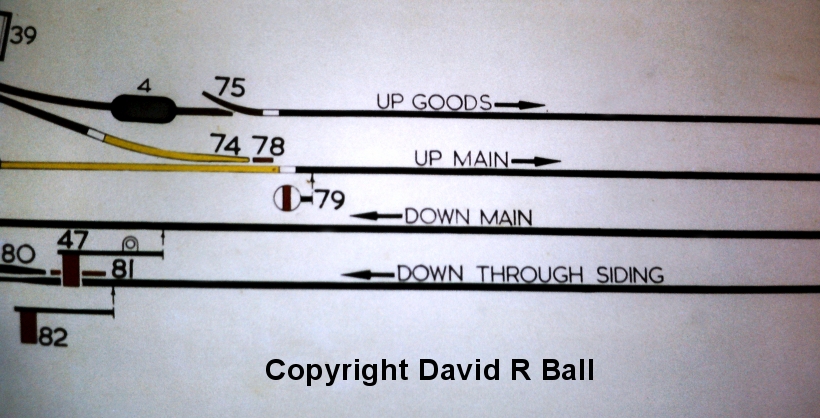
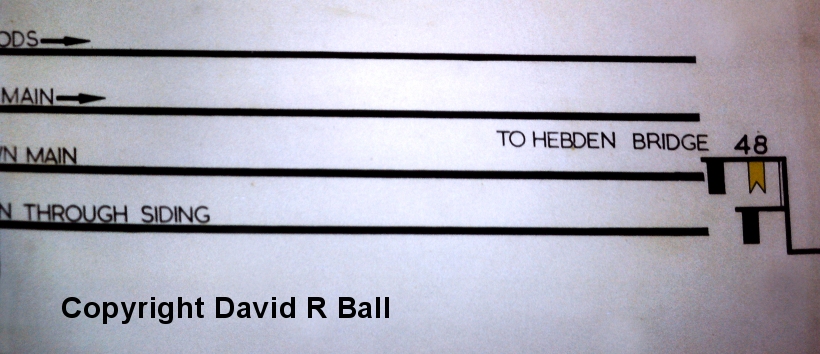
Levers 45, 46 , 47 and 48 have all been pulled in this shot. The red and yellow levers worked signals, all in the Down direction. The further bank of white levers relate to the redundant Down Bay siding and Down siding.
Copyright David R Ball; all rights reserved
Copyright David R Ball; all rights reserved
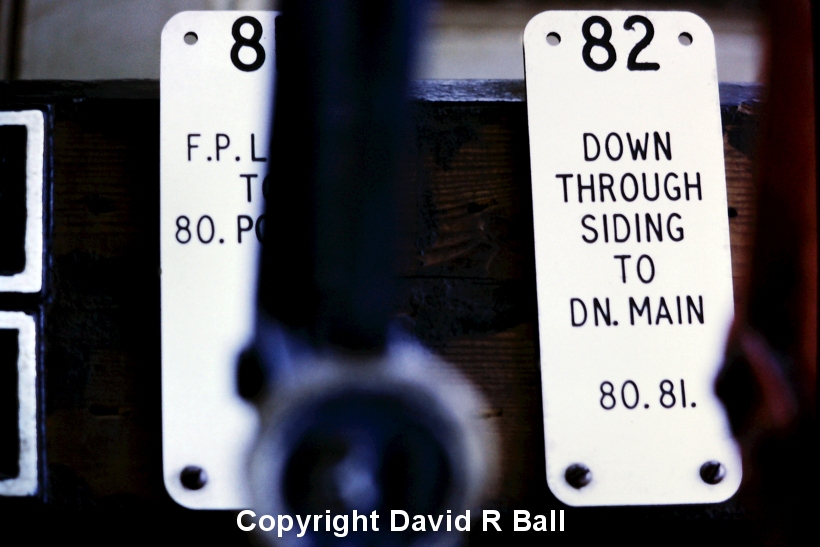
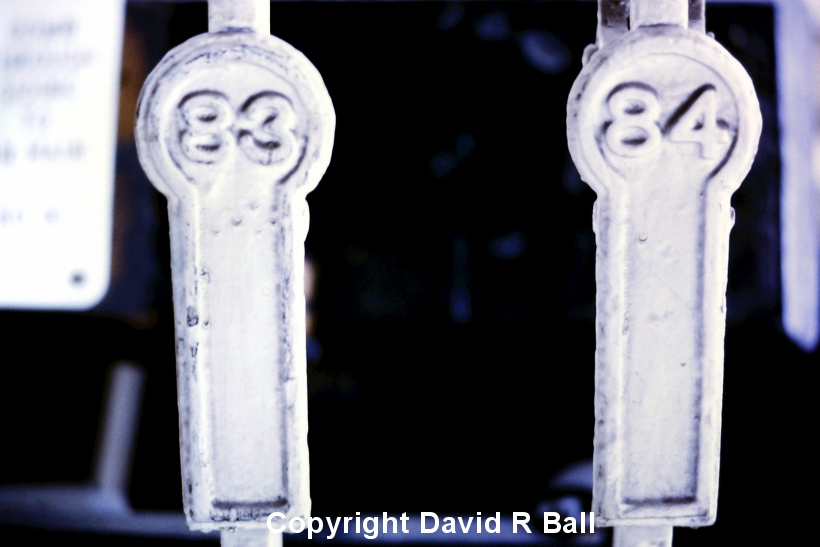
The white levers on the end of the frame (83 and 84) are shown as Spare on the 1959 diagram. The signalman has his hand on lever 73 which worked the Facing Point Lock on the connection from the Up Passenger Loop to the Up Goods, whilst the black lever (75) works the catch point protecting the exit from the Up Goods in the down direction.
Copyright David R Ball; all rights reserved
Copyright David R Ball; all rights reserved
Copyright David R Ball; all rights reserved
Copyright David R Ball; all rights reserved
Copyright David R Ball; all rights reserved
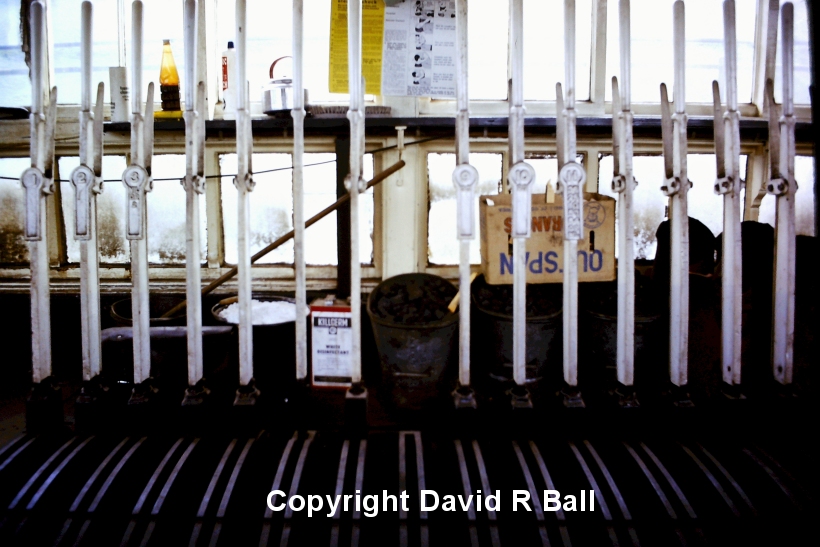
Sowerby Bridge was also one of the last locations to have working coal drops, and David was able to capture the drops whilst they were still in operation, and then return in later years to record their slow decline.
Copyright David R Ball; all rights reserved
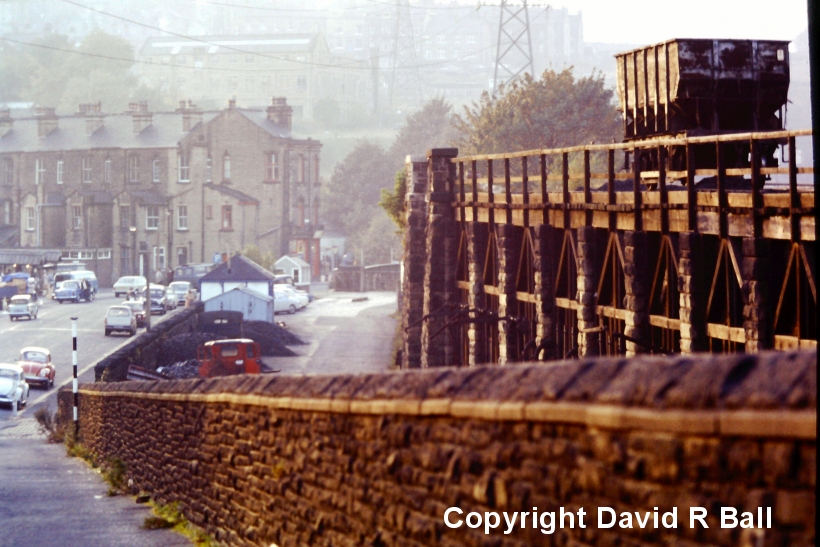
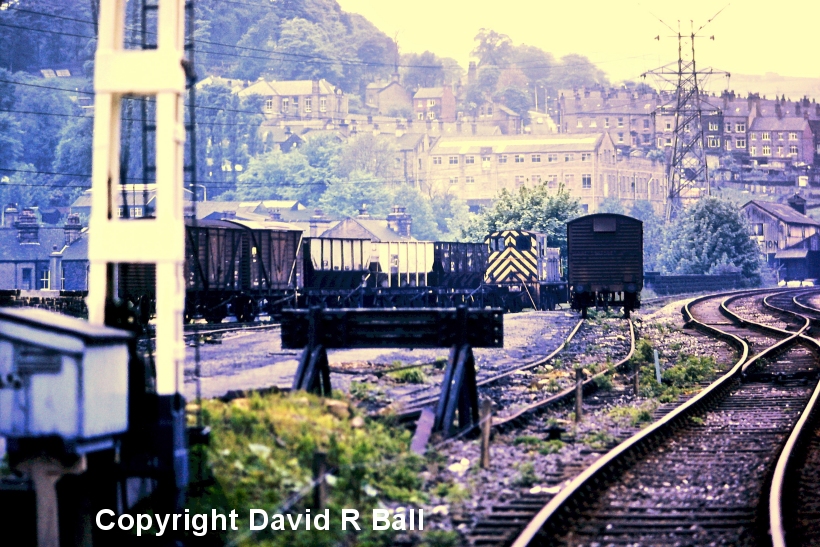
A September 1971 showing a single coal hopper spotted on the coal drops. The view is looking down Station Road, Sowerby Bridge. The coal drops were built in the late 19th Century. To the left of centre can be seen the weighbridge and shed. Sowerby Bridge Market is to the left of this photo.
Copyright David R Ball; all rights reserved
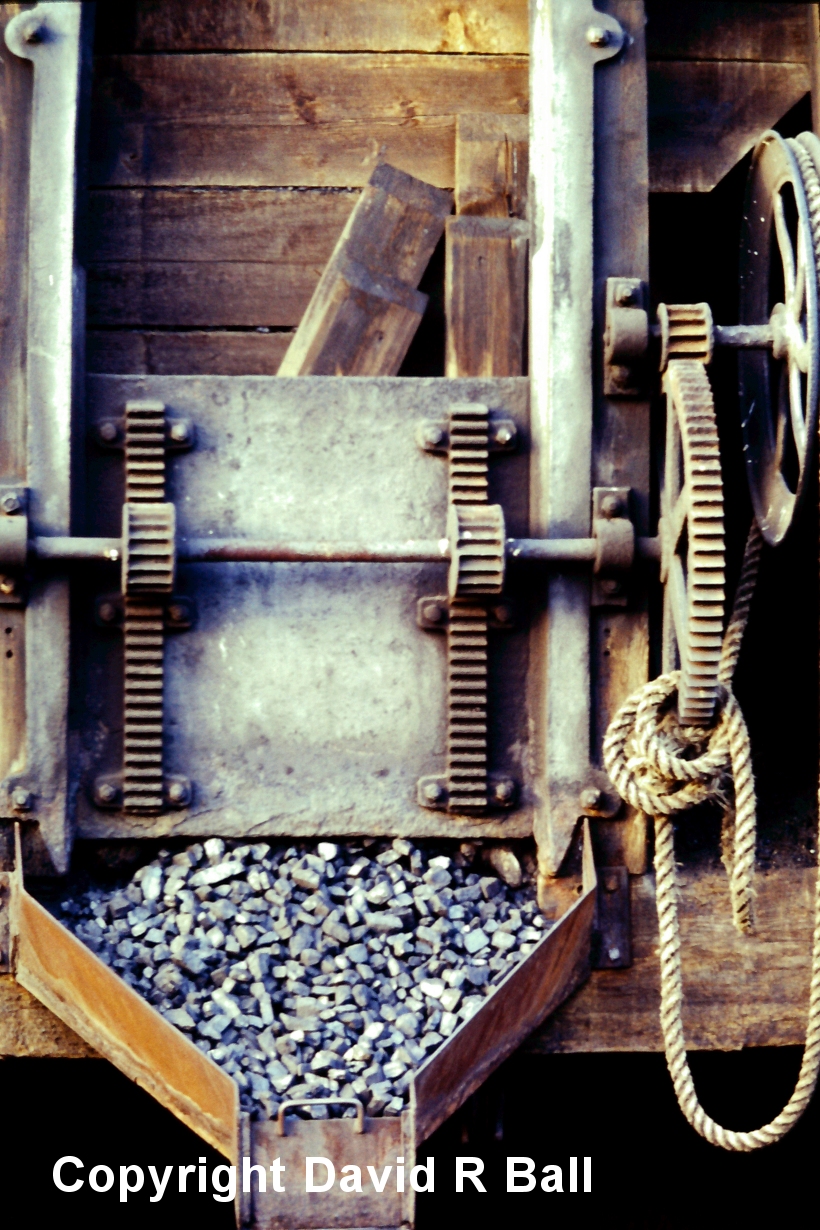
A wonderfully detailed shot of the coal drop hopper operating mechanism photographed in September 1971.
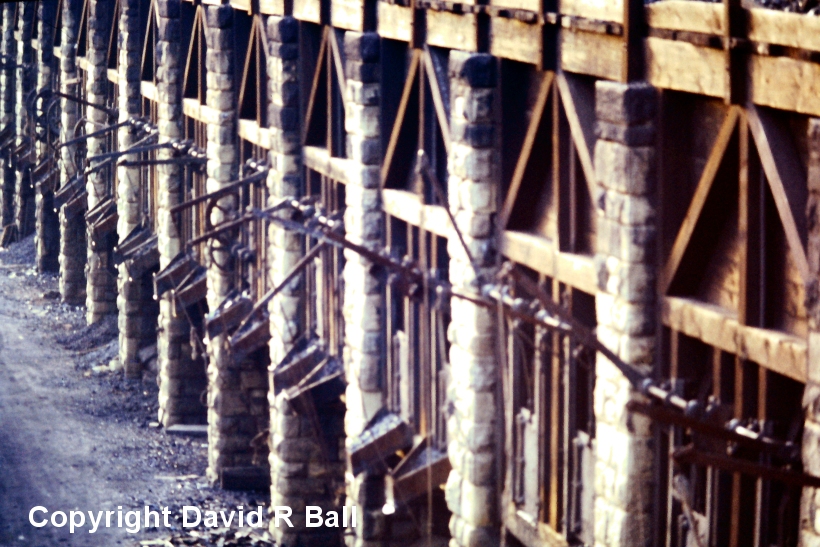
Copyright David R Ball; all rights reserved
Copyright David R Ball; all rights reserved
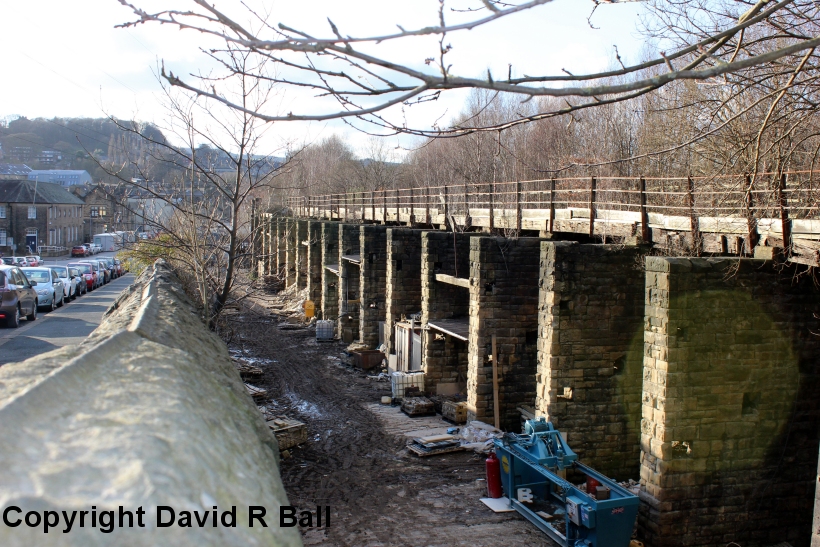
A 23 February 2016 shot of the coal drops after they were abandoned.
Copyright David R Ball; all rights reserved
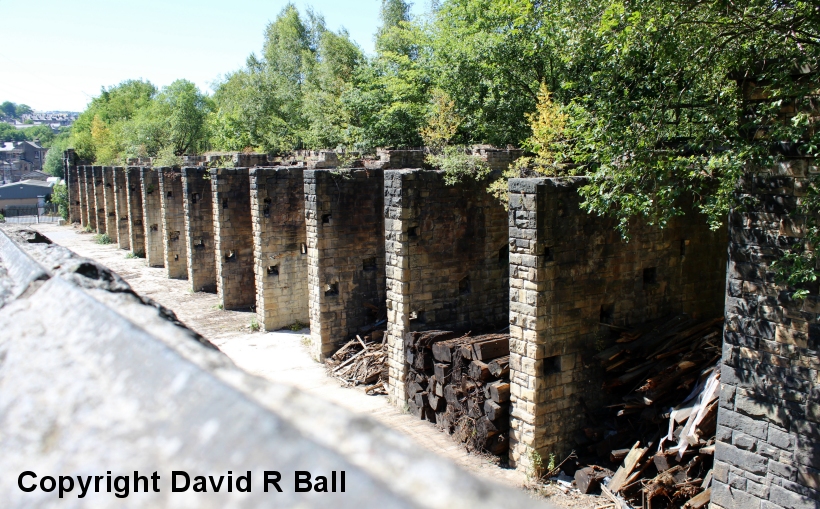
A final look at the coal drops taken on Saturday 30 June 2018, as the trees continue to take over.
And finally, the goods yard with its 03 pilot, used to spot the 16 ton mineral wagons on the coal drops.
Copyright David R Ball; all rights reserved
Copyright David R Ball; all rights reserved
About the contributors:
David Ball is a resident of Sowerby Bridge and is a prolific photographer, recording much of the life of both the town and the Calder Valley; mainly in stills but also in film. His library of work can be viewed on Flickr.
Chris Littleworth is the Signal Steward of the Lancashire and Yorkshire Railway Society and his signal box diagrams appear both in dedicated books about the LYR system, but also regularly in the publications of the LYR Society. He has recently completed a significant input into a soon to be published work (written in March 2022) on Manchester Victoria.
This Website is deeply grateful to both of for them for their support and provision of unique content.

Copyright J K Wallace, t/a 'Hall Royd Junction' 2013-2023 email: Hall Royd Junction
7 Portobello Close, Chesham, Bucks. HP5 2PL, UK
tel: +44 (0)7513 412880