
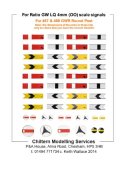
Great Western Railway/British Railway Western Region Lower Quadrant 4mm
Signal Waterslide Transfers (decals) for MSE/Wizzard & Ratio arms
Step 1
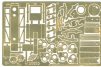
First, acquire one of the excellent brass frets produced by MSE/Wizard - their reference SOO15. Just so you know, you get: 1. 4ft plain distant arm (1 off); 2. 4ft plain home arms (2 off); 3. 4ft lipped-edge home arms (2 off); 4. 3ft plain home arm for sidings etc. (1 off); 5. 3ft lipped-edge home arm for sidings etc. (1 off); 6. 3ft backing arm (not installed after 1947) (1 off); 7. 2ft4in disc for use under platform canopies ('banjo') (1 off); 8. Goods line arm ring (1 off); 9. Cranked balance levers (7); 10. Spectacle plates (8 off); 11. Rule 55 track circuit diamond (1 off); 12. Backlight blinders (6 off); 13. 2-way route indicator (1 off); 14. 2-doll bracket (1 off); 15. Disc signals (2 off).
Step 2
![]()
Step 3
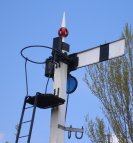
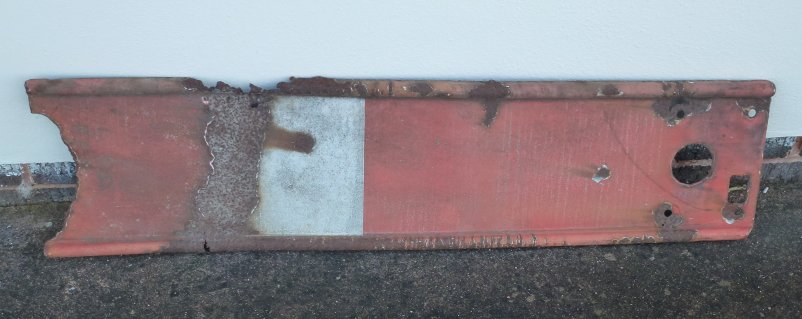
What does a 1933 GWR Home Signal arm look like?
Visit your local GWR museum railway centre to take photographs of all possible signals, signs, huts, sheds, window frames, roof materials, etc for possible modelling projects. Ignore the large blue King type locomotive and splendid Steam Rail Motor 93 and Trailer 92 as they are DISTRACTIONS.
But on the basis that is it a beautiful Bank Holiday Weekend, take the photographs of restored GWR locomotives 'because they are there'
Step 4
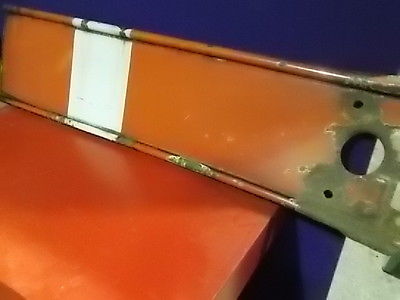
The Great Western Society on its Website suggests the ribbed metal type date from the 1927-1945 period. Adrian Vaughan in his 'A Pictorial Record of Great Western Signaling' (OPC) writes: "...but in 1925/6 came the first of thousands of tubular steel signal posts carrying a new rolled steel arm with a vitreous enamel covering and beaded edge top and bottom for strength, 4ft and 5ft arms were made." Peter Squibb in 'A Scratchbuilder's Guide to Semaphore Signal Consstruction' notes: "When the Great Western decided to introduce metal arms in 1930 it had to be different, The corrugations were at the top and bottom of the arms, Later, in BR days the simpler flat metal with two flanges, as used by the other companies, became standard."
GWR arms can therefore be summarised: pre-Grouping (pre-1923): wood; post-Grouping (1927-1947) rib/corrugation top and bottom of arm; Nationalisation (post-1947) flat with lips folded rearwards at right angles to face at top and bottom. Arguably this last change gave similar strength for greatly eased manufacturing process. Of interest, virtually all arms that appear on eBay are of BR vintage, and even these are stamped with dates surprisingly late in the process: dates as late as 1985 being common. This suggests that the arms perhaps had a working life of maybe 30 years or thereabouts. A good example of preserved 1927-1947 steel arms is at Bewdley with both home and distant arms displayed on the bracket signal protecting the station from trains arriving off the Stourport 'stub'
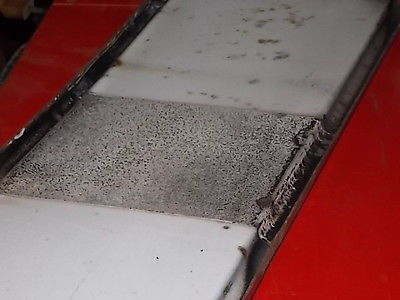
Metal arms were originally used with the same spectacle plates as used on the wooden arms, but the later type had a spectacle plate specially designed for metal arms. I have however seen references suggesting the change to the folded edge was made circa 1930.
Home GWR ribbed steel arms are quite common: an actual distant arm in good condition in a location capable of being photographed has proved very difficult to track down. However, a prototype of a fixed distant has been located, although this is 'fixed' arm, so will require some manipulation (so lacking the spectacle plate and associated bolt work). But as a back-up, some 'wash-off' yellow paint has been obtained so that if all else fails, a full-sized arm can be photographed in 'yellow' and then the chevron and spindle and bolts added in PhotoShop.
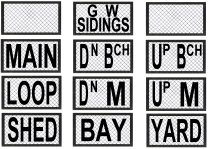
For those with a particular interest in route indicators, I would recommend Peter Squibb's 'A Scratchbuilder's Guide Semaphore Signal Construction'. Chapter 7 is entitled 'GWR Route Indicators'. Peter suggests they were mainly deployed as platform starters and notes the one at Yeovil Pen Mill directed trains to the Down Main, Shed, Up Branch and Down Branch. He writes: "All of these were abbreviated to use no more than 5 letters in each display." Apparently the signal survived - with just two routes - till 2008. Peter suggests that they were first introduced sometime between 1908 and 1910. Peter also notes: "The full sized slides were made of wire mesh held in a rectangular steel frame. The letters were soldered to the mesh so that they were clearly delineated against a white background. This was illuminated by a special lamp developed for the route indicators". Peter also notes that the GW lacked consistency with its abbreviations, so on the transfer sheet two unlettered frames are provided for customisation. As to the actual font used, the GW style is very close to modern-day Arial, which, when stretched, is very close. The only obvious variation is G and D, which in GW-style have a straight back/front.
For anyone building a 7mm working route indicator this book is highly recommended.
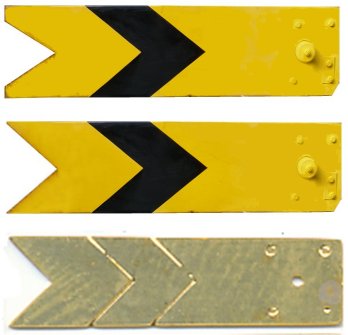
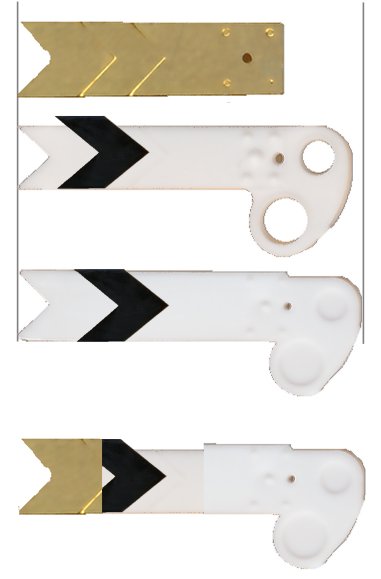
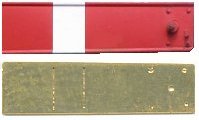
There has been further discussion on whether there should just be a one set of arms for the MSE fret, or whether the Ratio plastic arms should also be allowed for. The first step was acquire a set of Ratio GW items, and then compare them with the MSE arm. The first revelation was that the arms in the 468 Ratio GWR Round Post (1 set Brackets/jcn.Signals) kit and 467 GWR Round Post (2 single post signals) kit, although notionally for the same single type (steel, folded edge), differ. The image hopefully shows these differences. Firstly, the spectacle plate is a different share, and one has solid lenses, and one has holes for self-glazing. But more problematically, they are different widths!
We've shown the three arms separately, and then a combo shot. The final solution will be to provide three sets of arms: a correctly shaped 'scale' distant; and then transfers for the MSE and narrow Ratio arms, so three in all for some arms. Ratio - thankfully - don't do backing or shunting arms, so only one set is needed for these items.
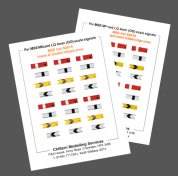
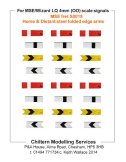
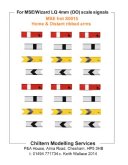
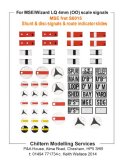
Once the multiple arm sizes were established (and having also discovered Mainly Trains produce a fret), the project hit the modeller's equivalent of writer's block. However a timely e-mail from Steve Hewitt suggesting I just concentrate on the arms he (and by extension, most people) needed has helped move the project forward again. This has resulted in sheets for the MSE frets for now, and then returning to Ratio variations at a later date - and, of course, the true scale distant for anyone making their arms from scratch. Steve has kindly offered to 'test' the first trial transfers on his current signal, and once Steve gives the 'all clear', will offer the first sheets for sale. There will be four different sheets this time: Home & Distant folded edge; Home & Distant ribbed; Shunting and disc signals, and mechanical route indicator slides; and a sheet for the Ratio arms.
Posted 13 December 2014
Stage 11:
Build! Here's is a YouTube clip showing how Steve Hewitt built a splitting bracket using the transfers.

Copyright J K Wallace, t/a 'Hall Royd Junction' 2013-2023 email: Hall Royd Junction
7 Portobello Close, Chesham, Bucks. HP5 2PL, UK
tel: +44 (0)7513 412880